Soundcheck
Overview
Soundcheck measures and provides incentives to improve the quality, reliability, and alignment of your software ecosystem. With Soundcheck, engineering organizations define development and operational standards and then use those standards to measure the health of their software components. Soundcheck provides teams with strong guidance to cultivate behavior and improve an organization's DevOps practices. Use Soundcheck to prioritize and visualize tech health and alignment to organizational best practices within Portal.
There are 5 fundamental elements that make up Soundcheck:
- Check: A standard or best practice a component is graded against.
- Check Result: The result of running a check against a component. Results are either pass or fail.
- Track: A long-term tech health initiative.
- Level: A group of checks that represent a milestone within a track.
- Certification: The outcome of passing all checks within a level.
Together, they show you how any given software component is performing against your organization's long-term tech health initiatives.
Find out more in the Soundcheck plugin documentation.
Getting started
Enabling Soundcheck
You can enable Soundcheck in Portal by following the steps outlined in the Setup Guide. You also have the option to enable or disable Soundcheck at any time through the Config Manager.
Pre-Loaded Checks, Tracks and Integrations
To help get you started, Soundcheck comes with a set of pre-loaded checks, tracks and integrations similar to those used at Spotify. These checks, tracks and integrations are intended to be a starting point for you to build upon and customize to fit your organization's needs. They can be modified or deleted as needed, or keep them as they are!
Managing Checks
There are two ways to manage checks, via the no-code UI or via remote URLs that host configuration files. You can choose either of the configuration sources or use both.
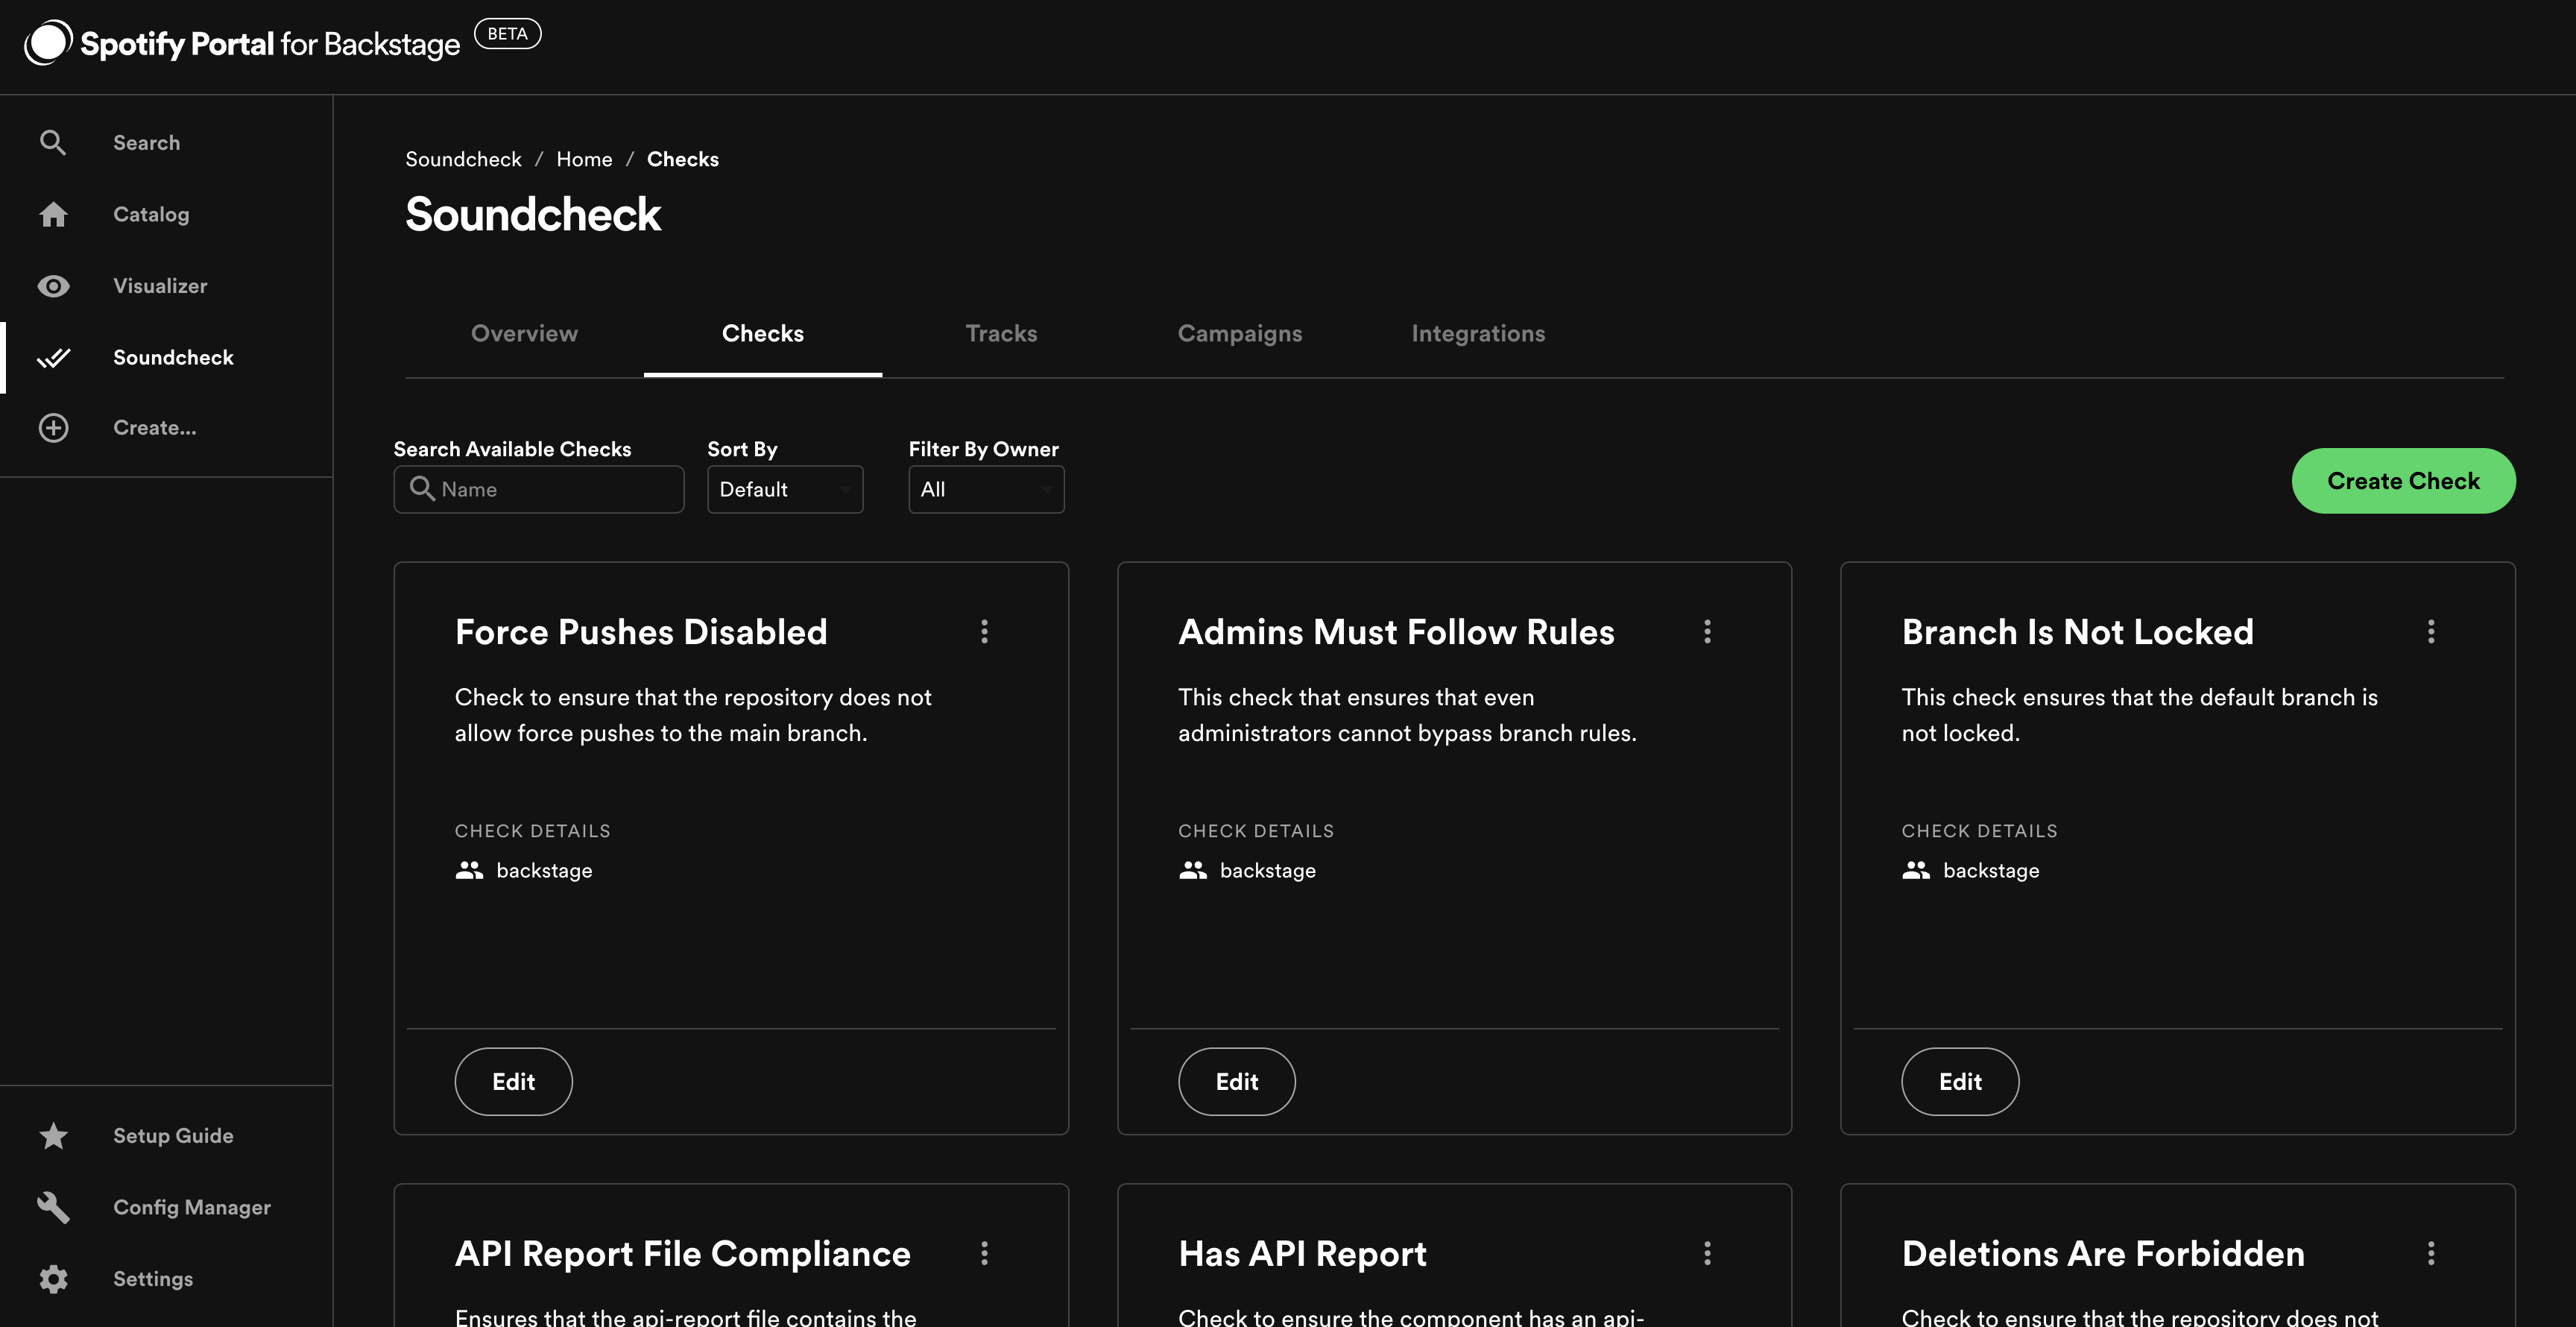
You can view and manage pre-loaded checks in the no-code UI by going to Soundcheck > Checks.
To create a new check via the no-code UI click the Create Check button.
Find out more in the Soundcheck plugin documentation - Checks - Managing checks via the no-code UI.
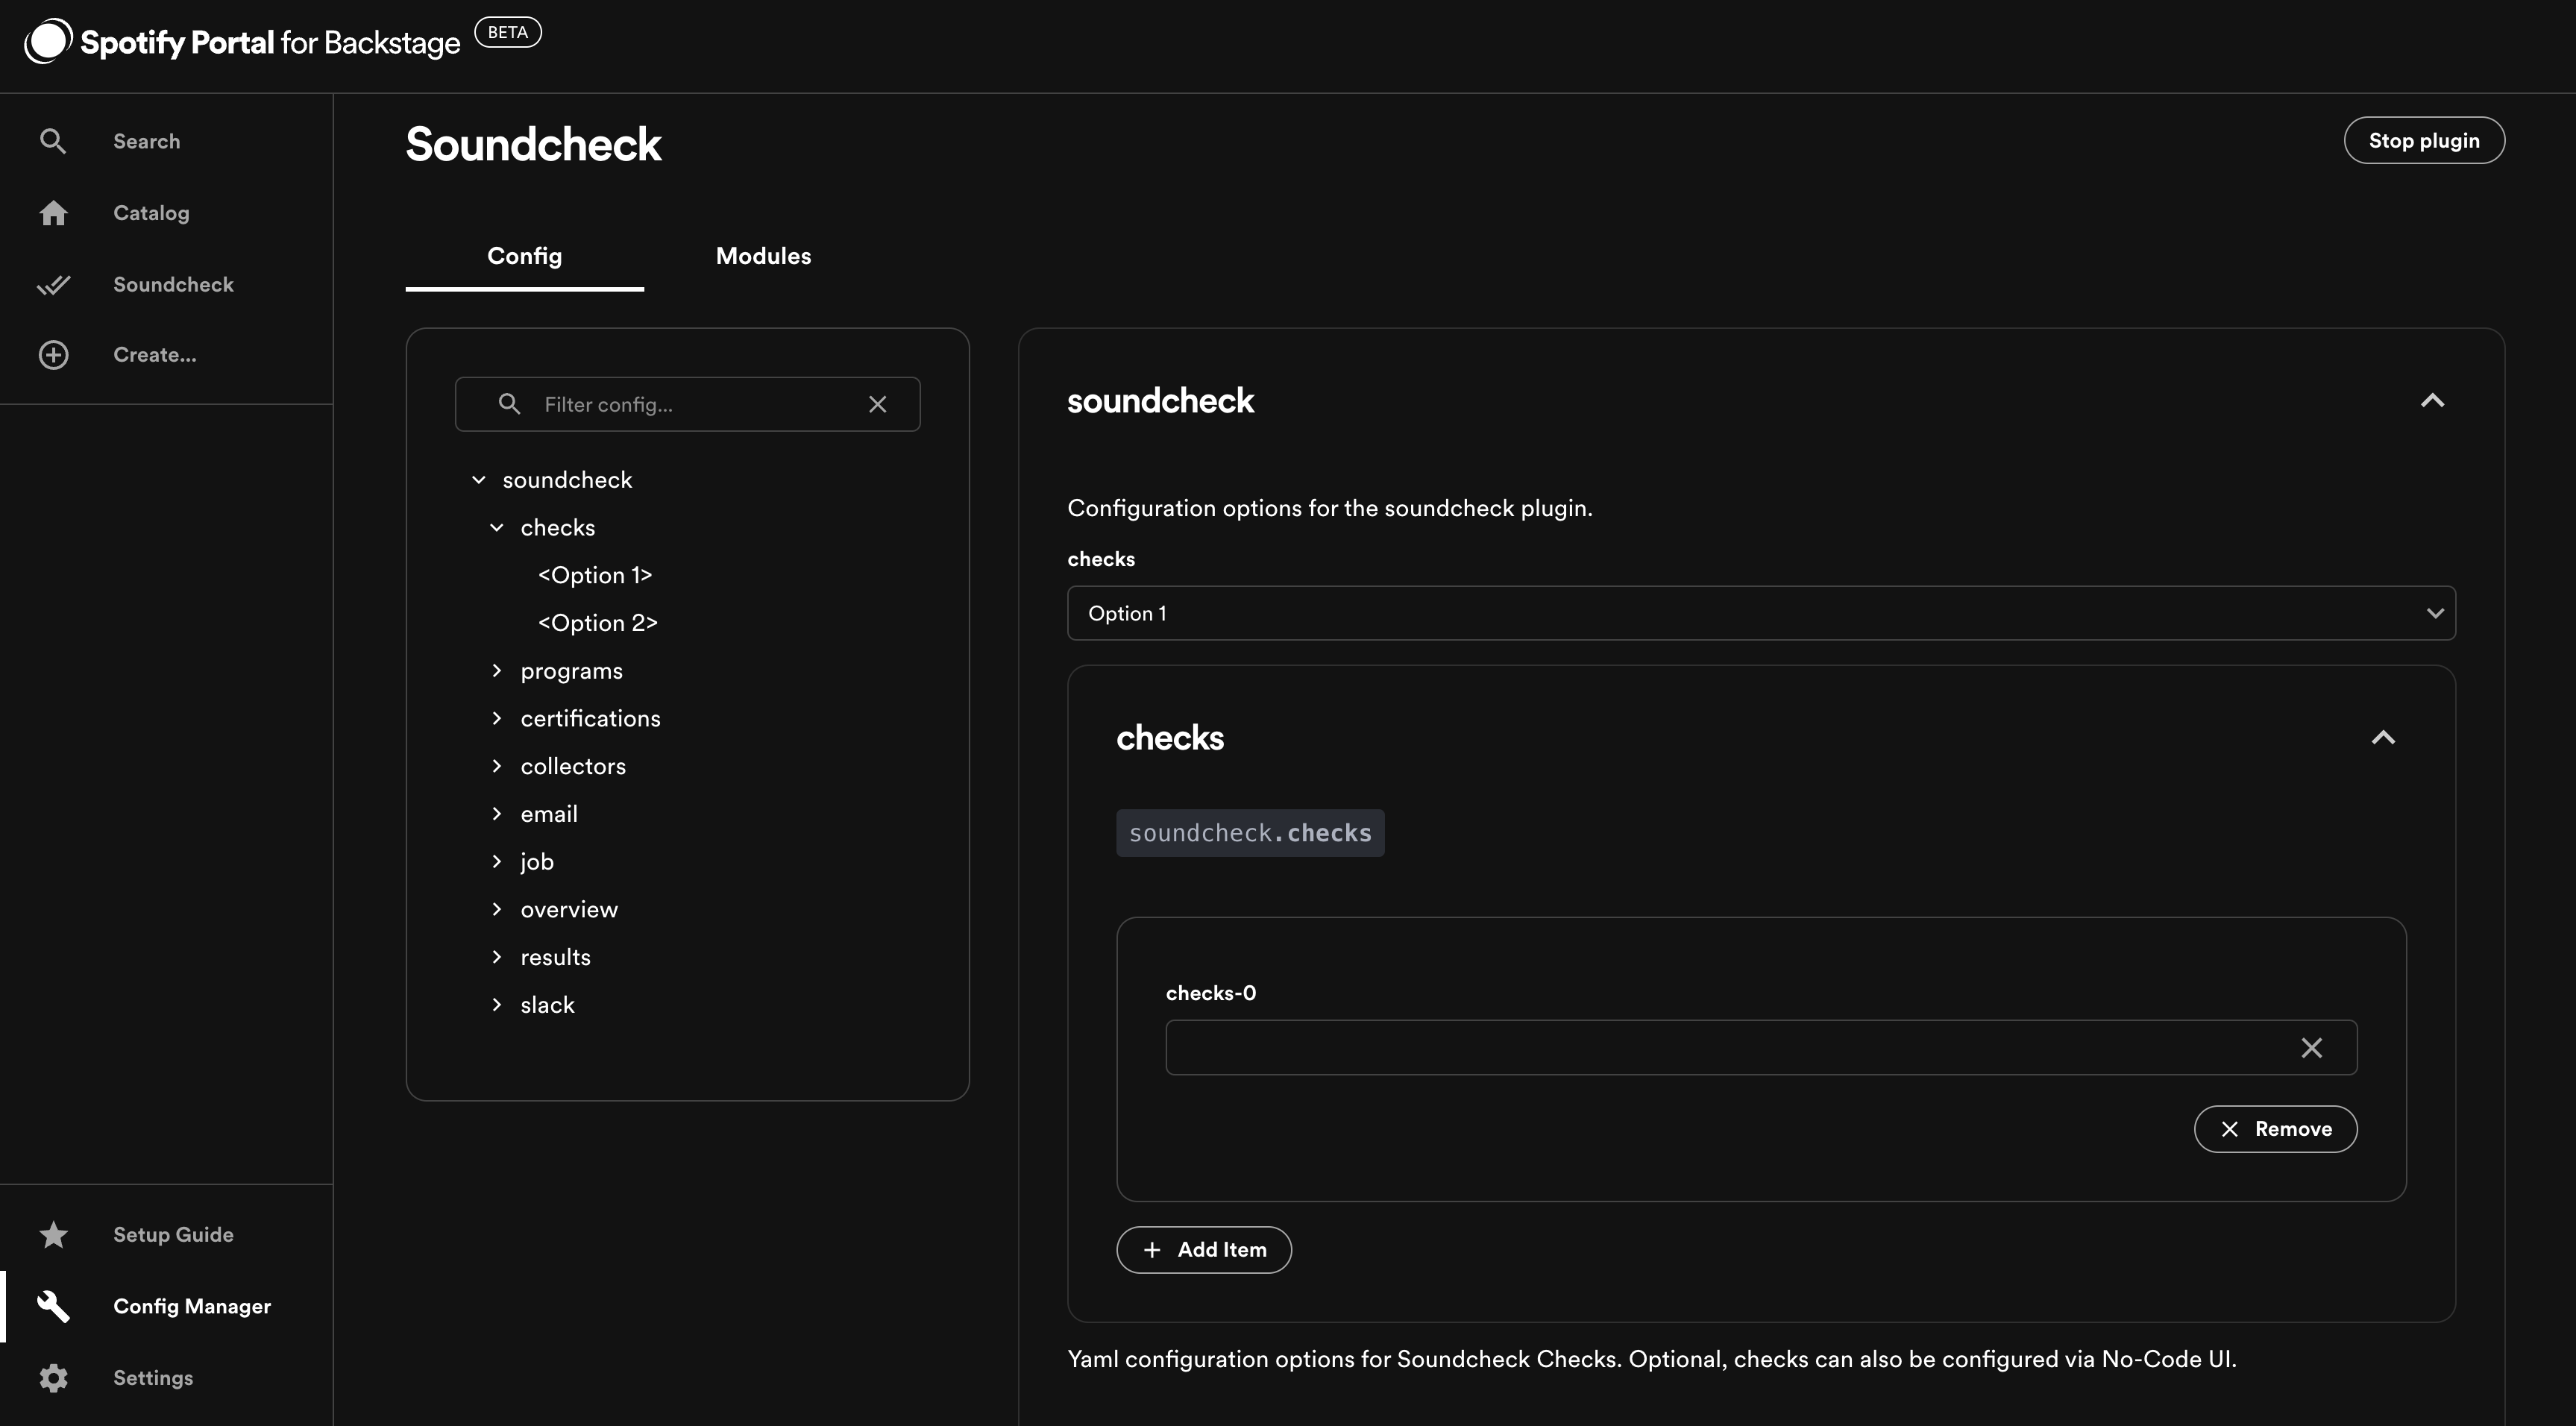
To configure checks via config files hosted at URLs (github/gitlab/bitbucket etc.),
go to Config Manager > Soundcheck and enter the URLs for the configuration files, under soundcheck.checks.
Soundcheck will pull the configuration files from the URLs and use them to configure checks.
Find out more in the Soundcheck plugin documentation - Checks - Managing checks via yaml configuration.
Managing Tracks
There are two ways to manage tracks, via the no-code UI or via remote URLs that host configuration files. You can choose either of the configuration sources or use both.
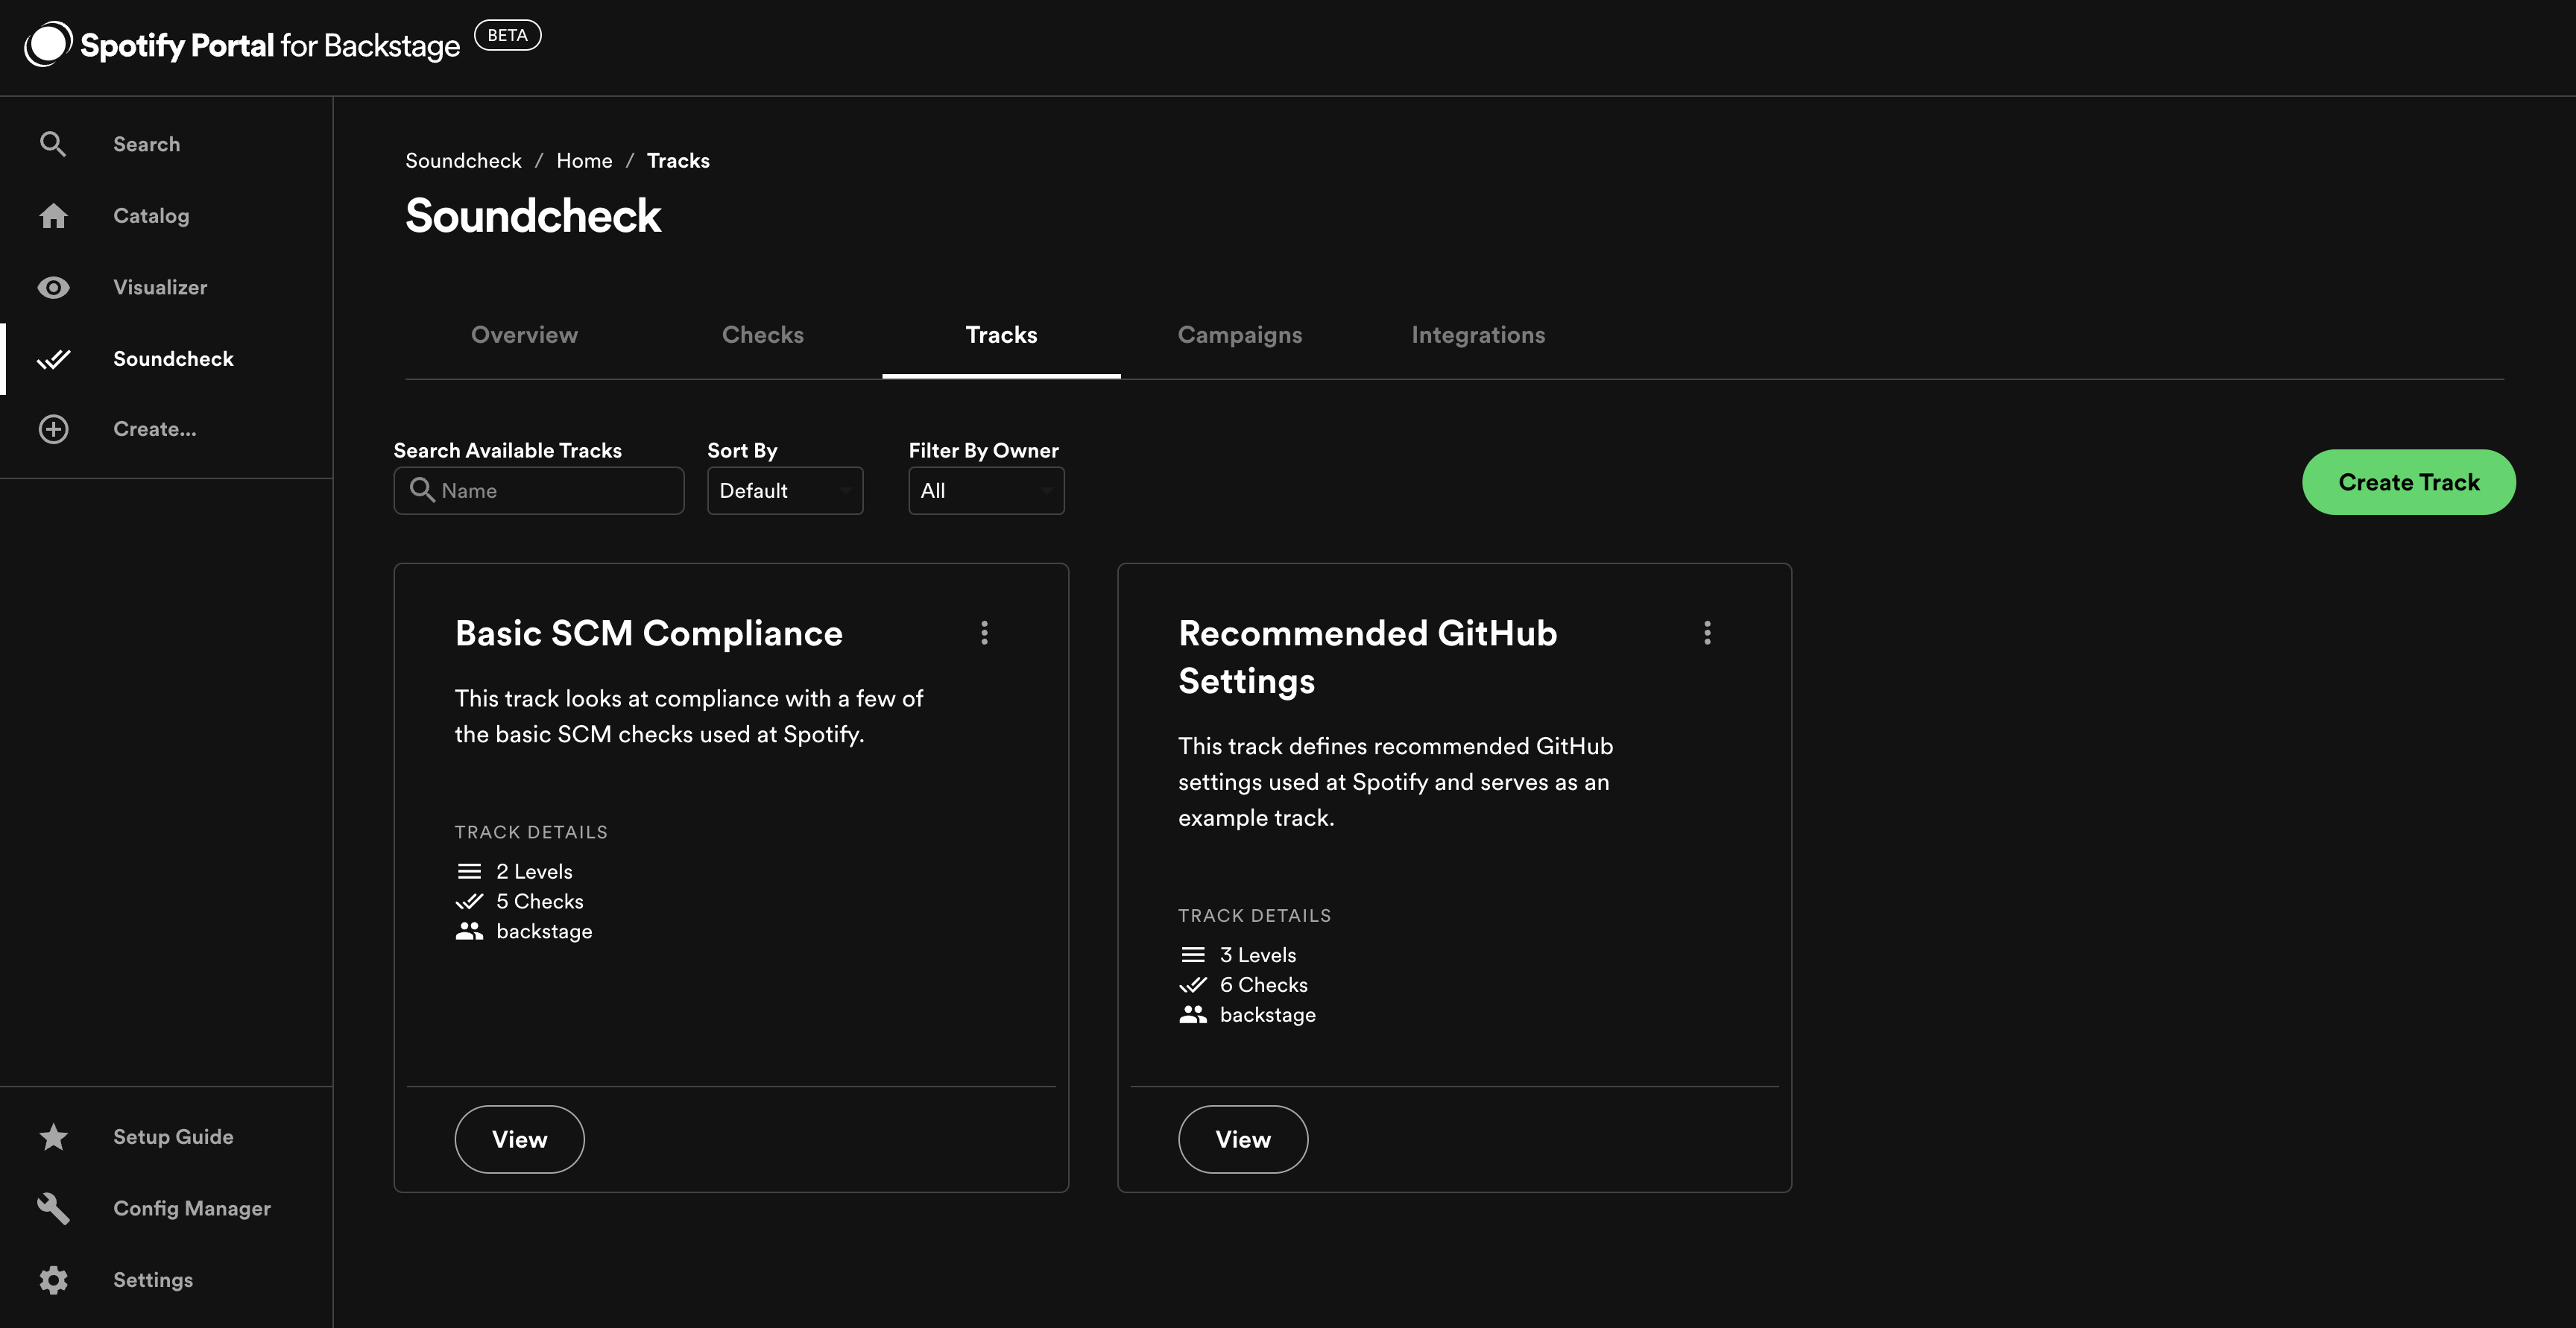
You can view and manage pre-loaded tracks by going to Soundcheck > Tracks.
To create a new track via the no-code UI click the Create Track button.
Find out more in the Soundcheck plugin documentation - Tracks - Managing tracks via the no-code UI.
To configure tracks via config files hosted at URLs (github/gitlab/bitbucket etc.),
go to Config Manager > Soundcheck and enter the URLs for the configuration files, under soundcheck.tracks.
Soundcheck will pull the configuration files from the URLs and use them to configure tracks.
Find out more in the Soundcheck plugin documentation - Tracks - Managing tracks via yaml configuration.
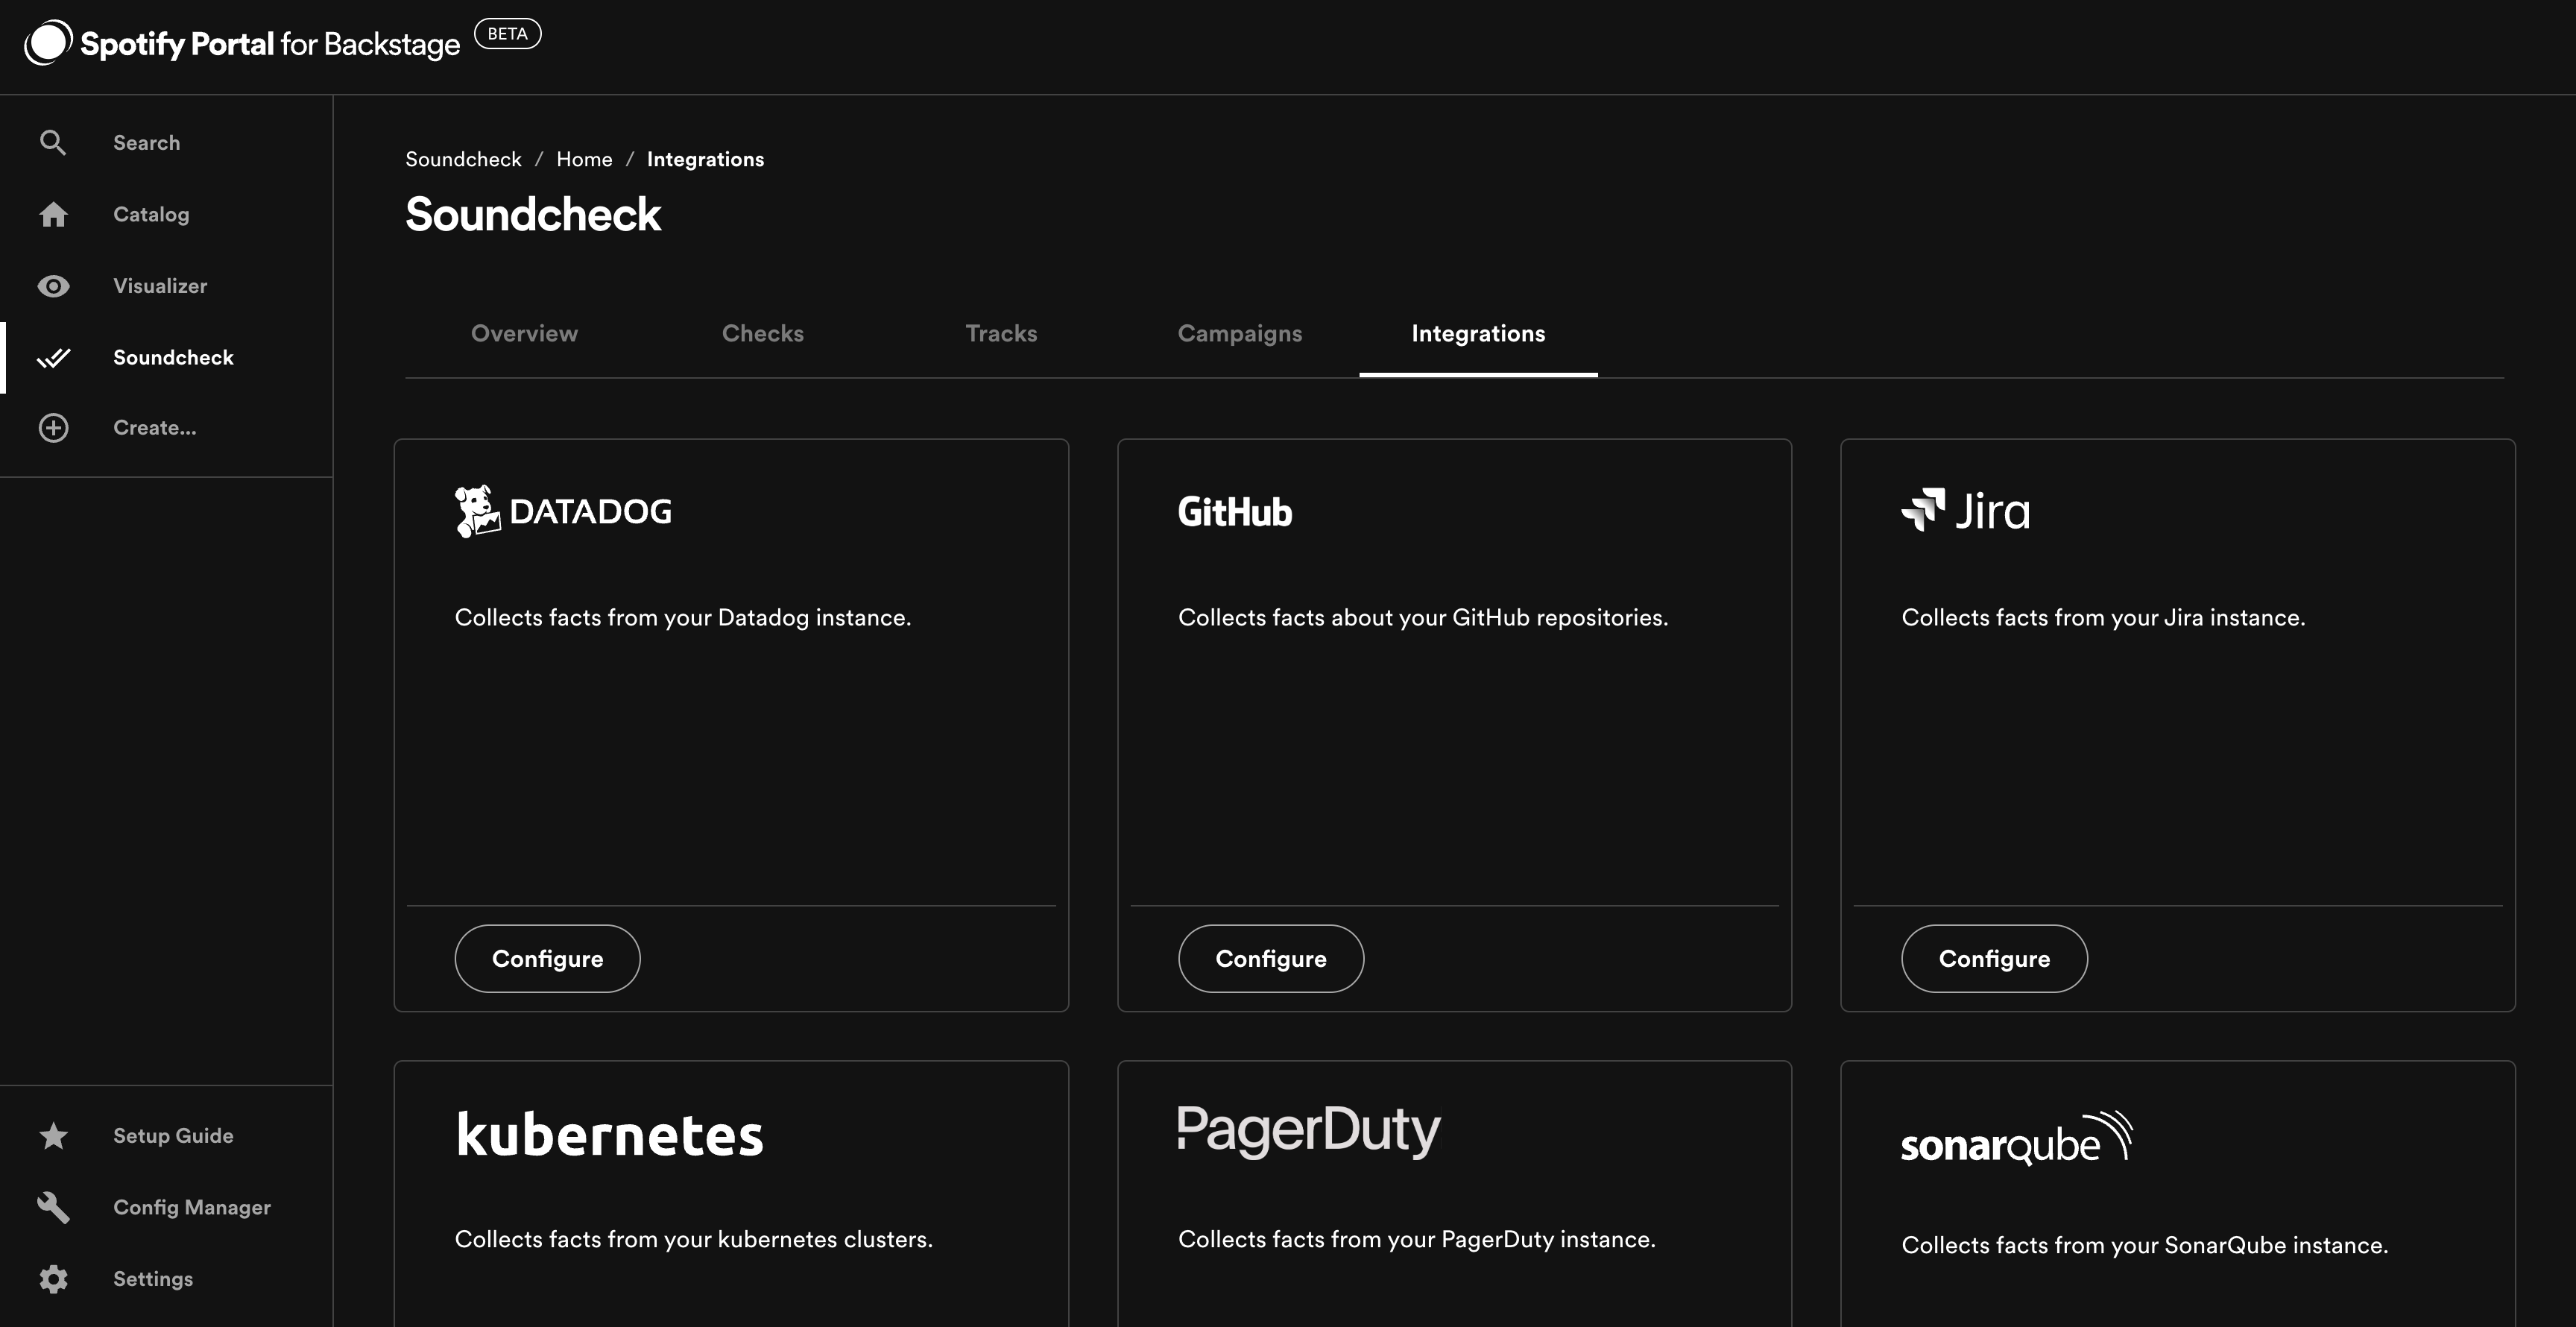
Managing Integrations
Soundcheck within Portal comes with the following integrations which are used to collect facts for use with checks:
GitHub and SCM integrations are enabled by default to power the pre-loaded checks and tracks included with Soundcheck. Other integrations must be configured before you can start using them with checks.
You can view and manage integrations by going to Soundcheck > Integrations.
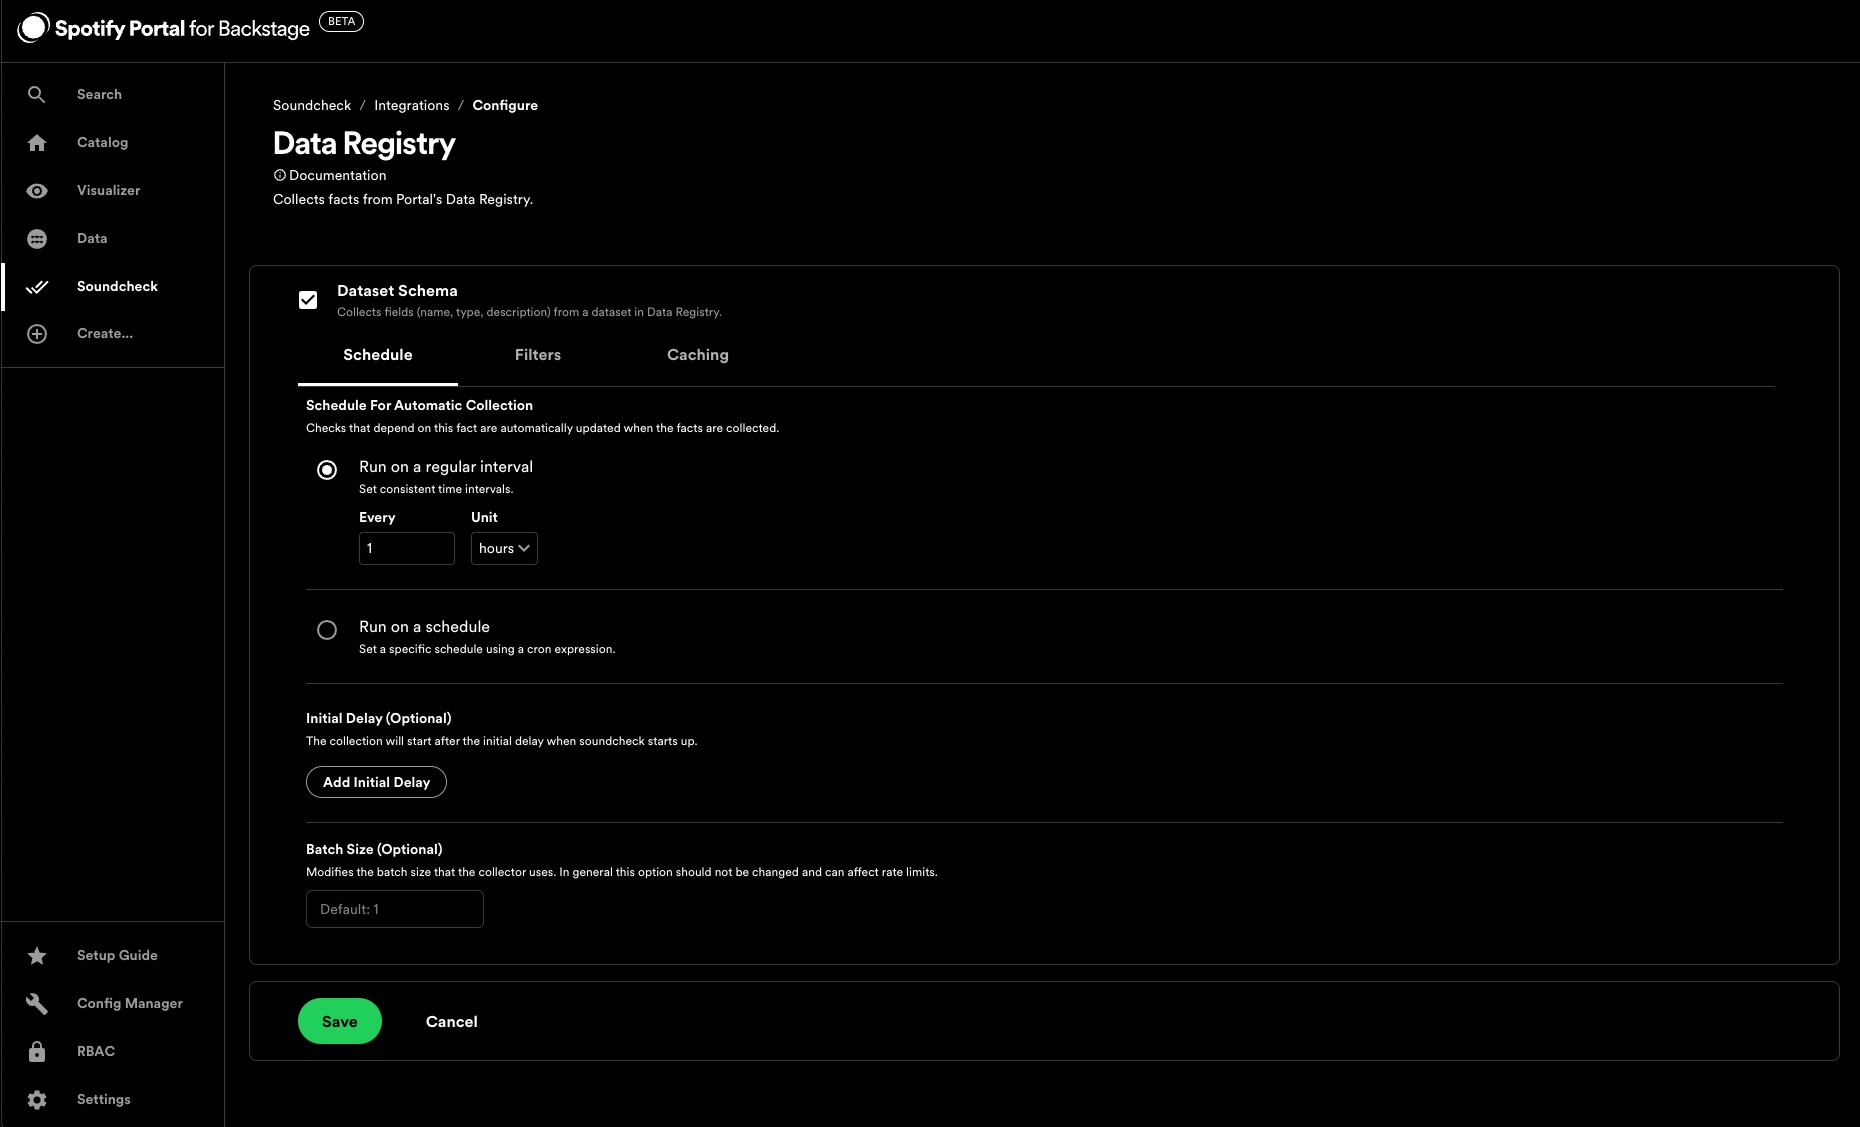
For each integration you can choose which facts to collect, how often to collect them, for which entities the facts should be collected, and if those facts should be stored in cache and for how long.
Find out more in the Soundcheck plugin documentation - Fact Collectors - Configuring a fact collector (integration) via the no-code UI.
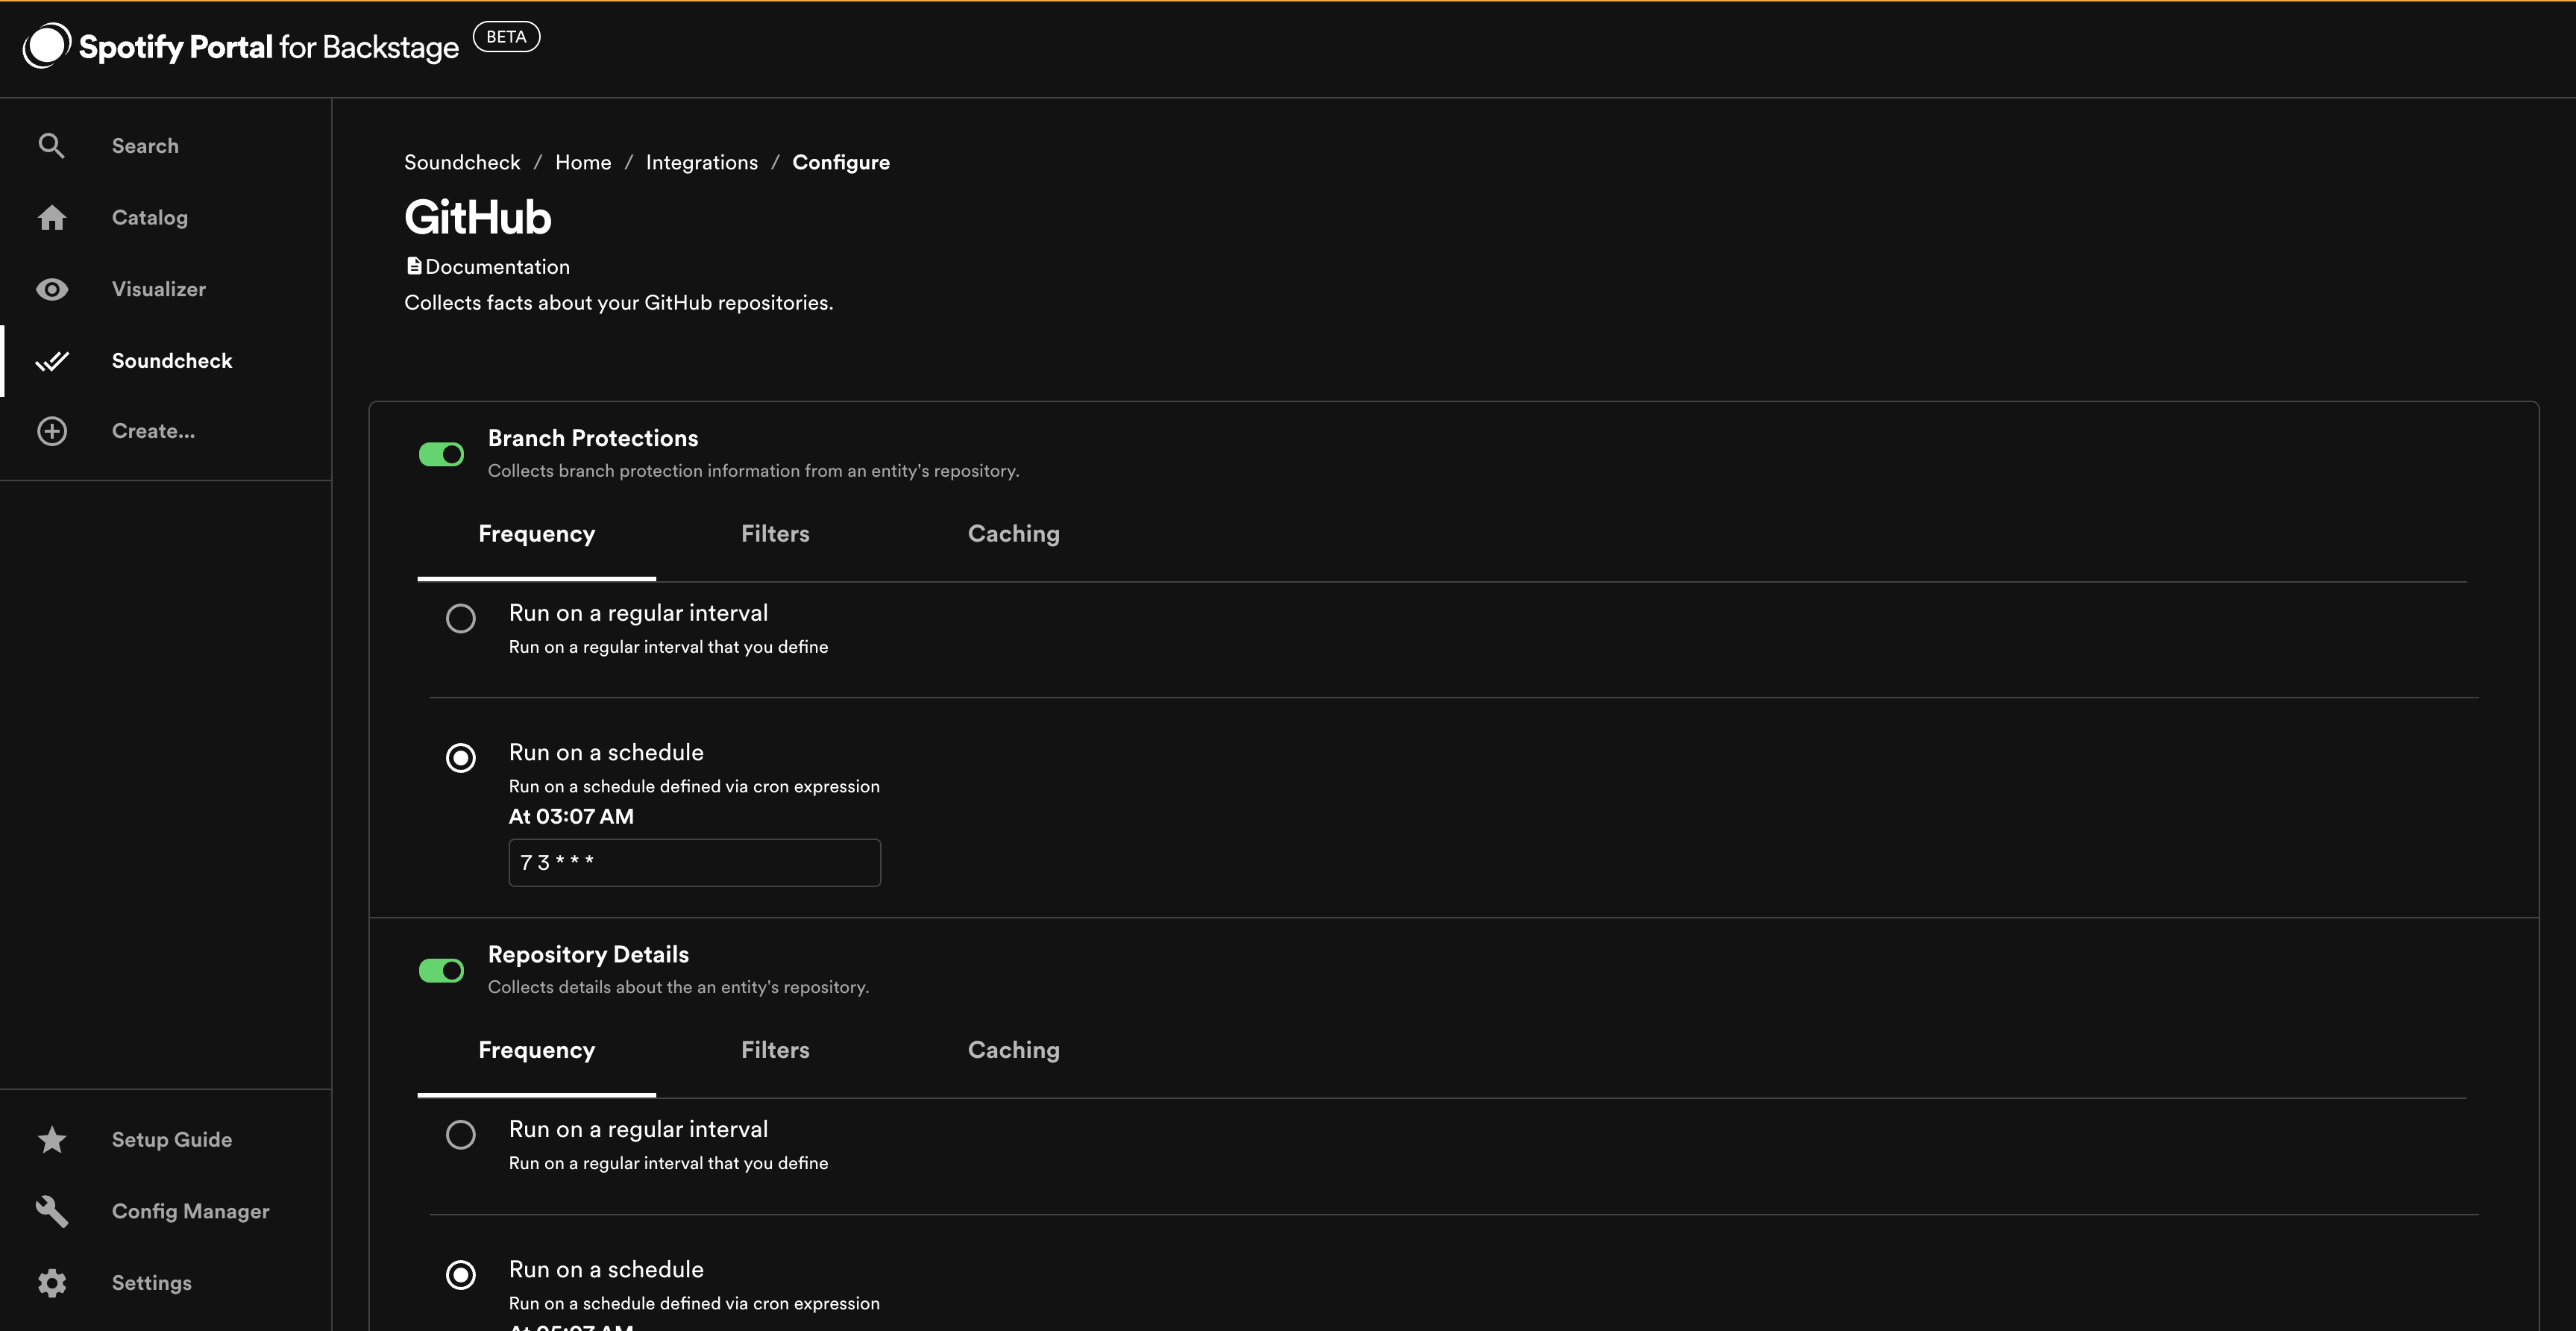
GitHub Integration
To modify the GitHub integration, go to Soundcheck > Integrations > GitHub and click the Configure button.
Find out more in the Soundcheck plugin documentation - Fact Collectors - Third Party Integrations - GitHub.
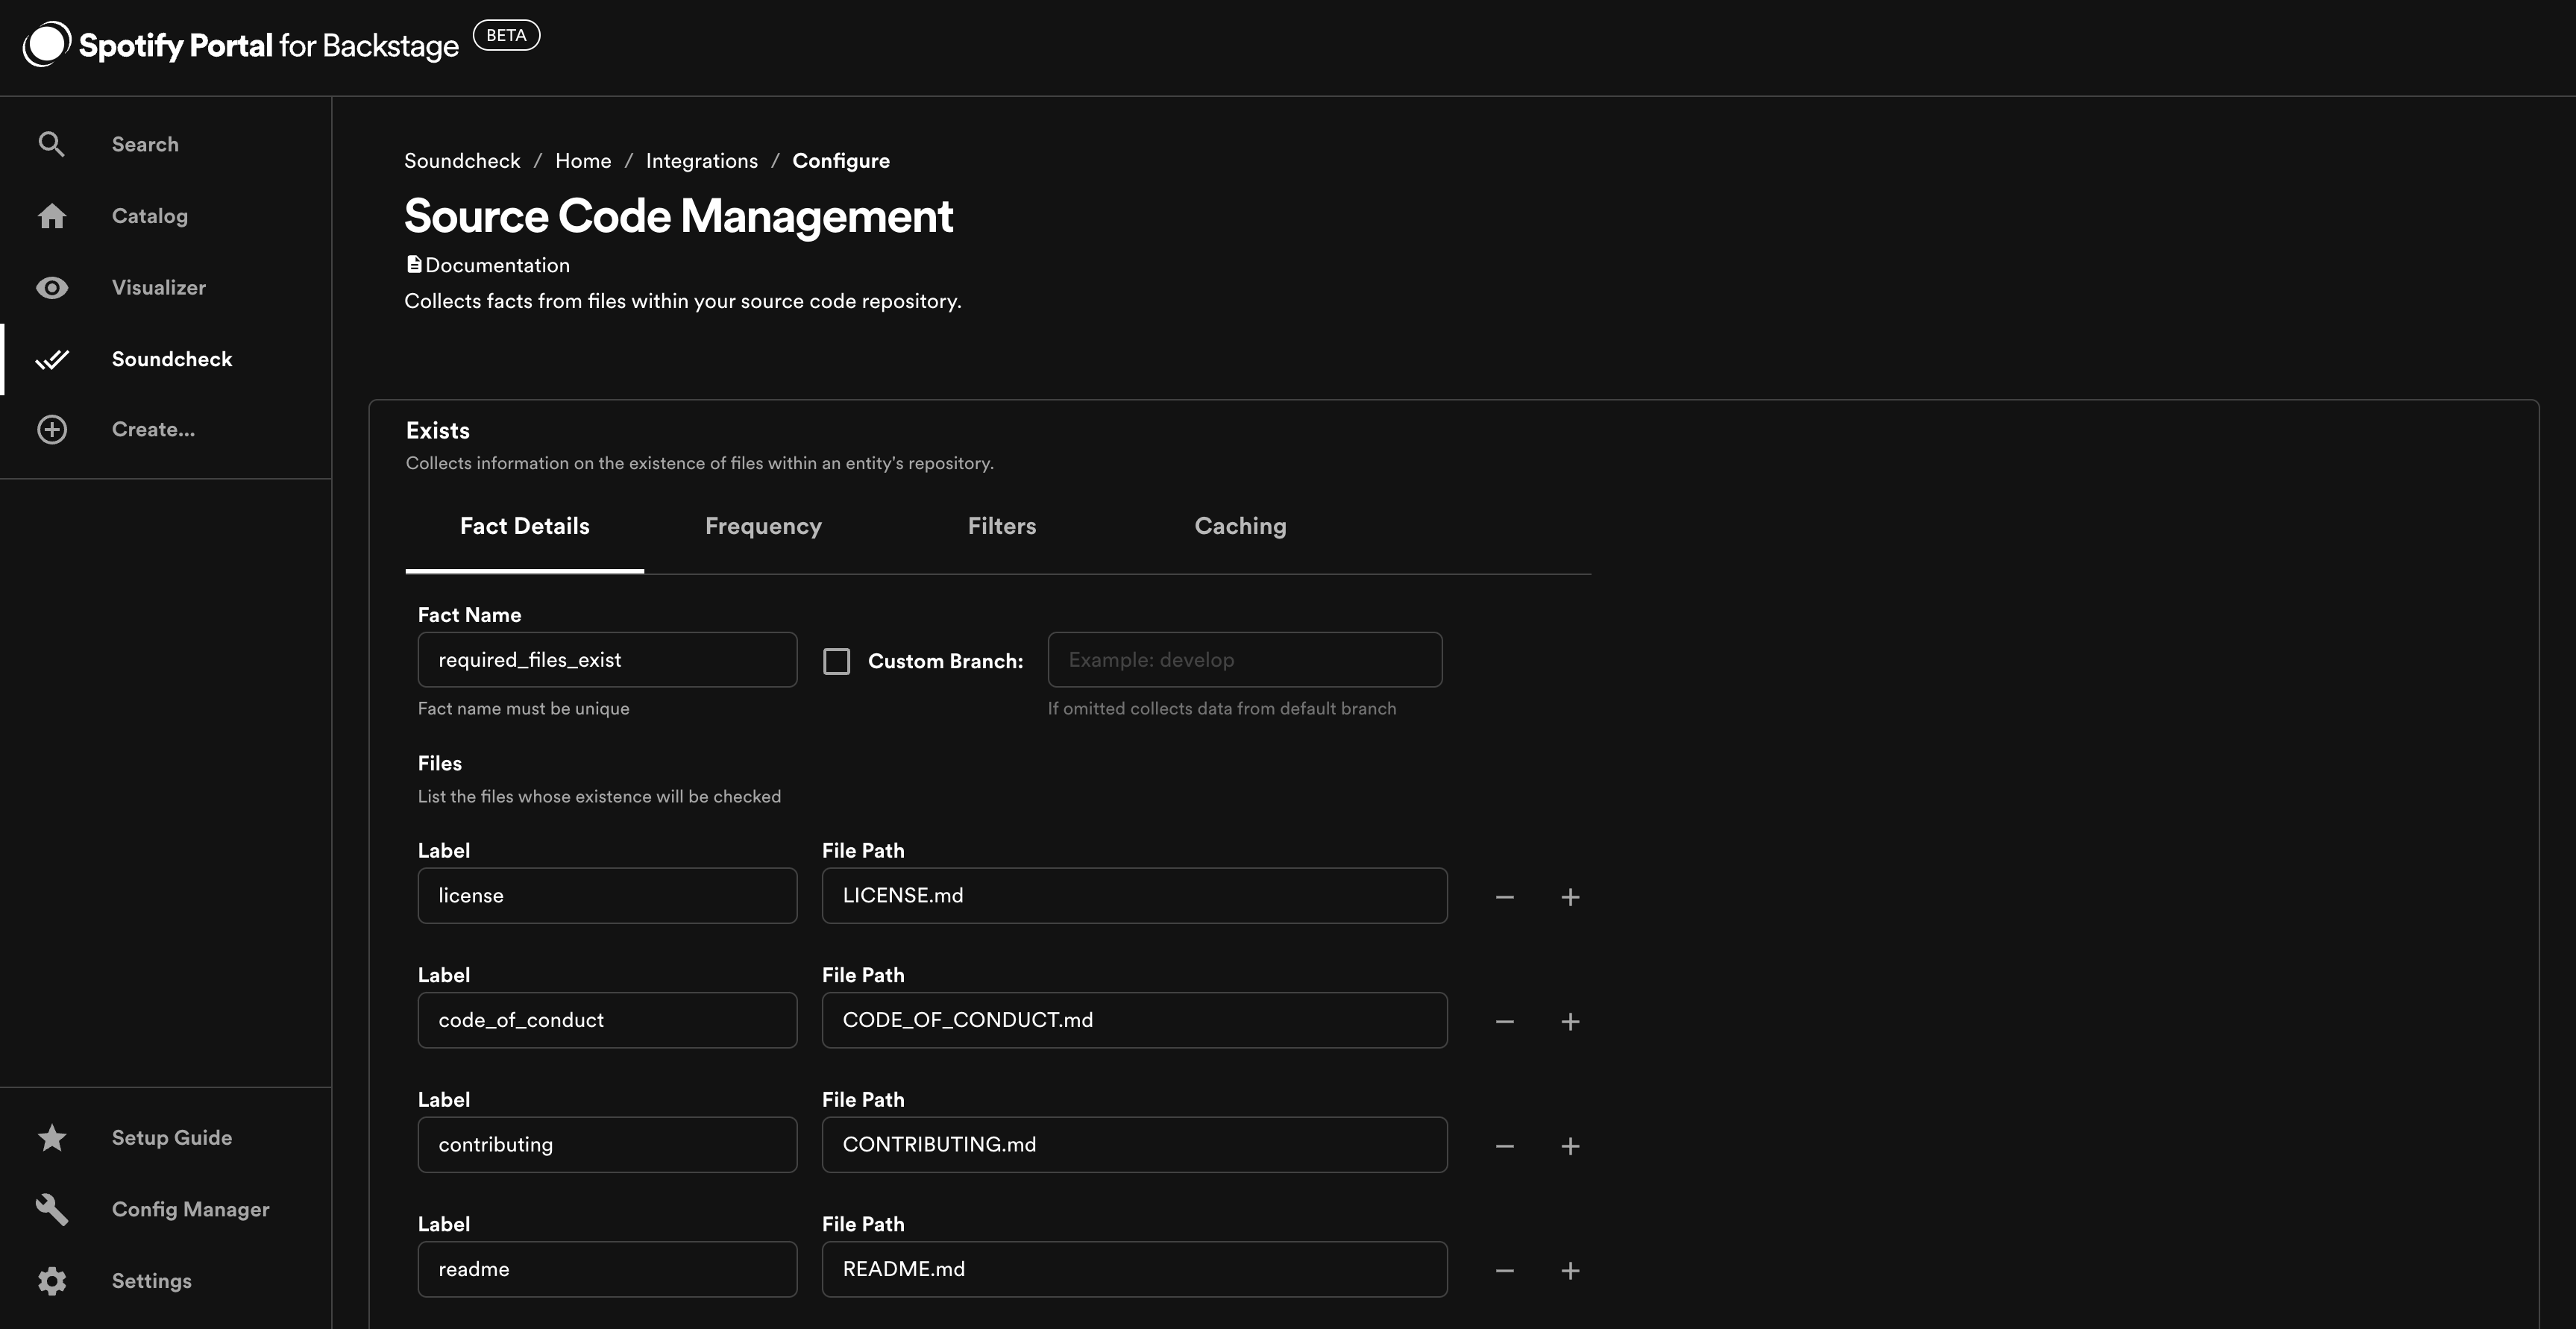
SCM Integration
There are two ways to manage the SCM integration, via the no-code UI or via a remote URL that hosts a configuration file. If you configure it via both no-code UI and remote URL, the configurations will be merged. It's preferable to choose a single configuration source (either no-code UI or remote URL) to avoid confusing merge results.
To modify the SCM integration via the no-code UI, go to Soundcheck > Integrations > SCM and click the Configure button.
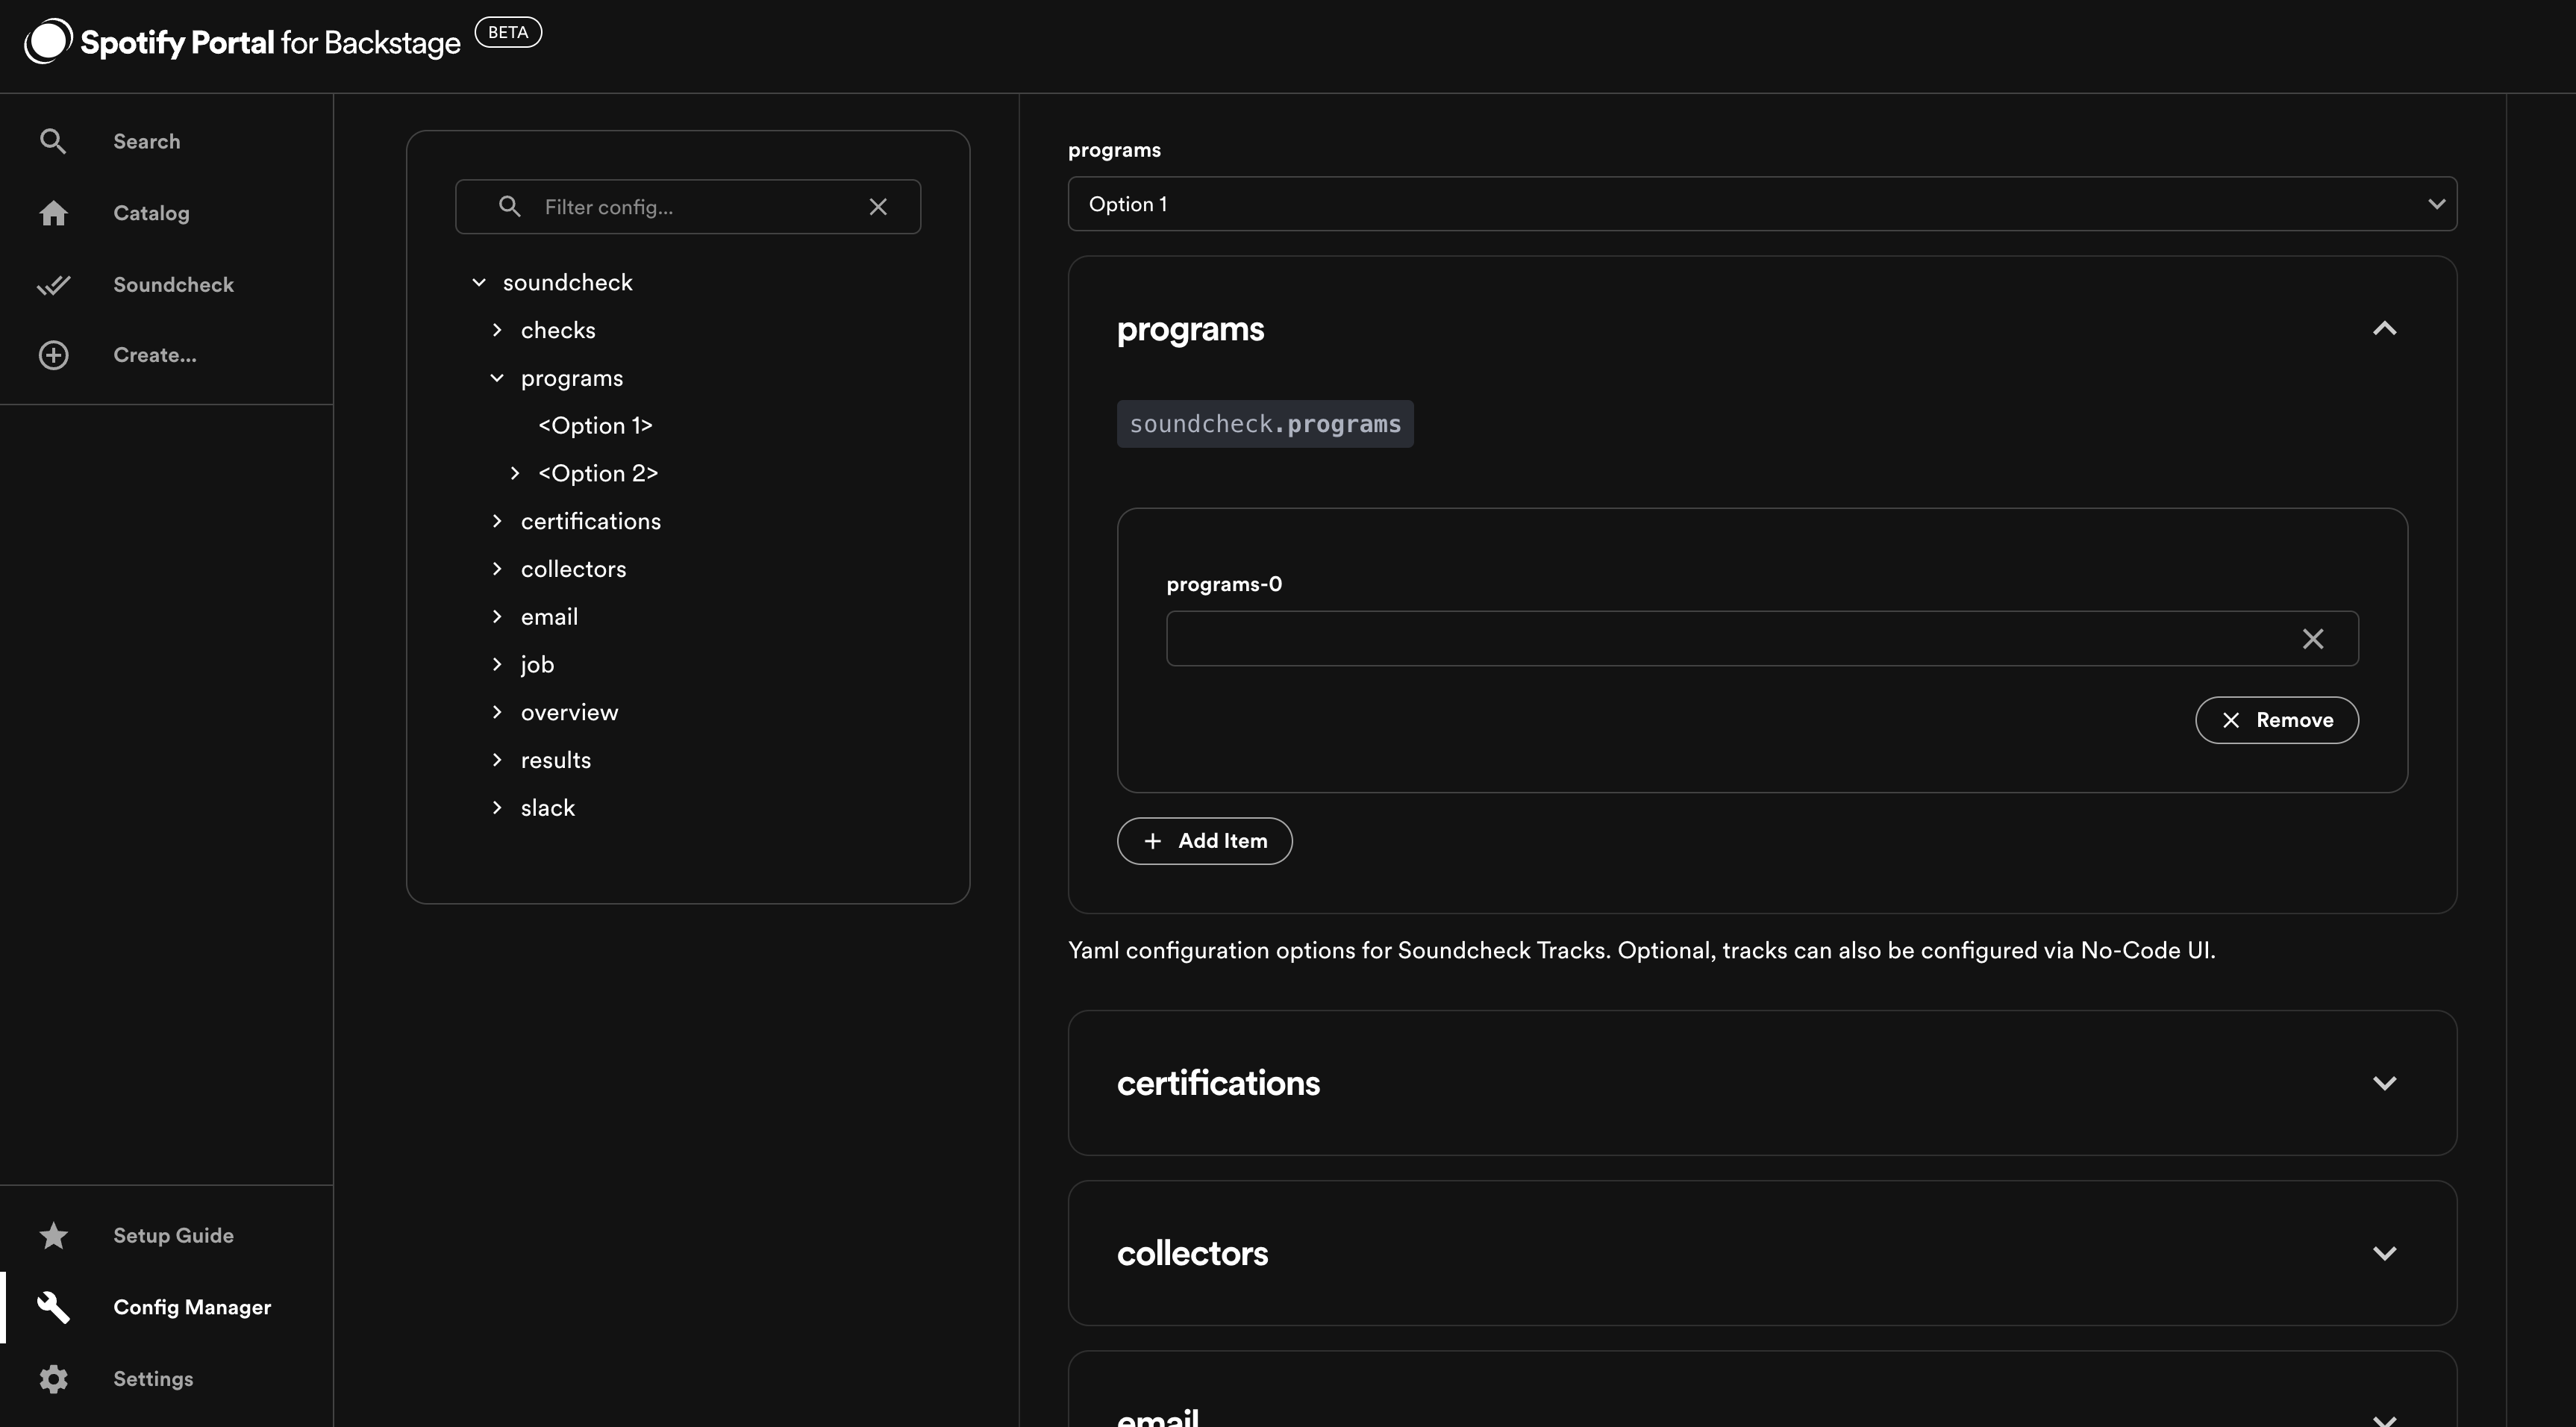
To configure the SCM integration via a config file hosted at a URL (github/gitlab/bitbucket etc.),
go to Config Manager > Soundcheck and enter the URL for the configuration file, under soundcheck.collectors.scm.url.
Soundcheck will pull the configuration file from the URL and use it to configure the SCM integration.
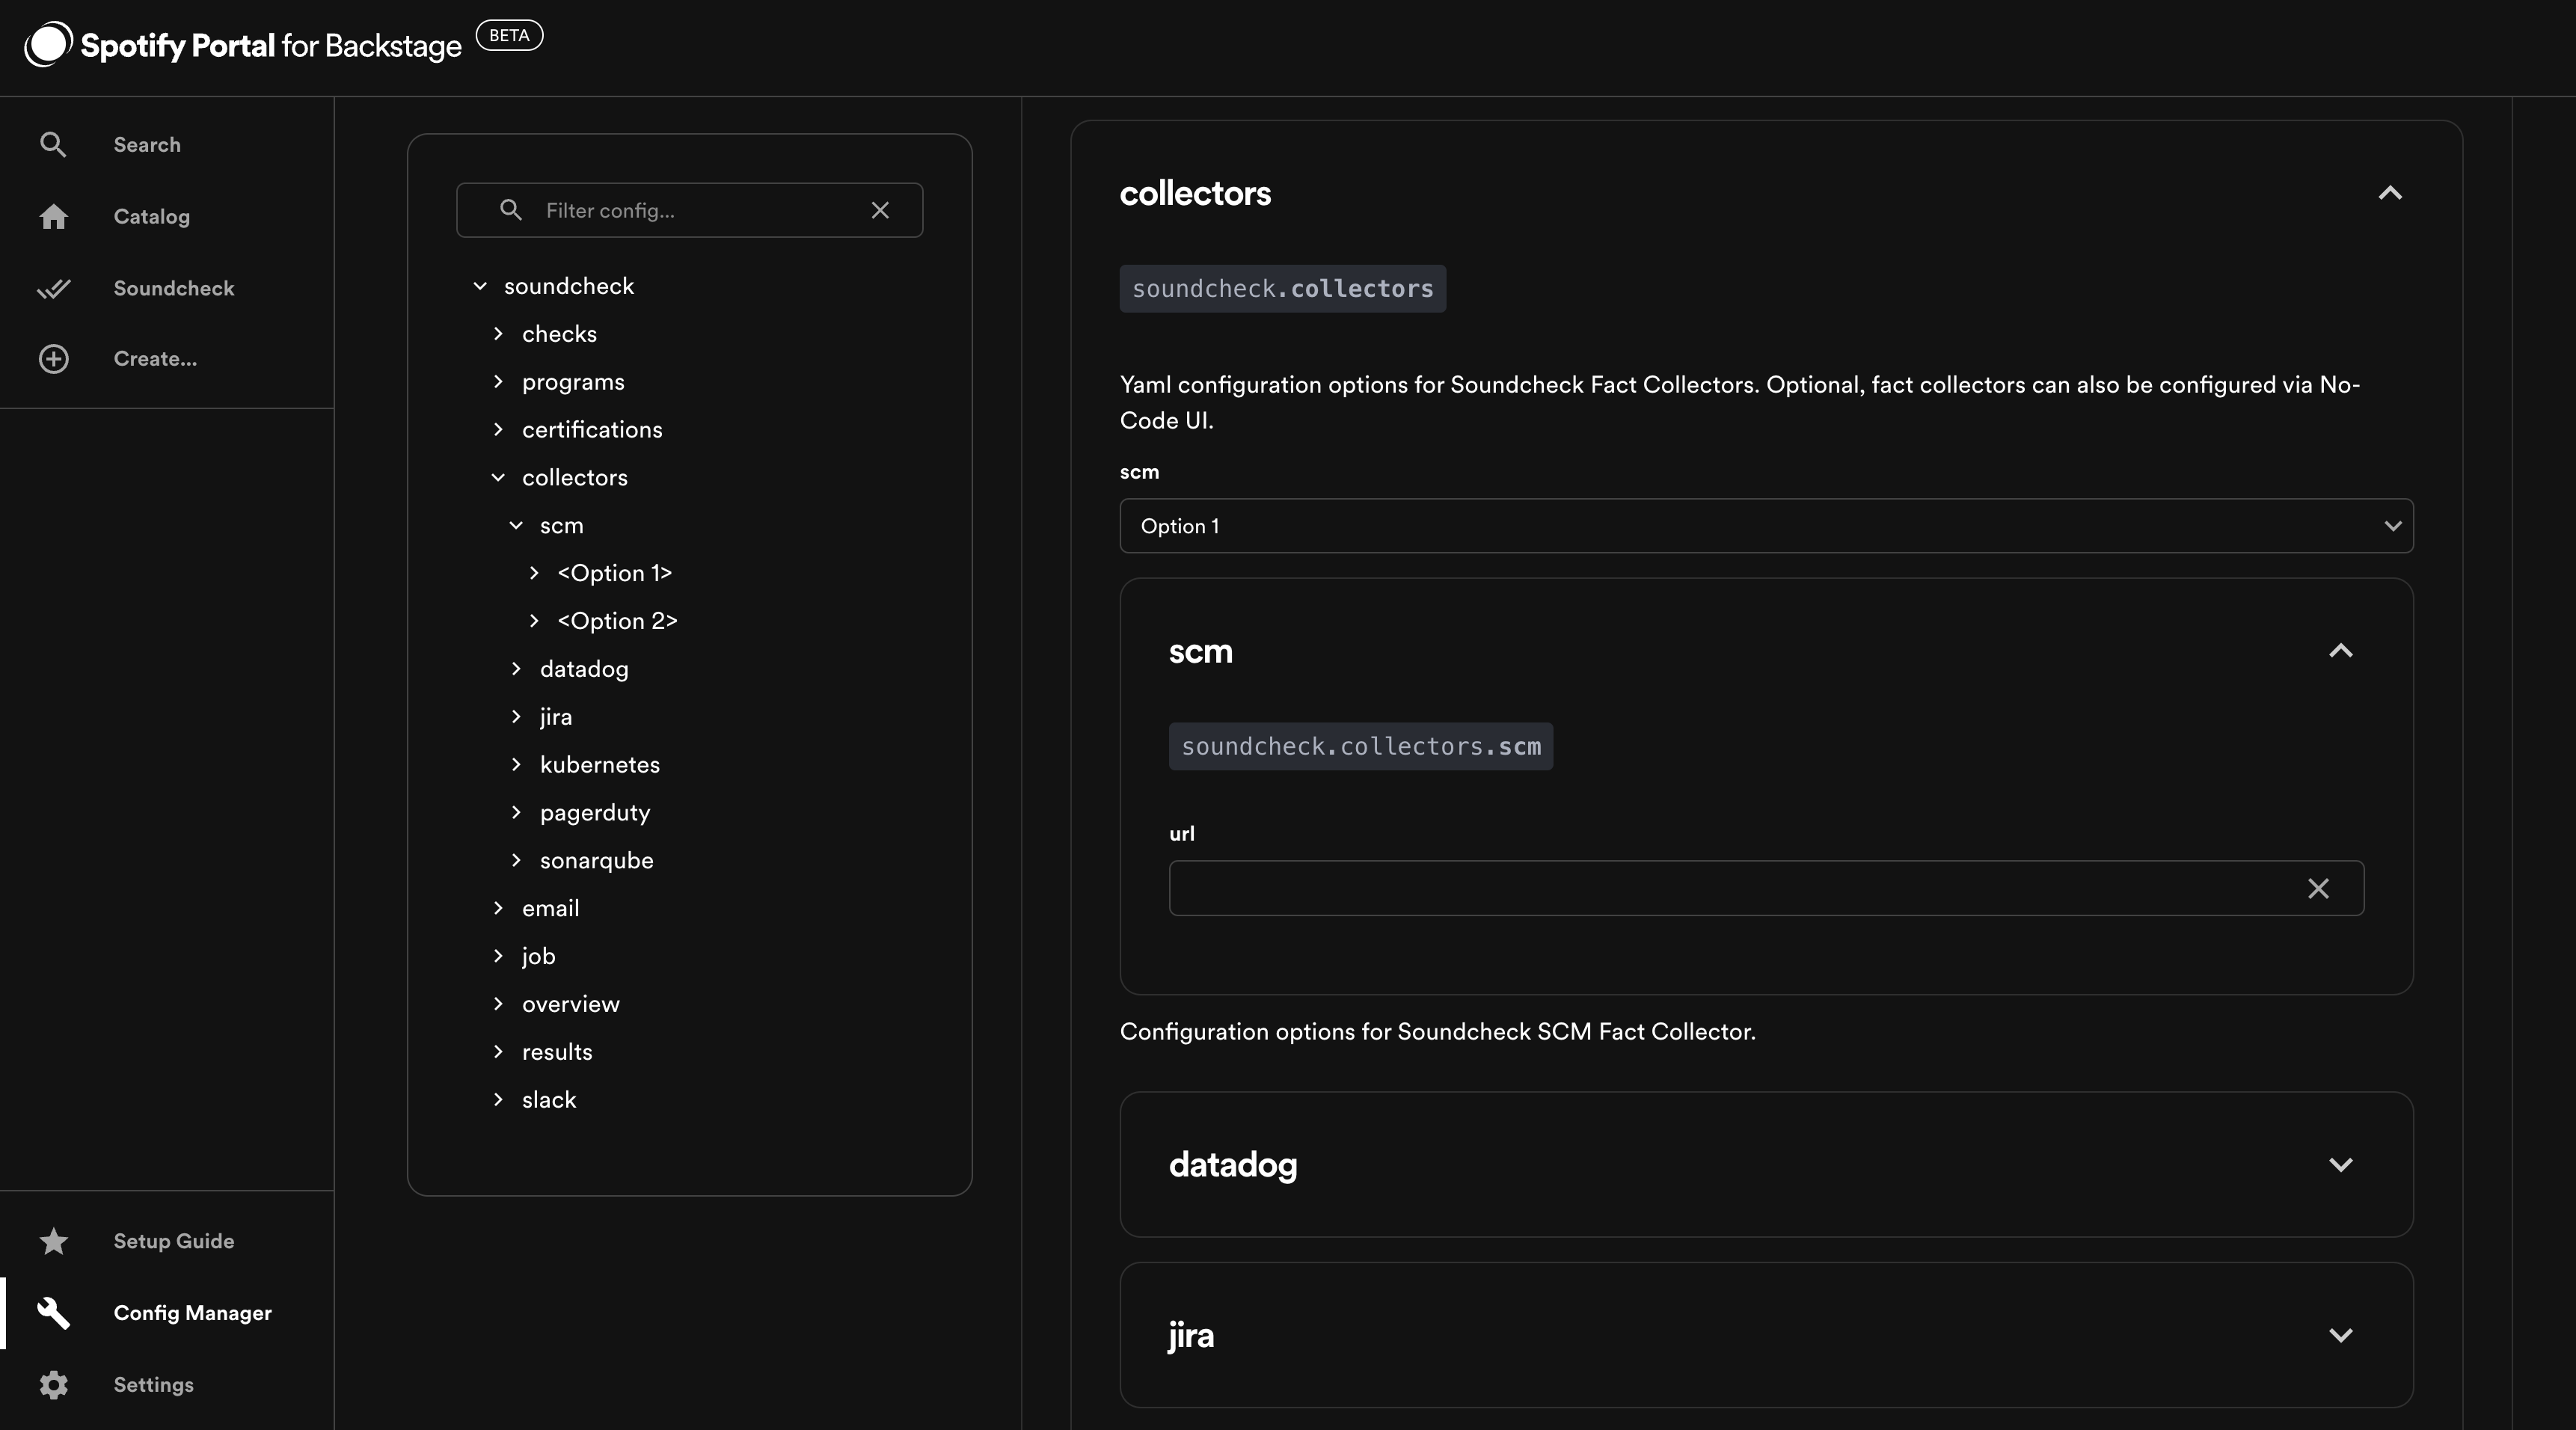
Find out more in the Soundcheck plugin documentation - Fact Collectors - Third Party Integrations - Source Control Management.
BigQuery Integration
As a prerequisite to enabling the BigQuery integration, you should configure your BigQuery authentication details.
Go to Config Manager > Soundcheck and enter the projectId and credentials under soundcheck.collectors.bigquery.auth.
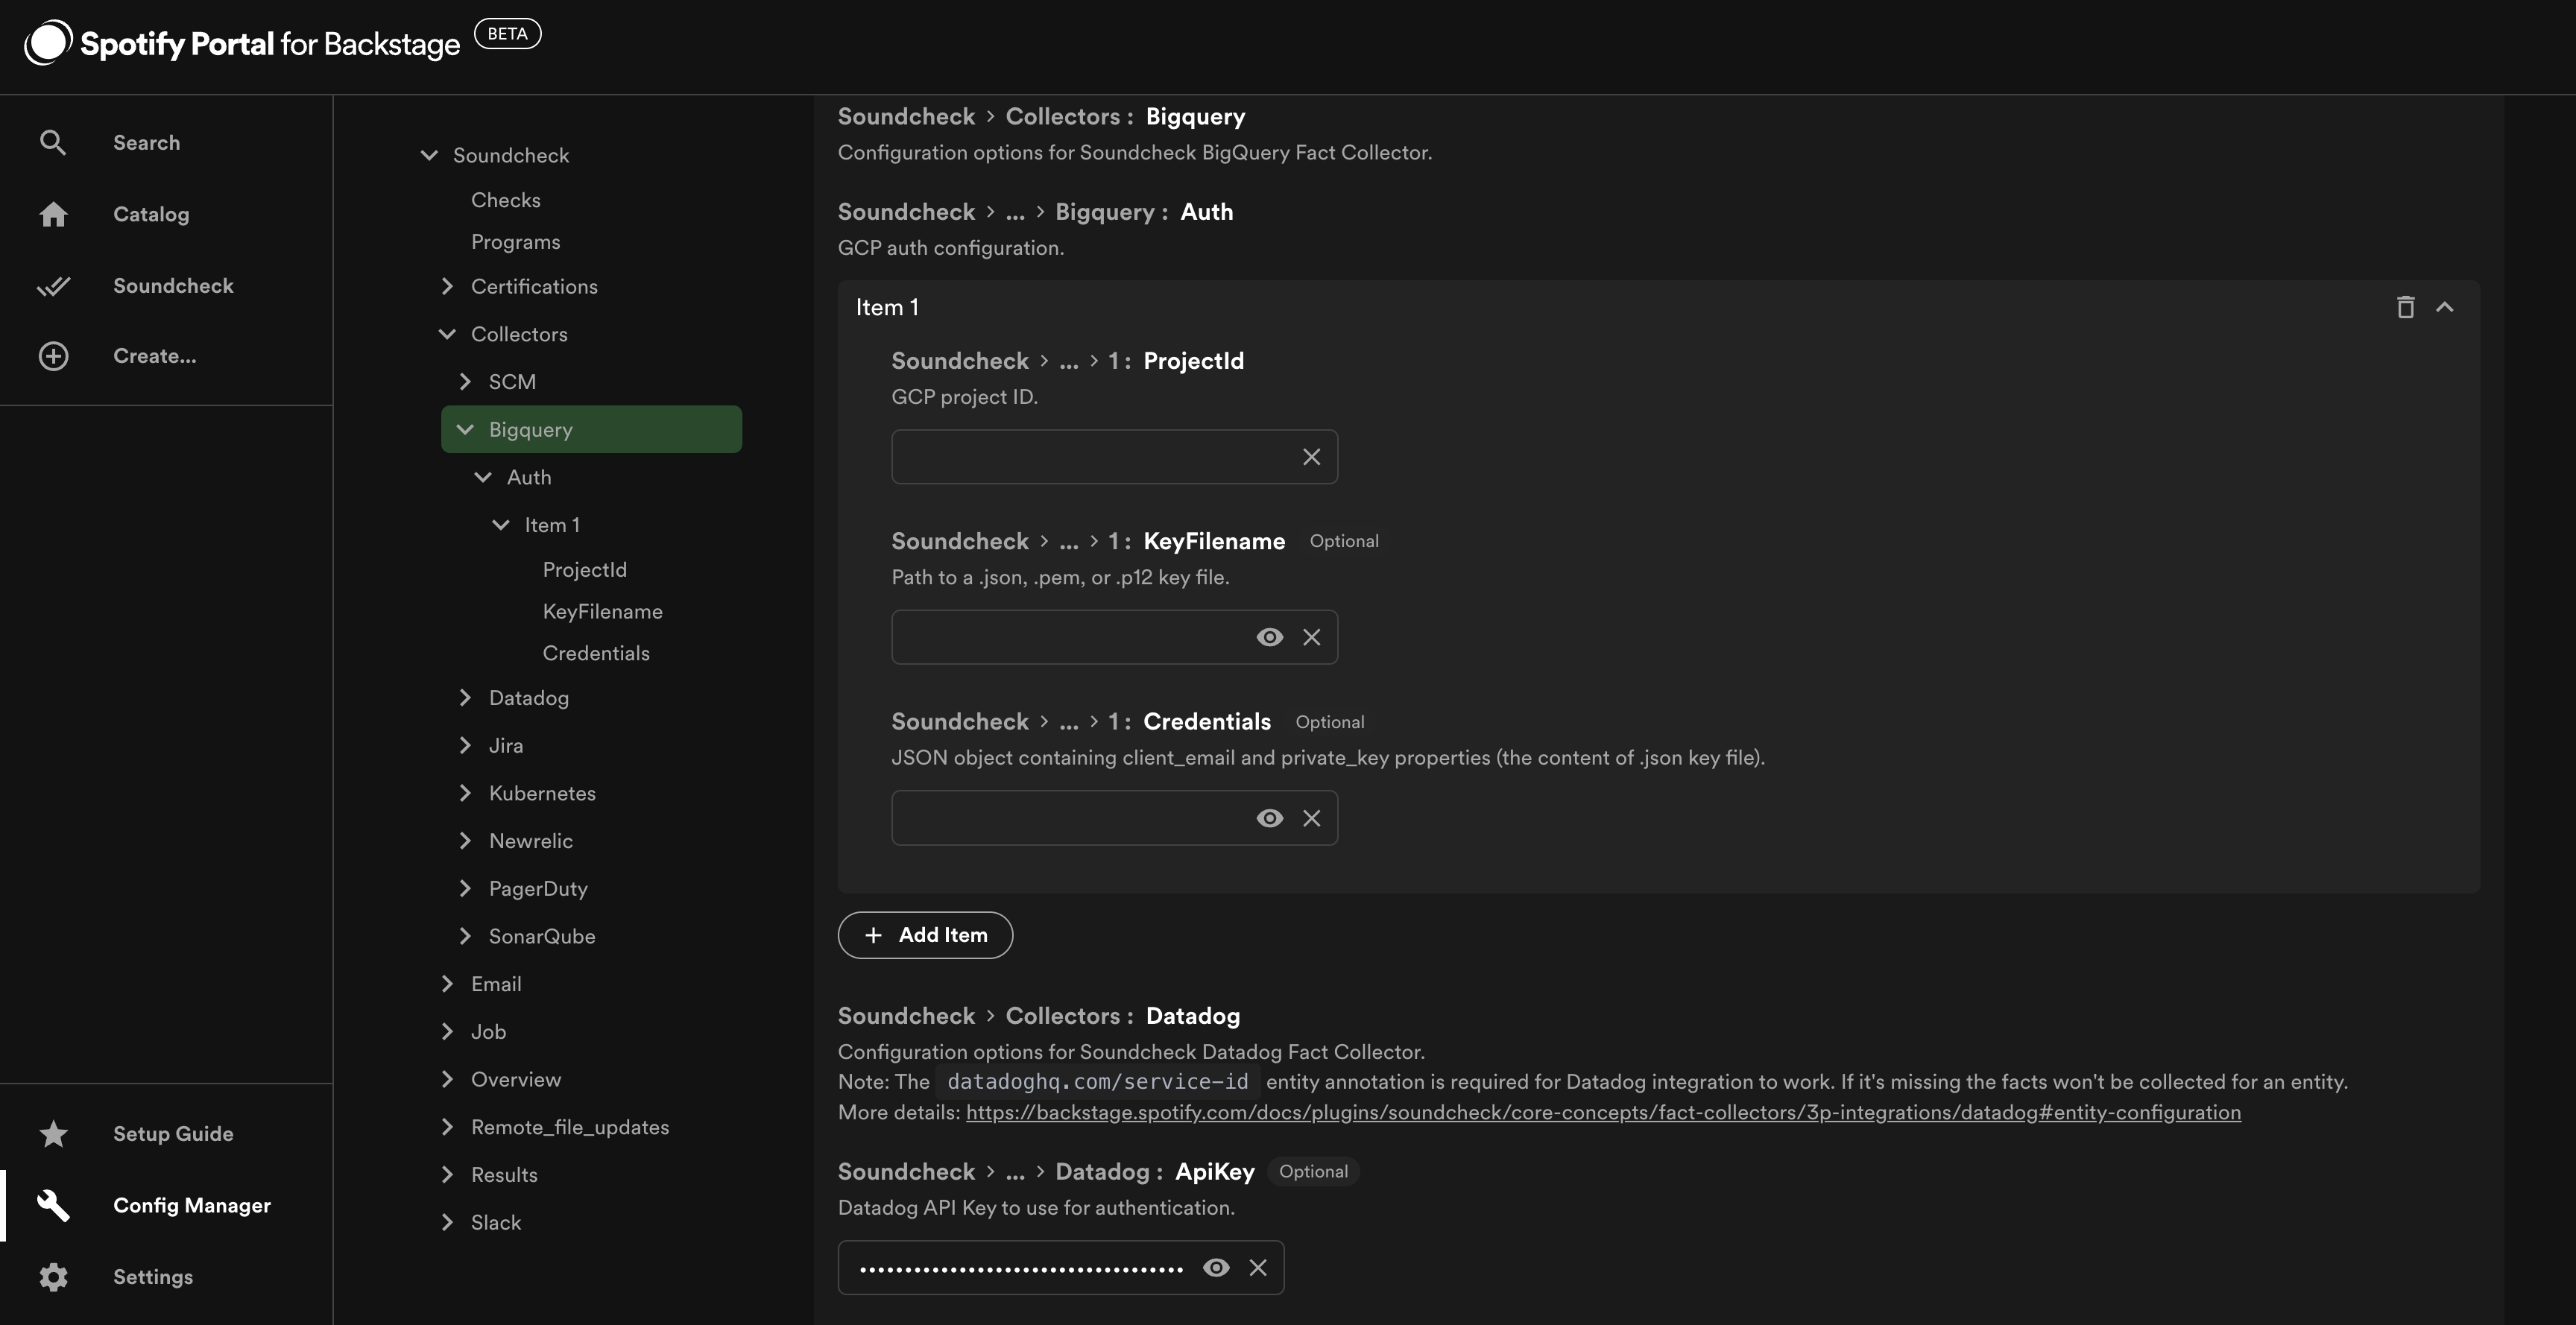
The authentication configuration is optional, alternatively you can set up Application Default Credentials by following the Google documentation.
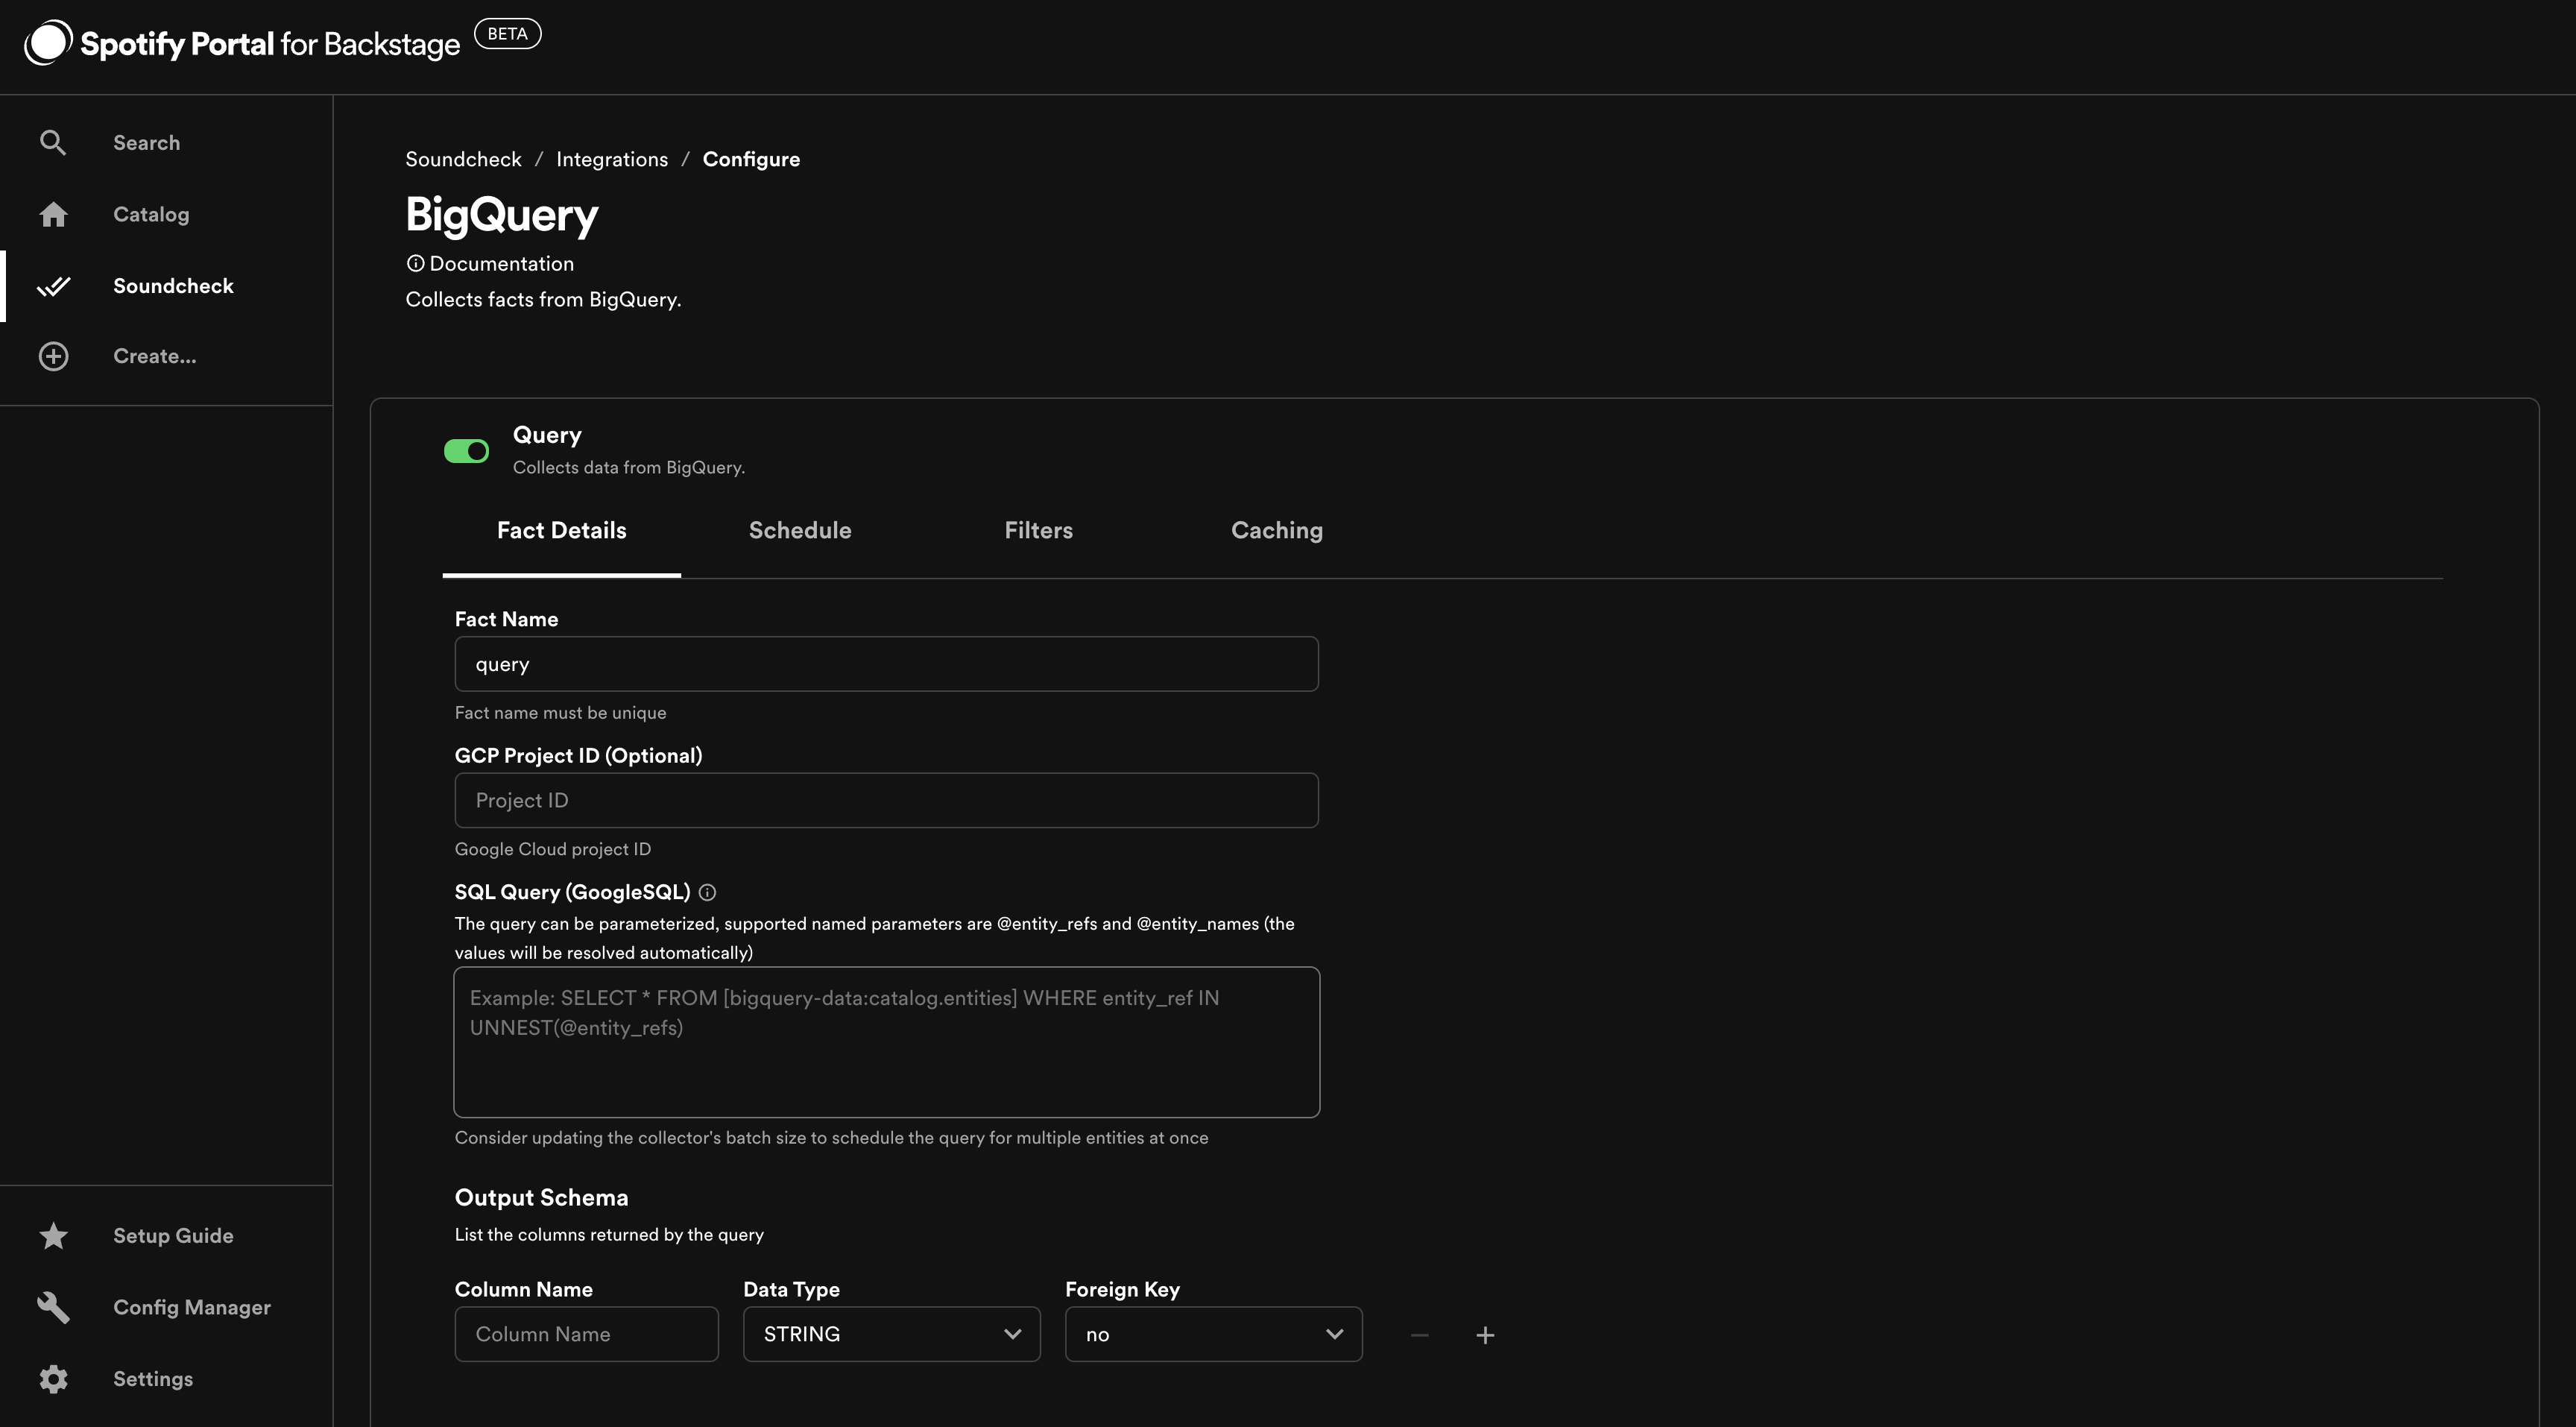
To enable the BigQuery integration, go to Soundcheck > Integrations > BigQuery and click the Configure button.
Find out more in the Soundcheck plugin documentation - Fact Collectors - Third Party Integrations - BigQuery.
Datadog Integration
As a prerequisite to enabling the Datadog integration, you must configure your Datadog instance details.
Go to Config Manager > Soundcheck and enter the baseUrl, appKey and apiKey under soundcheck.collectors.datadog.
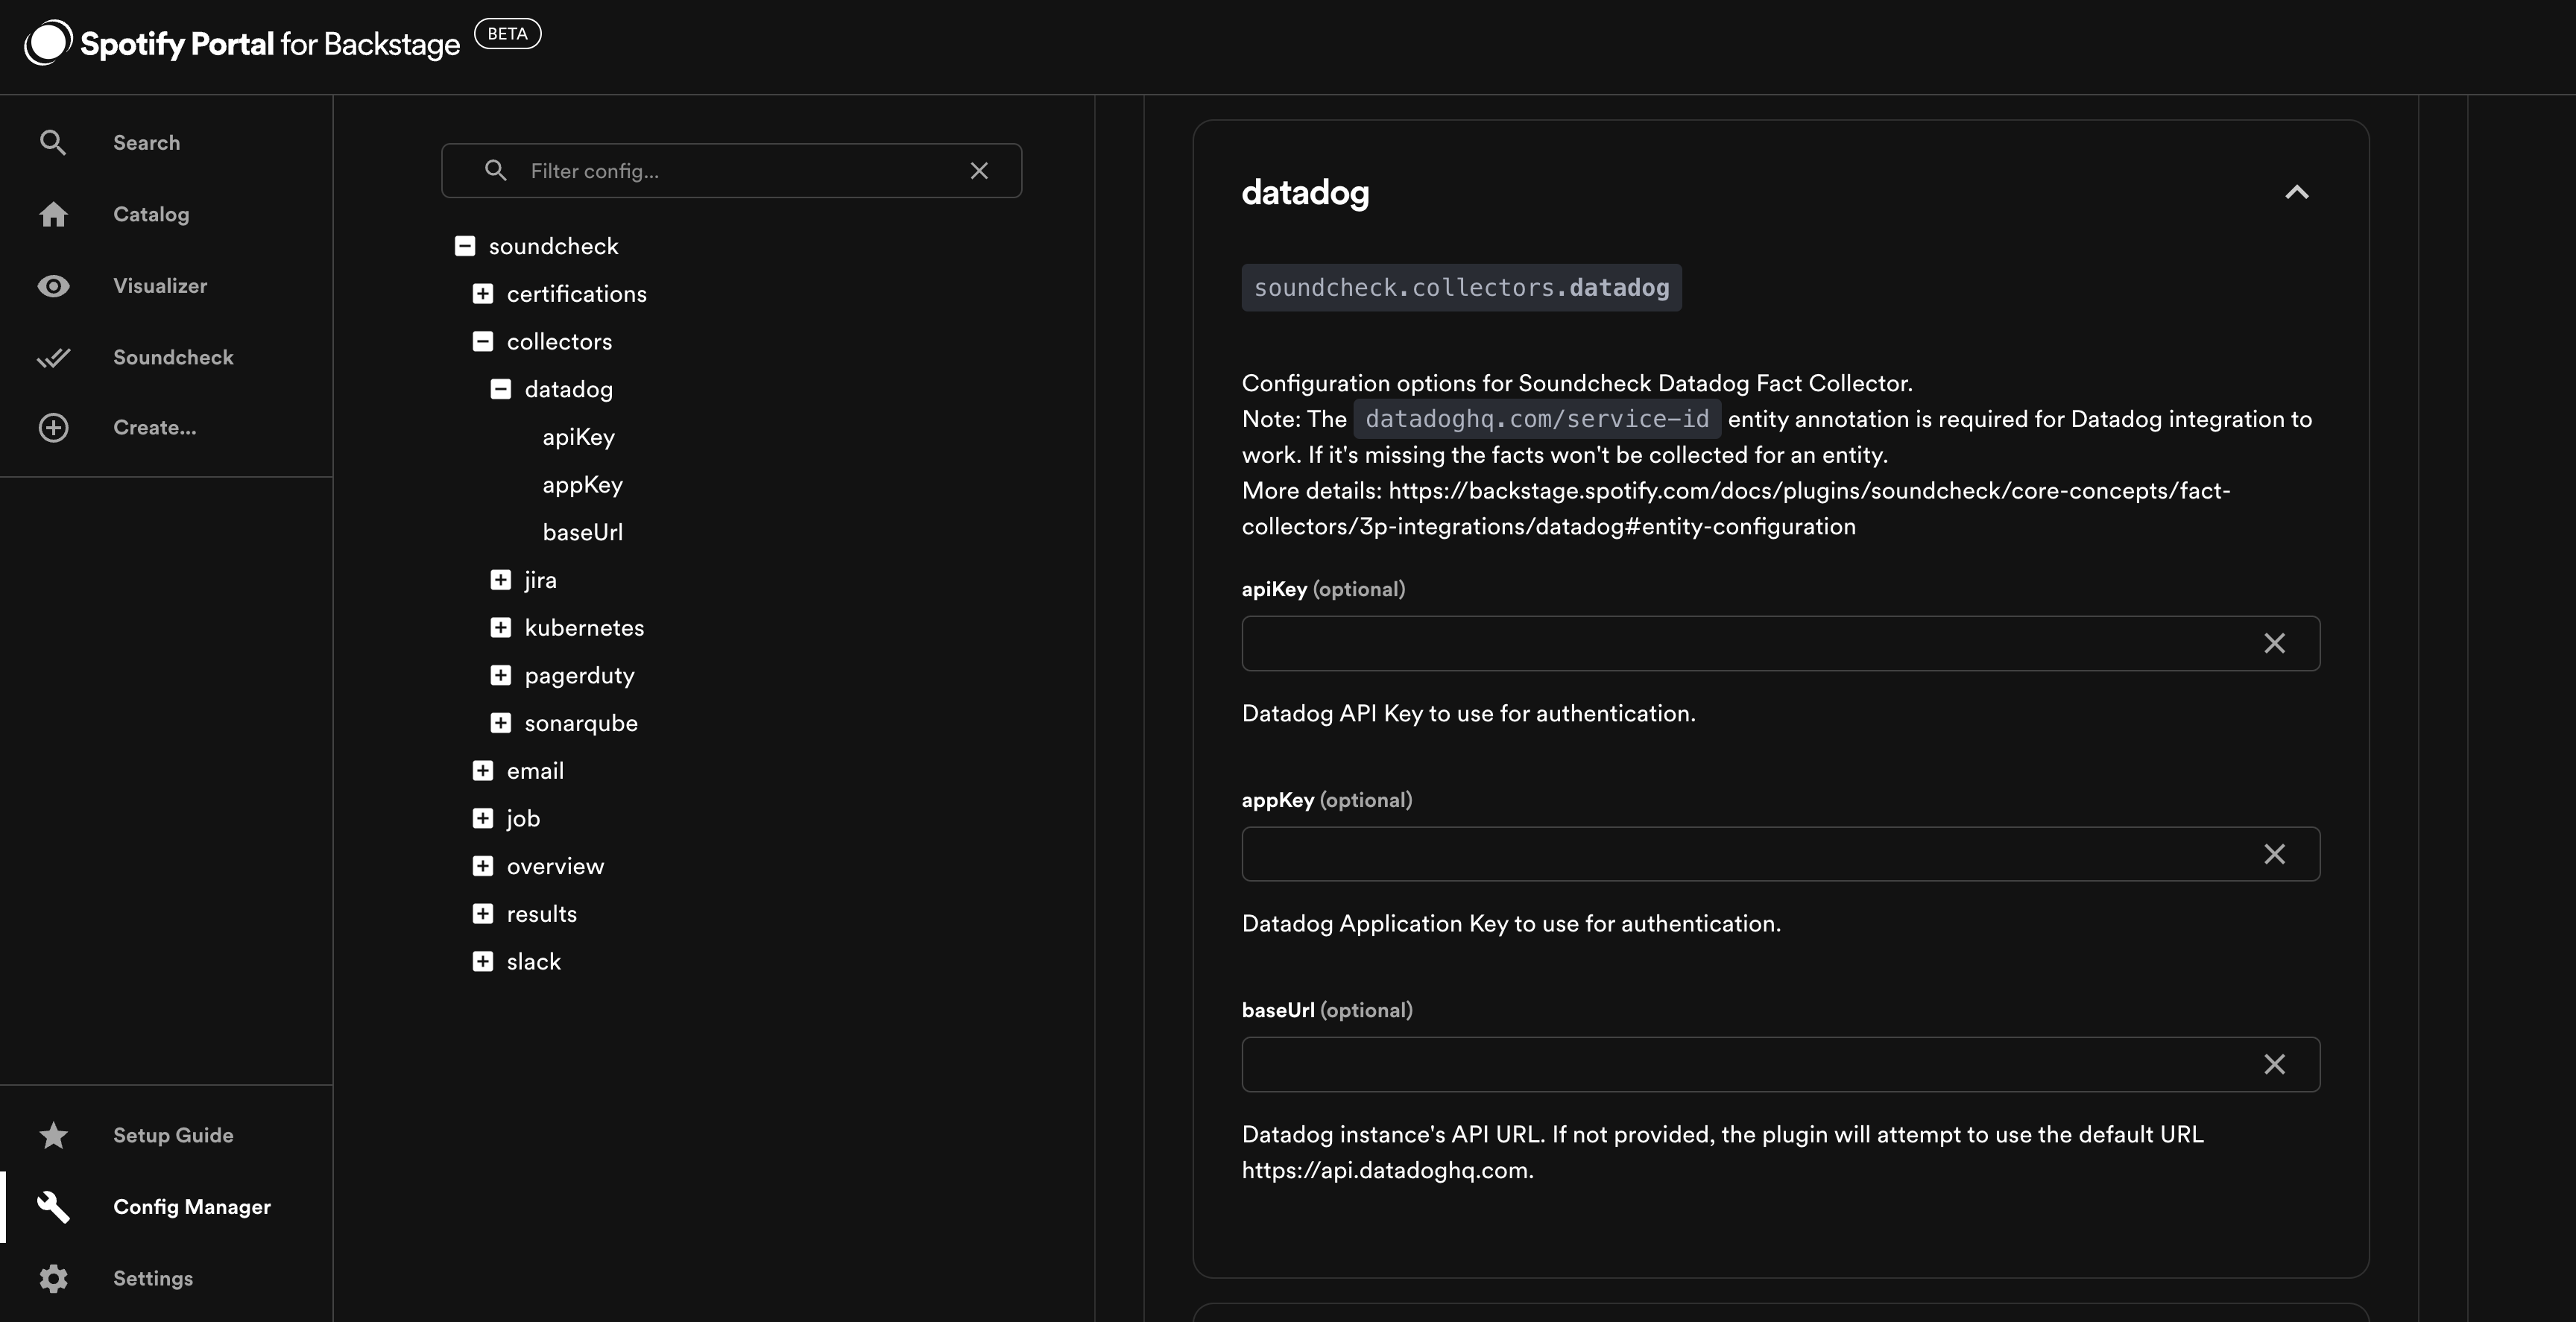
To enable the Datadog integration, go to Soundcheck > Integrations > Datadog and click the Configure button.
Find out more in the Soundcheck plugin documentation - Fact Collectors - Third Party Integrations - Datadog.
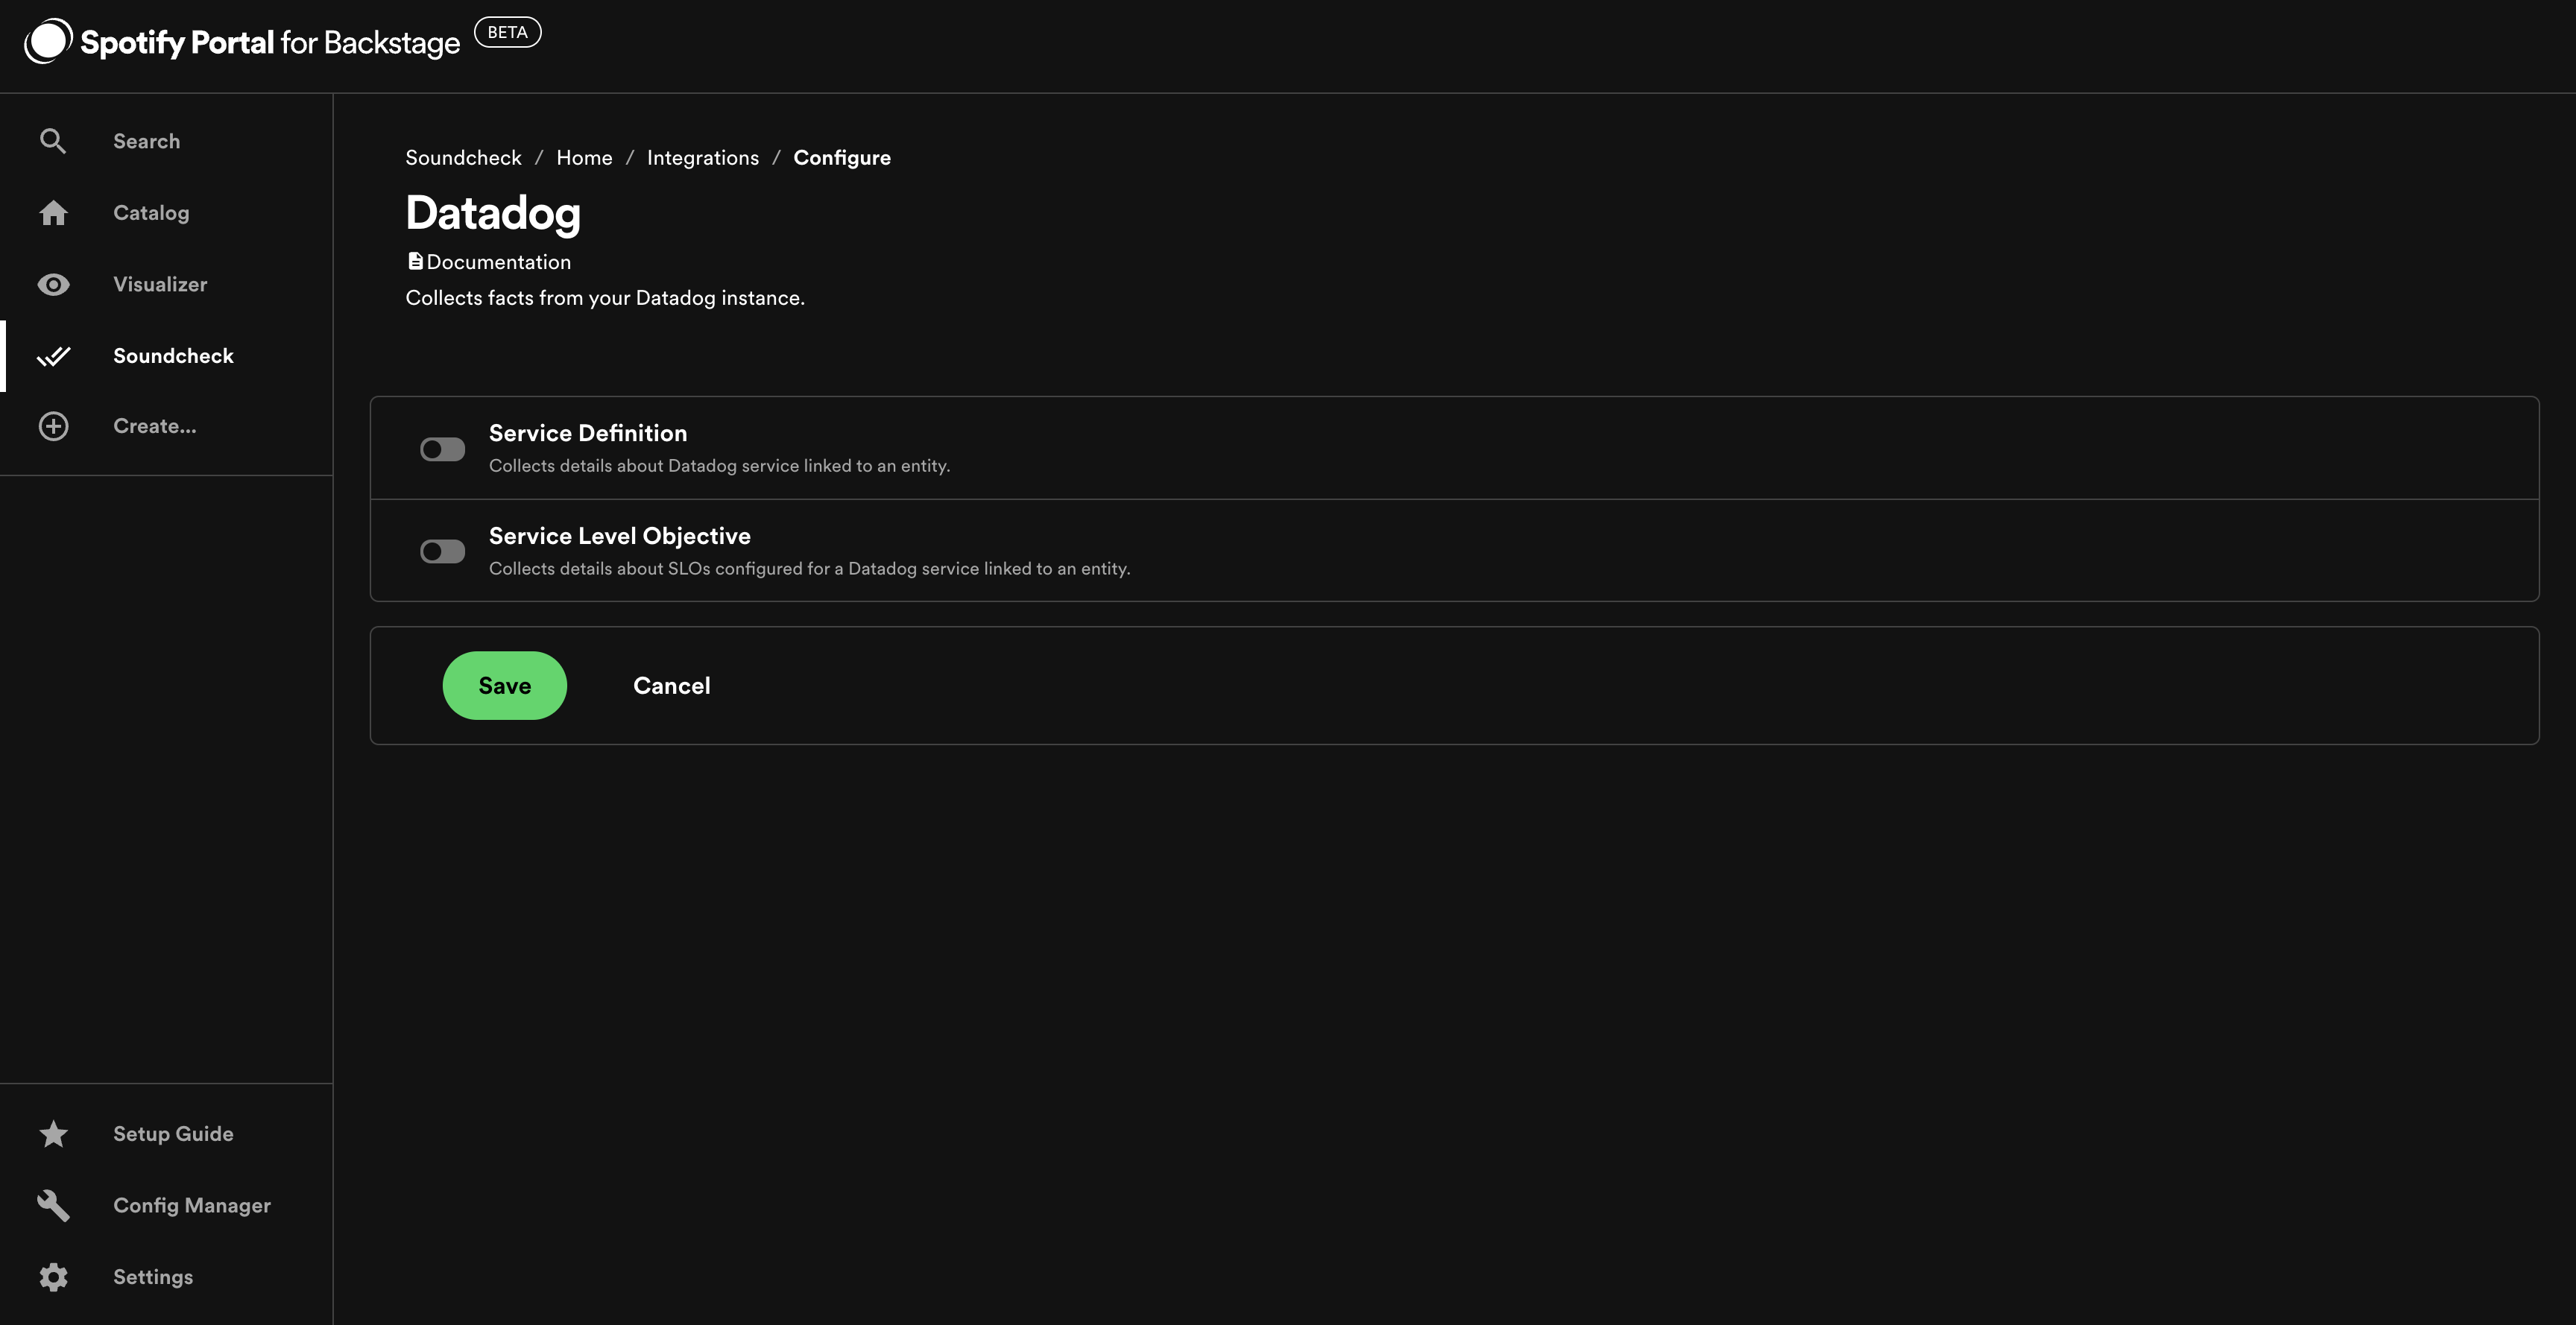
Note: The datadoghq.com/service-id entity annotation is required for Datadog integration to work. If it's missing the facts won't be collected for an entity.
HTTP Integration
As a prerequisite to enabling the HTTP integration, you should configure your HTTP secrets.
Go to Config Manager > Soundcheck and enter the key - value pairs under soundcheck.collectors.http.secrets.

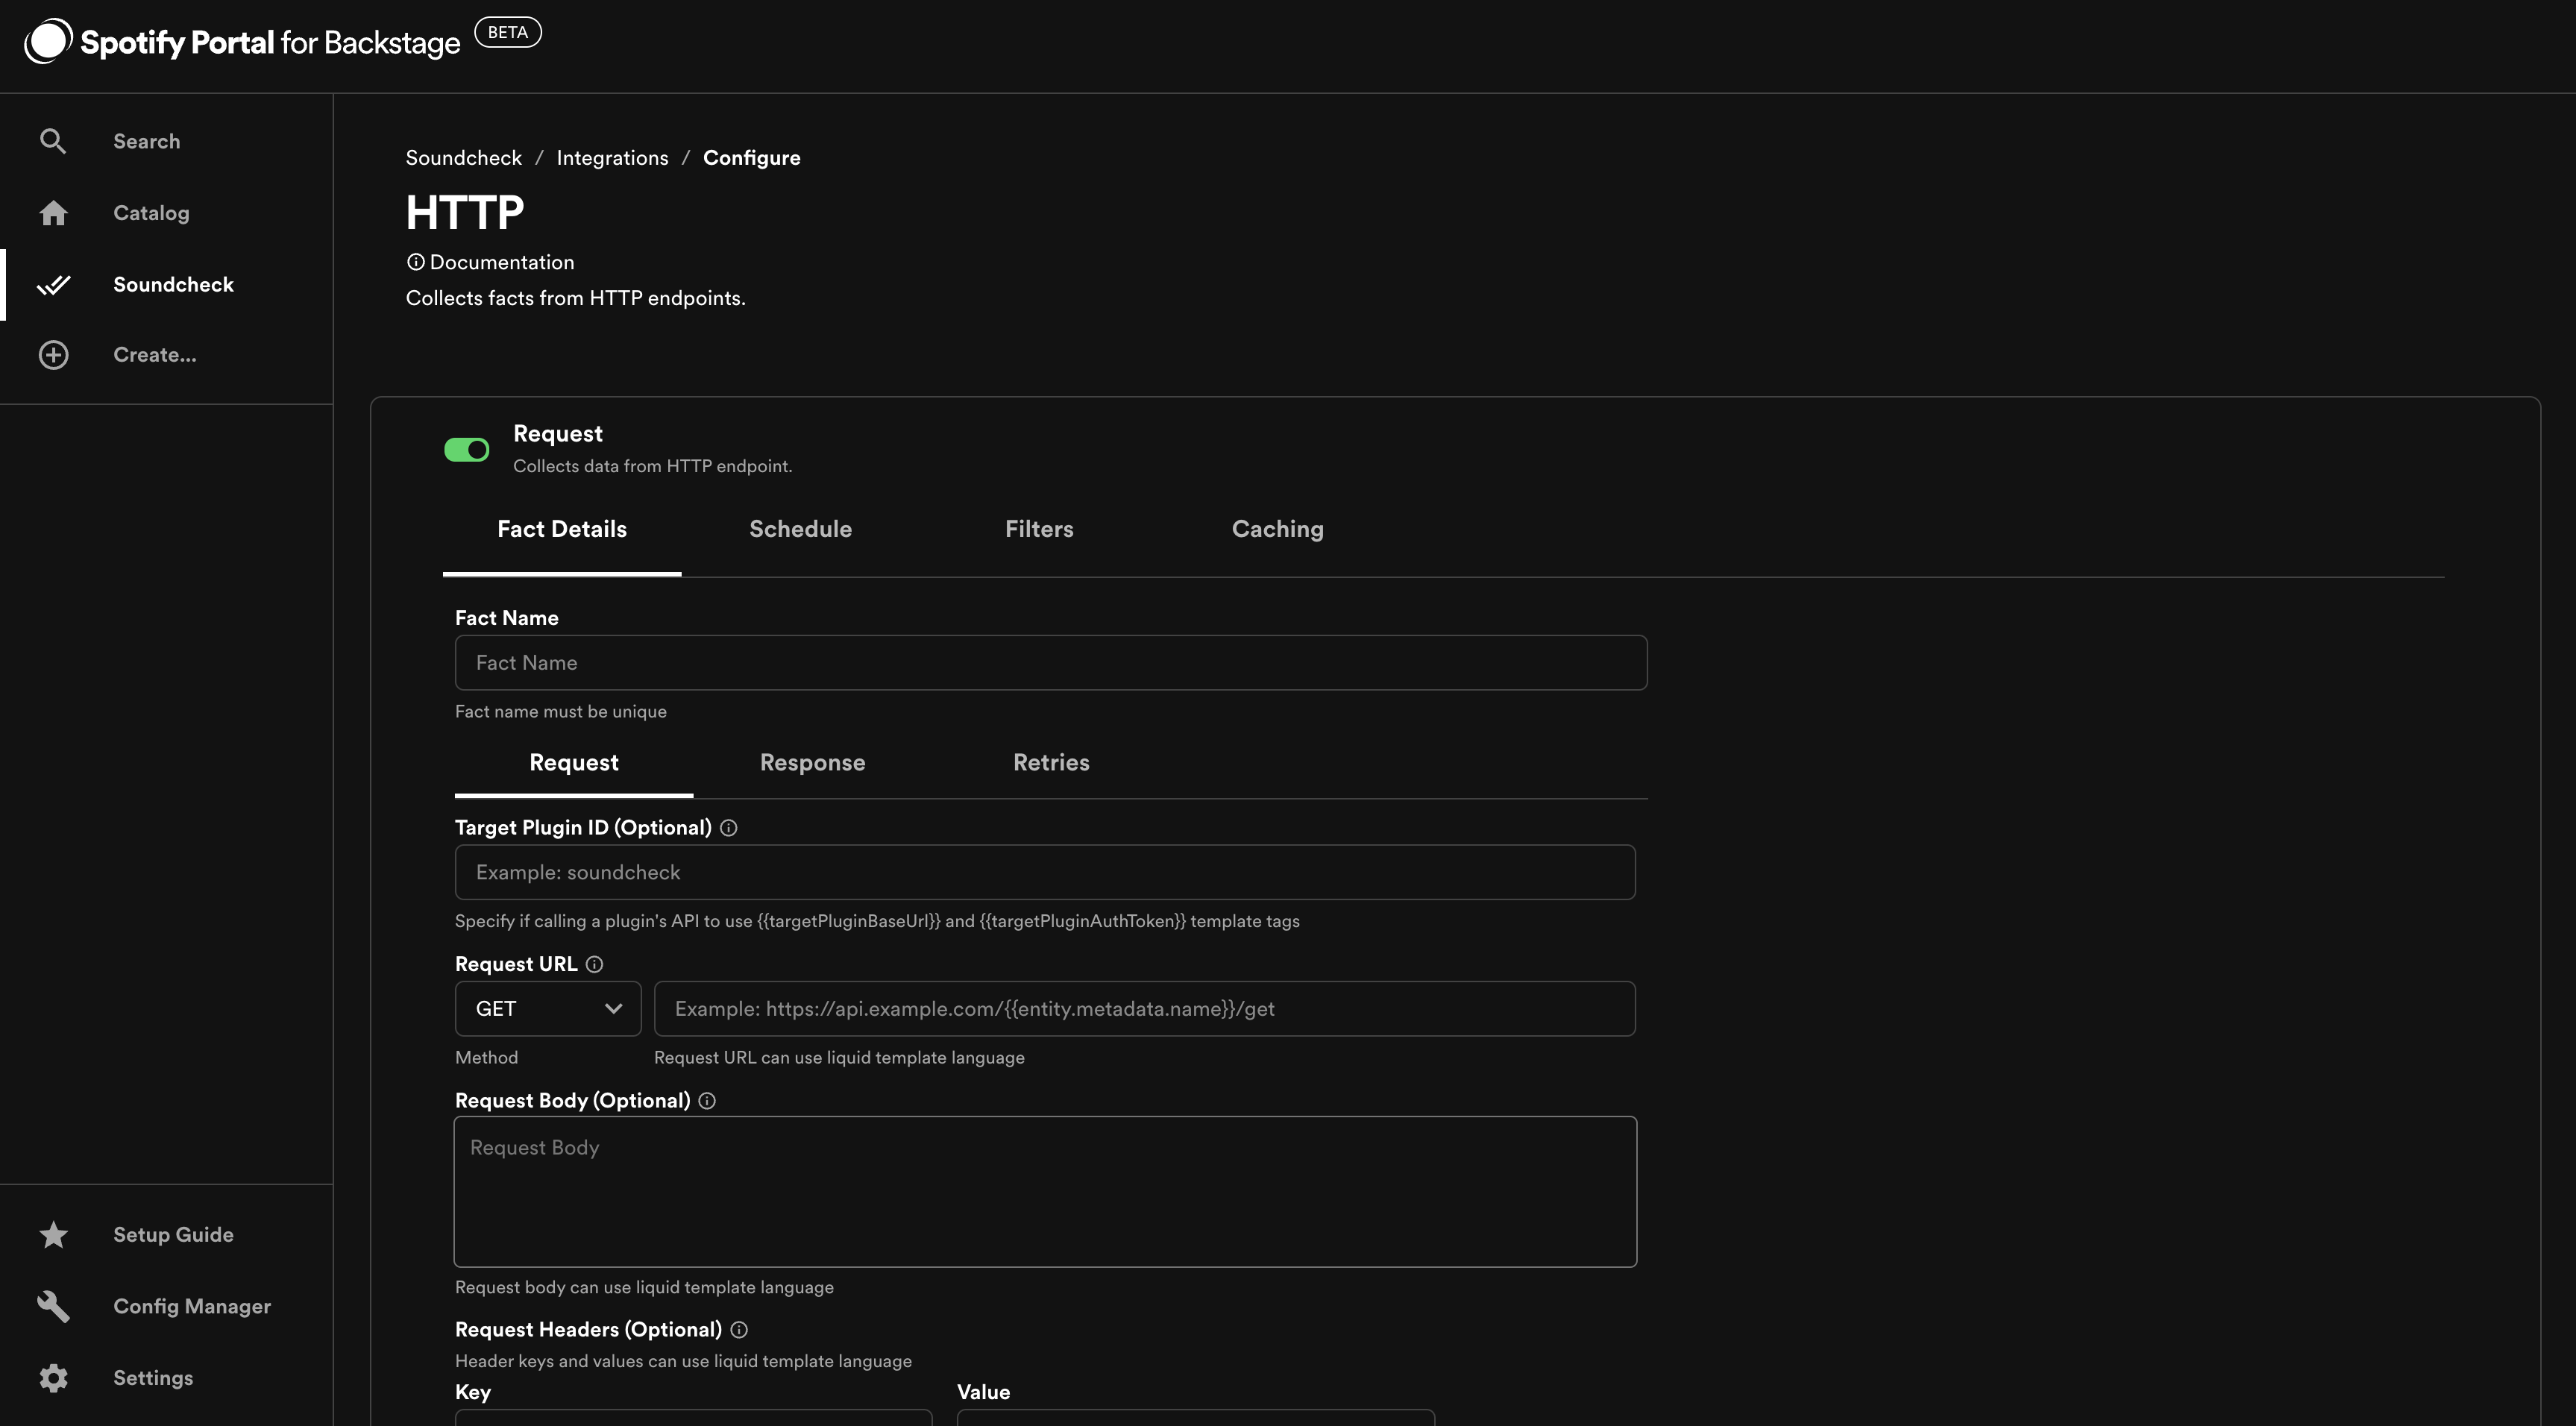
To enable the HTTP integration, go to Soundcheck > Integrations > HTTP and click the Configure button.
Find out more in the Soundcheck plugin documentation - Fact Collectors - Third Party Integrations - HTTP.
Jira Integration
As a prerequisite to enabling the Jira integration, you must configure your Jira instance details.
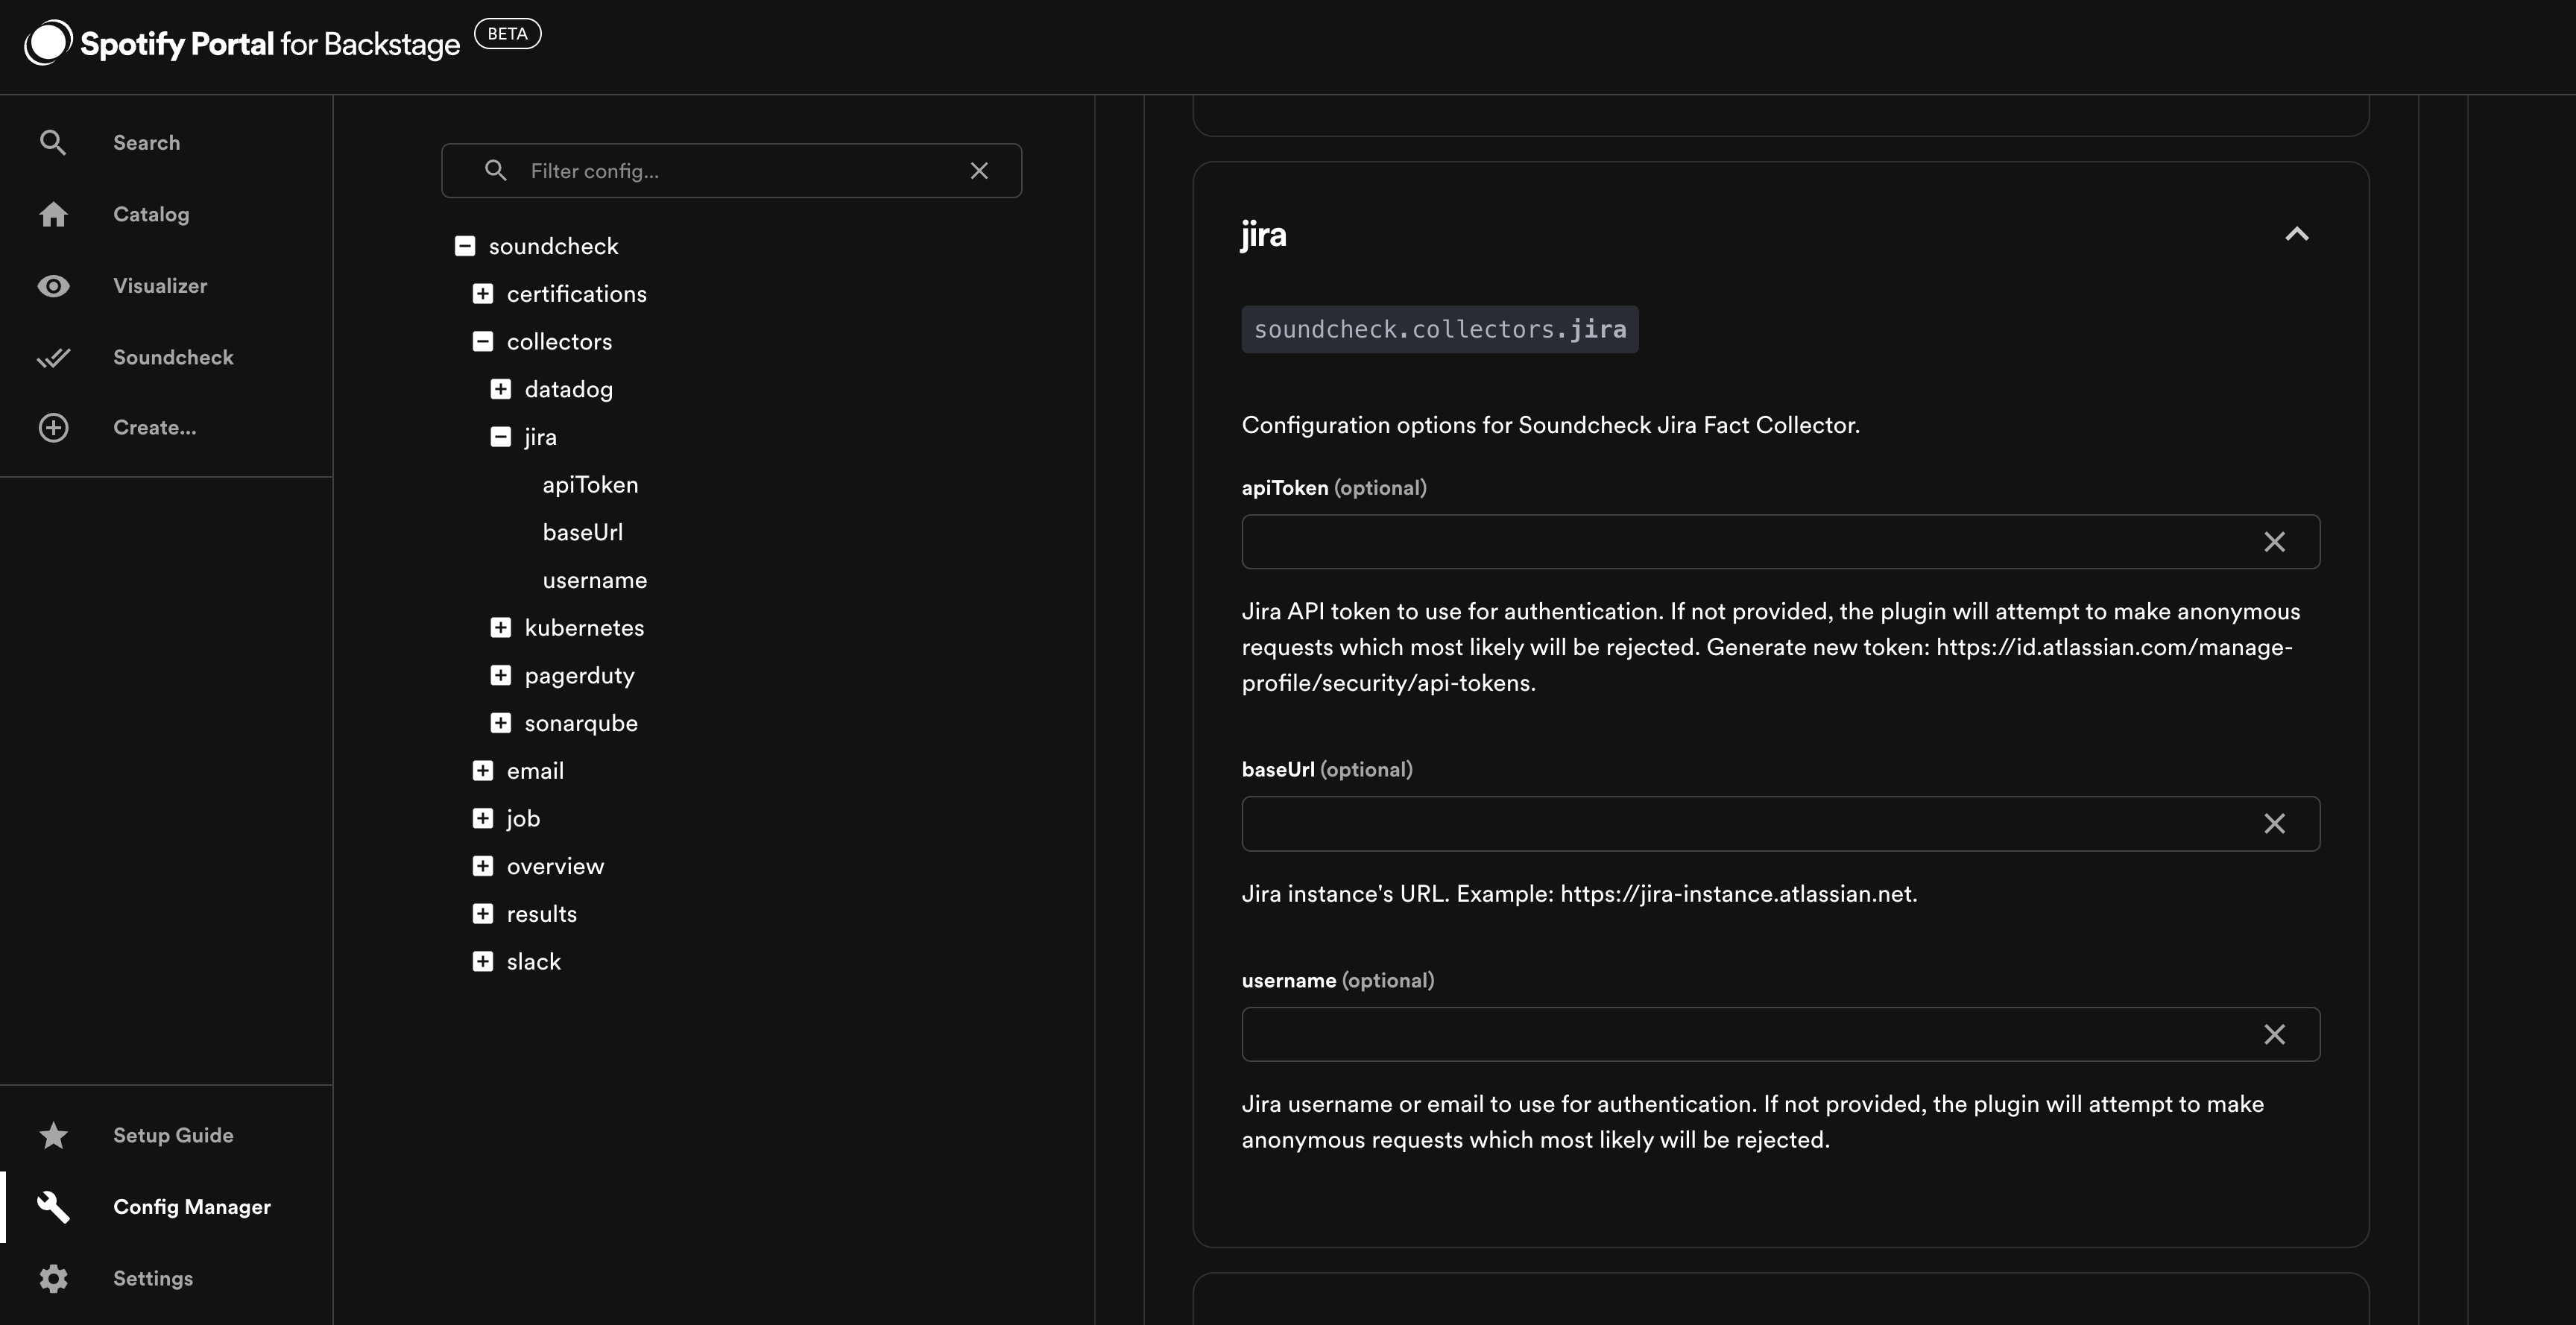
Go to Config Manager > Soundcheck and enter the baseUrl, username and apiToken under soundcheck.collectors.jira.
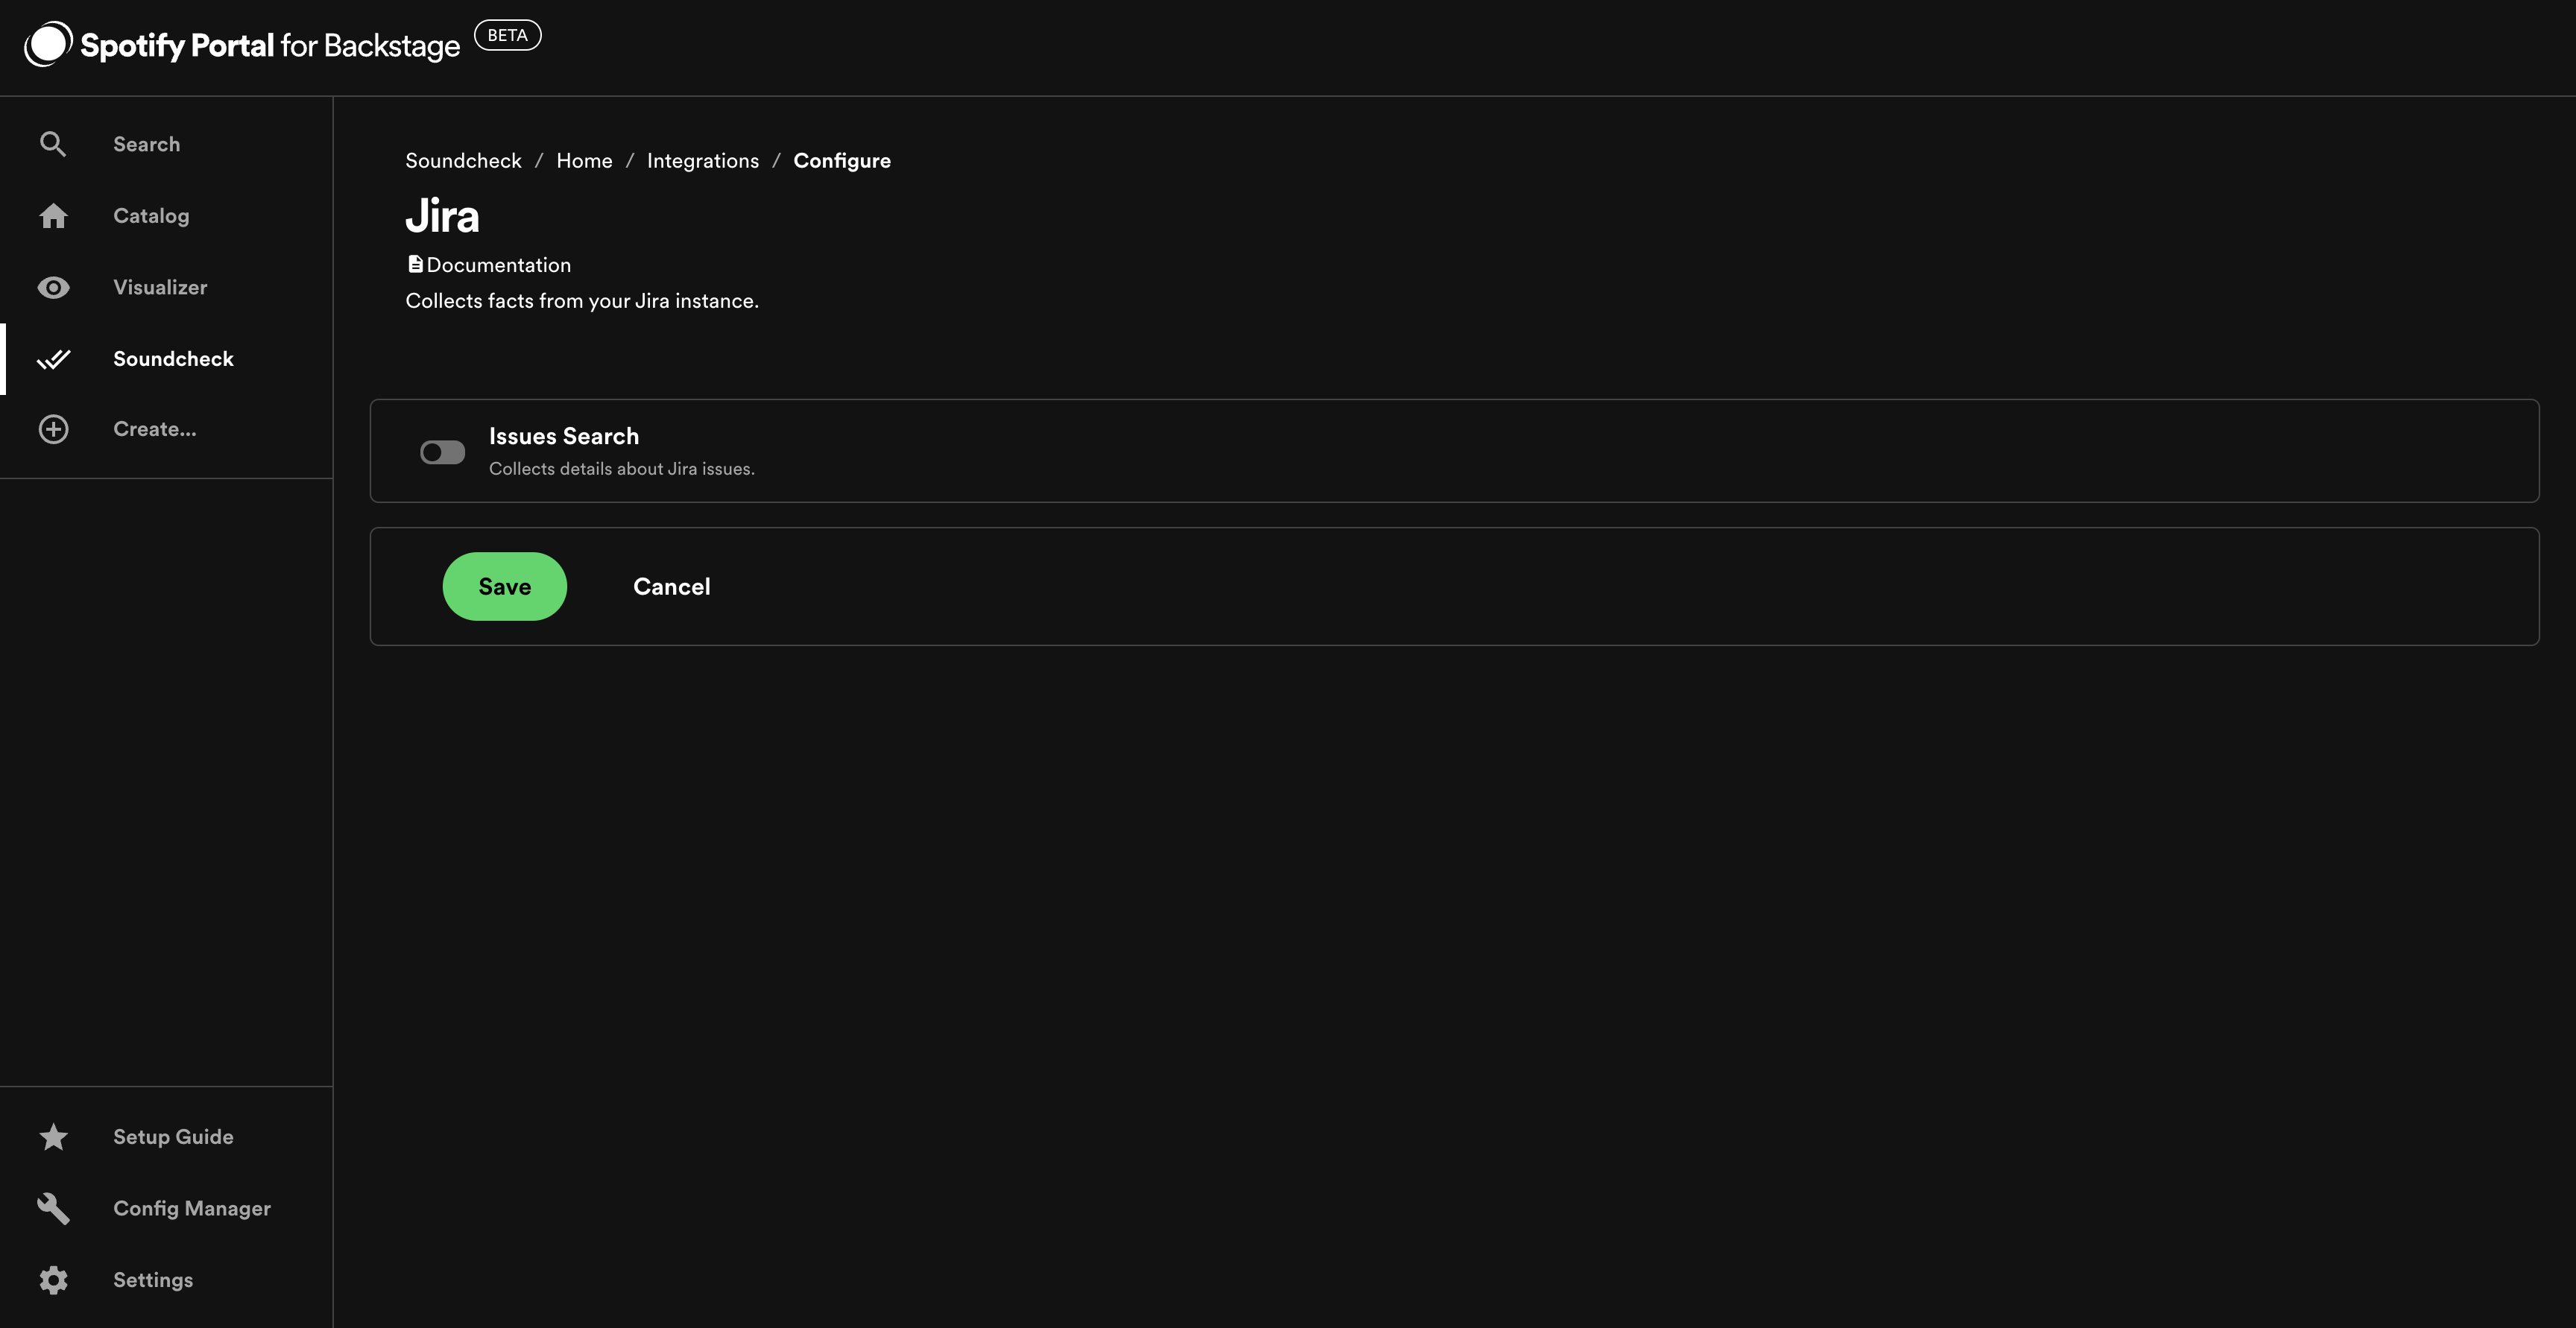
To enable the Jira integration, go to Soundcheck > Integrations > Jira and click the Configure button.
Find out more in the Soundcheck plugin documentation - Fact Collectors - Third Party Integrations - Jira.
Kubernetes Integration
As a prerequisite to enabling the Kubernetes integration, you must configure your Kubernetes instance details.
Go to Config Manager > Kubernetes and enter the details according to the backstage Kubernetes plugin docs.
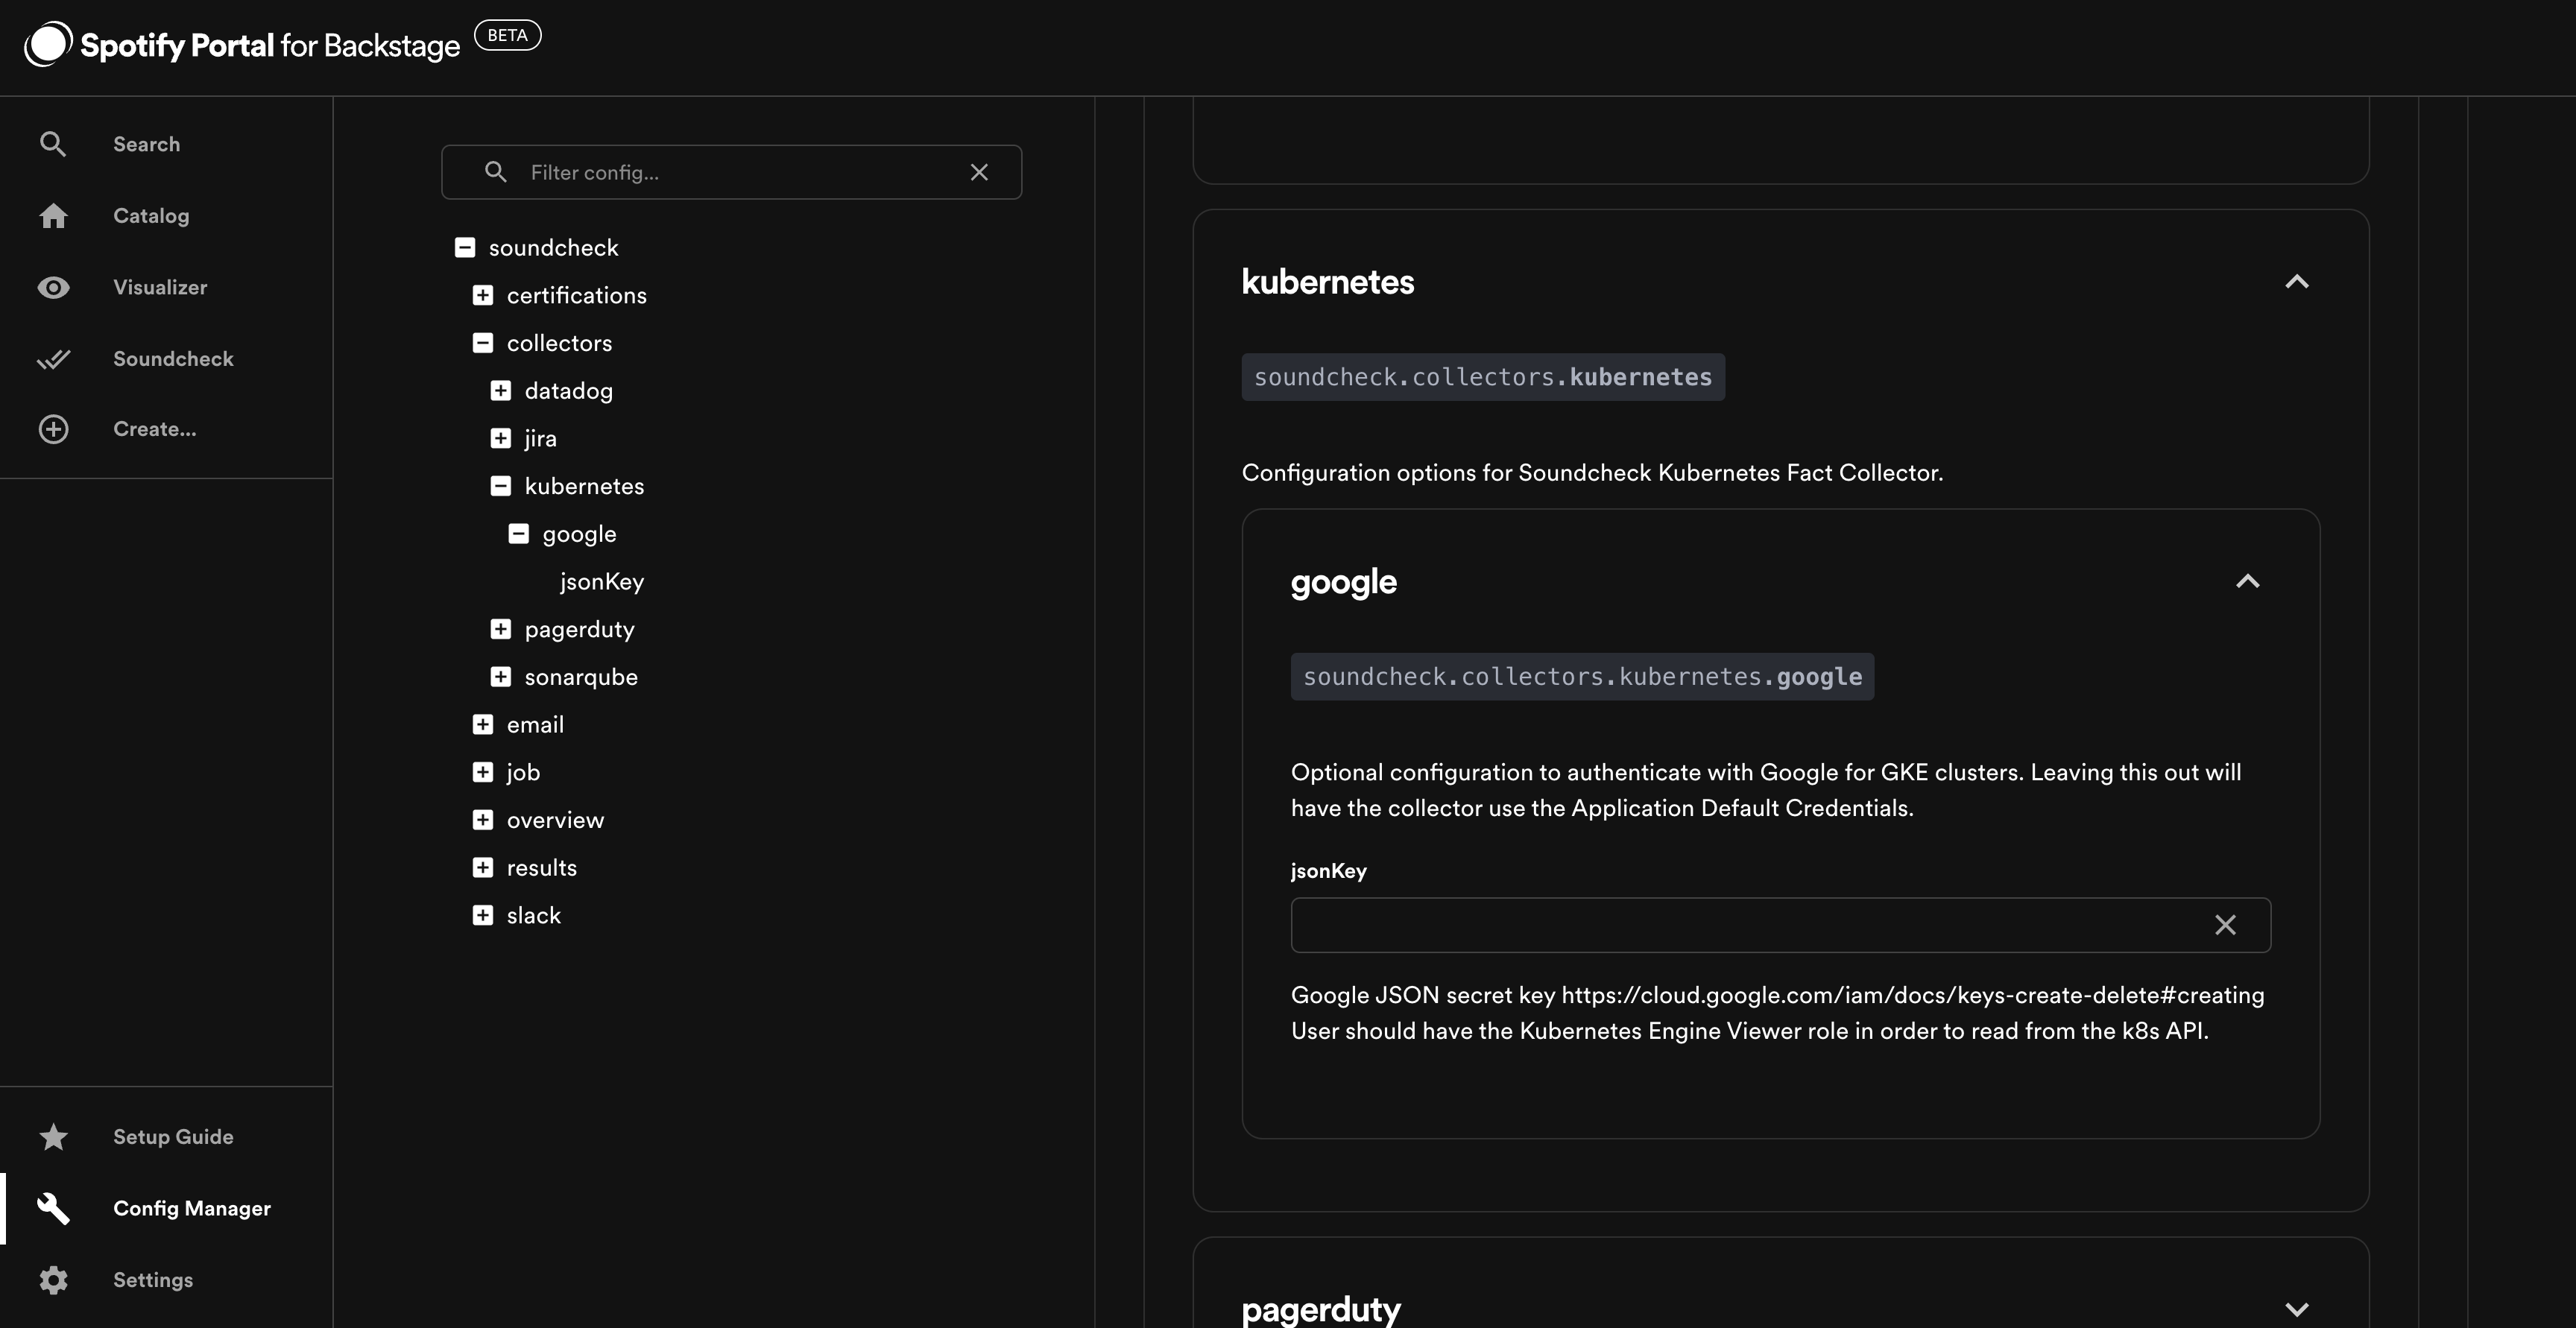
Additionally, you can configure Google authentication by going to Config Manager > Soundcheck and entering jsonKey under soundcheck.collectors.kubernetes.google.
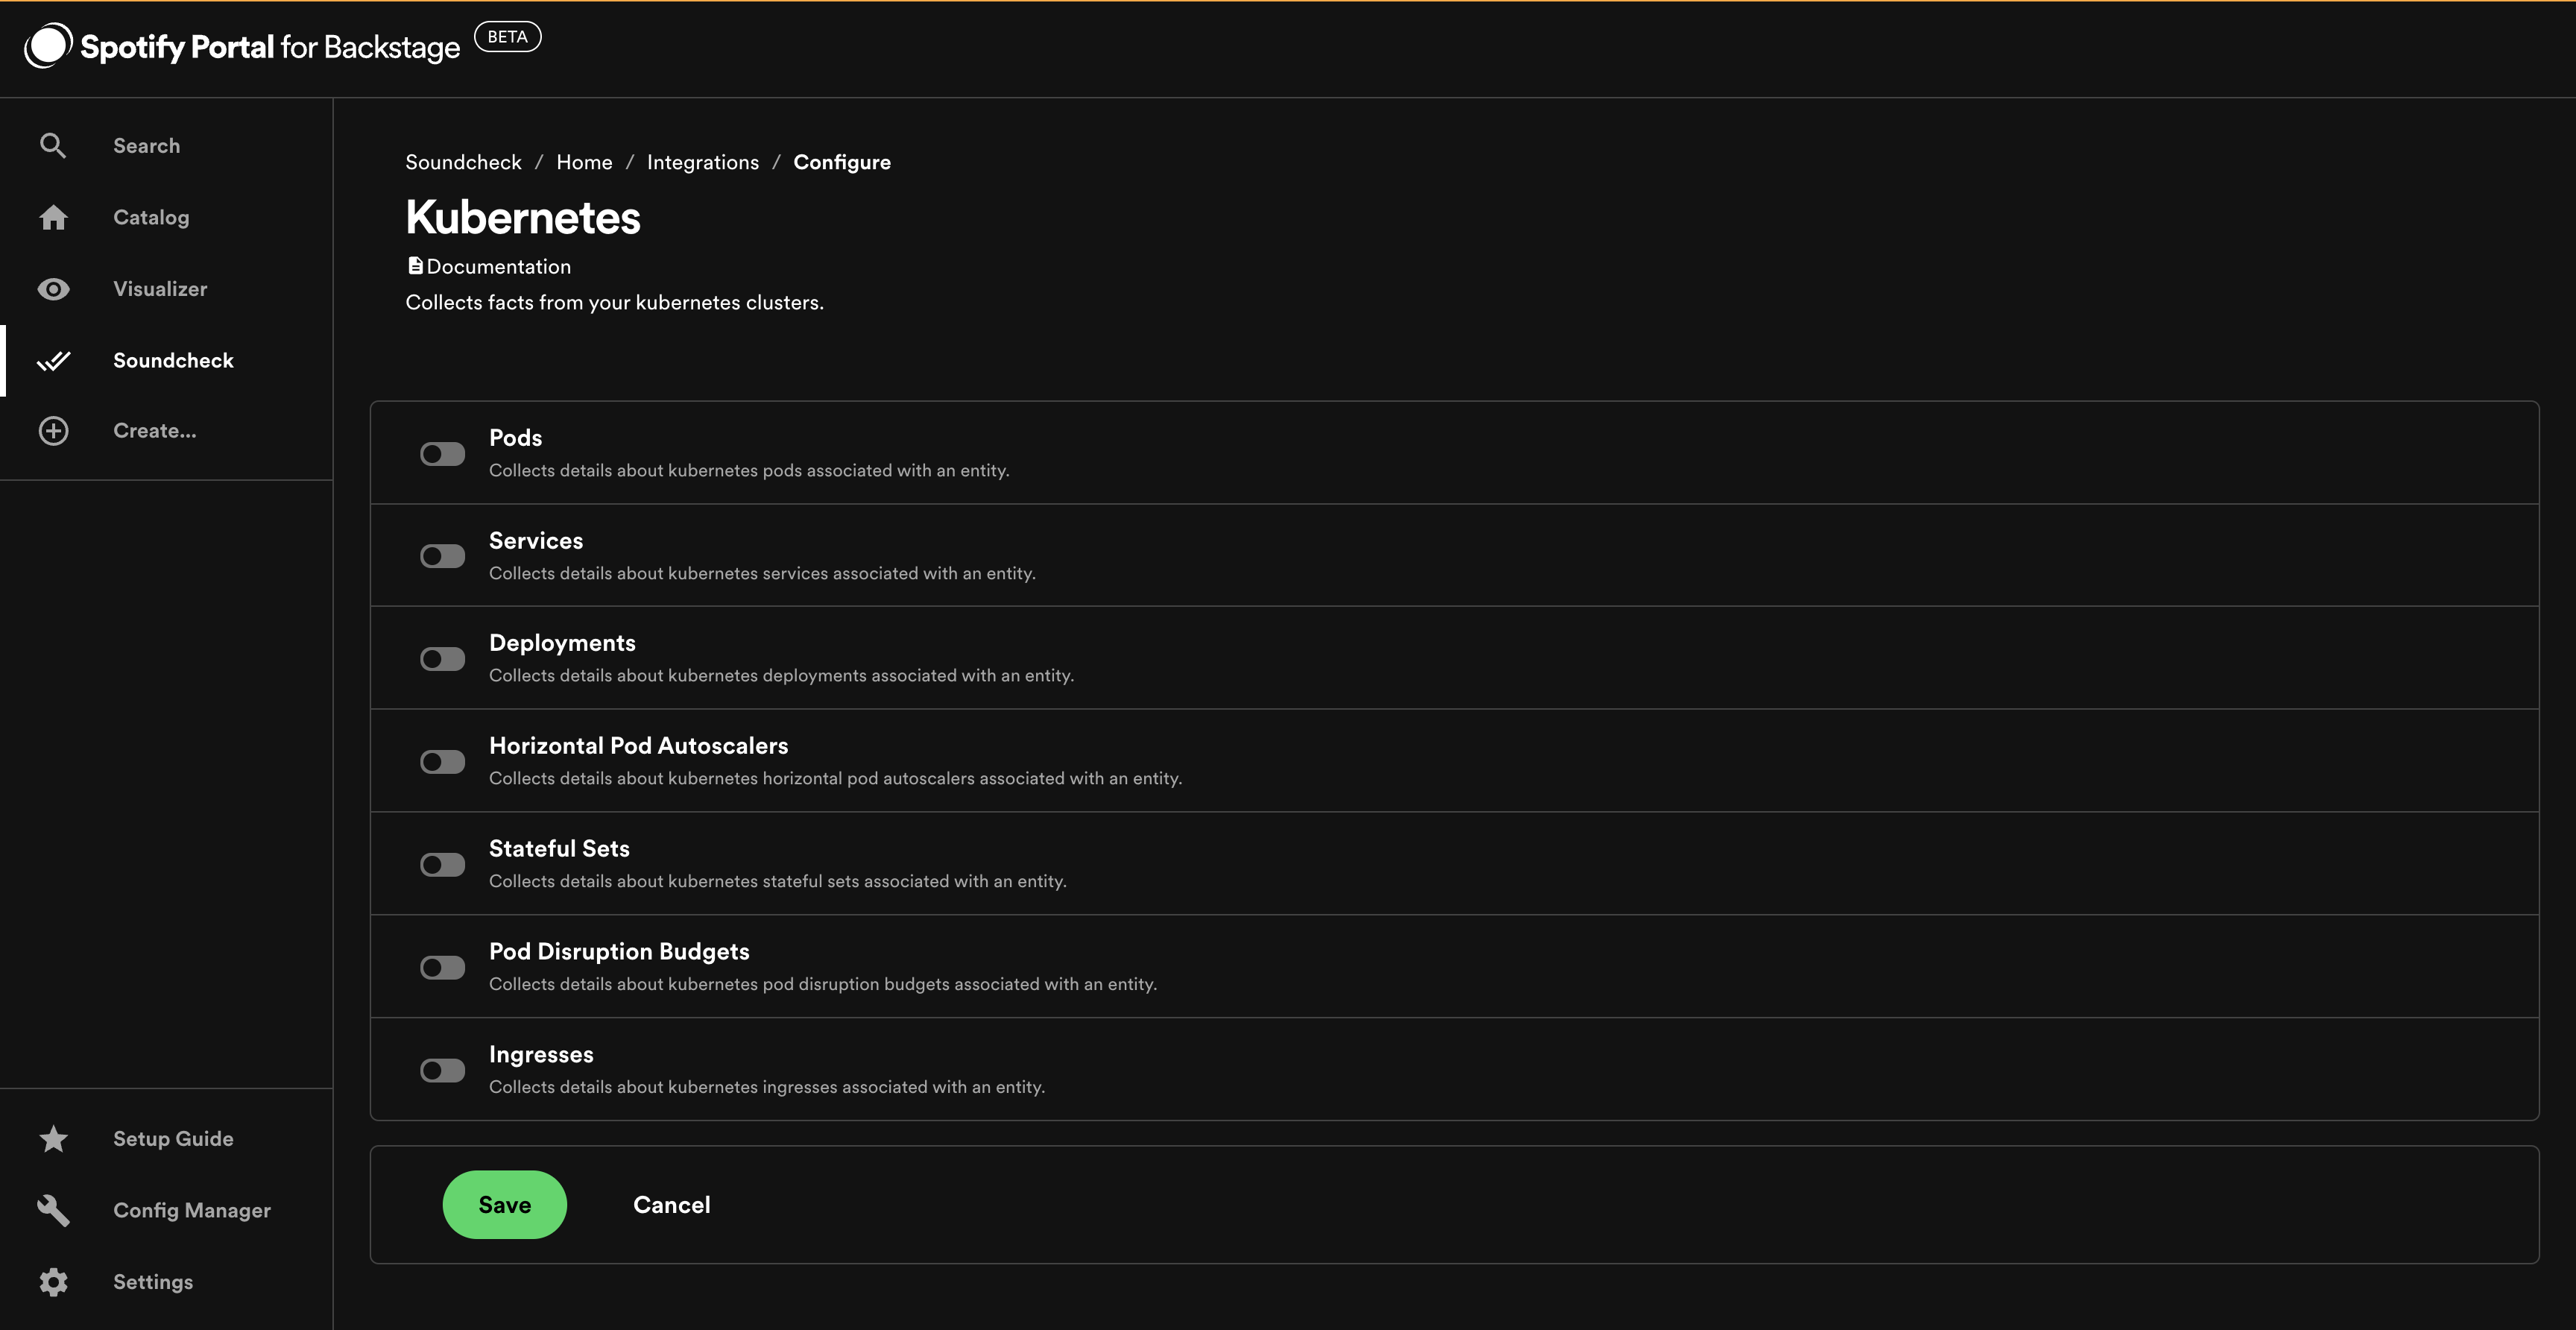
To enable the Kubernetes integration, go to Soundcheck > Integrations > Kubernetes and click the Configure button.
Find out more in the Soundcheck plugin documentation - Fact Collectors - Third Party Integrations - Kubernetes.
NewRelic Integration
As a prerequisite to enabling the NewRelic integration, you must configure your NewRelic instance details.
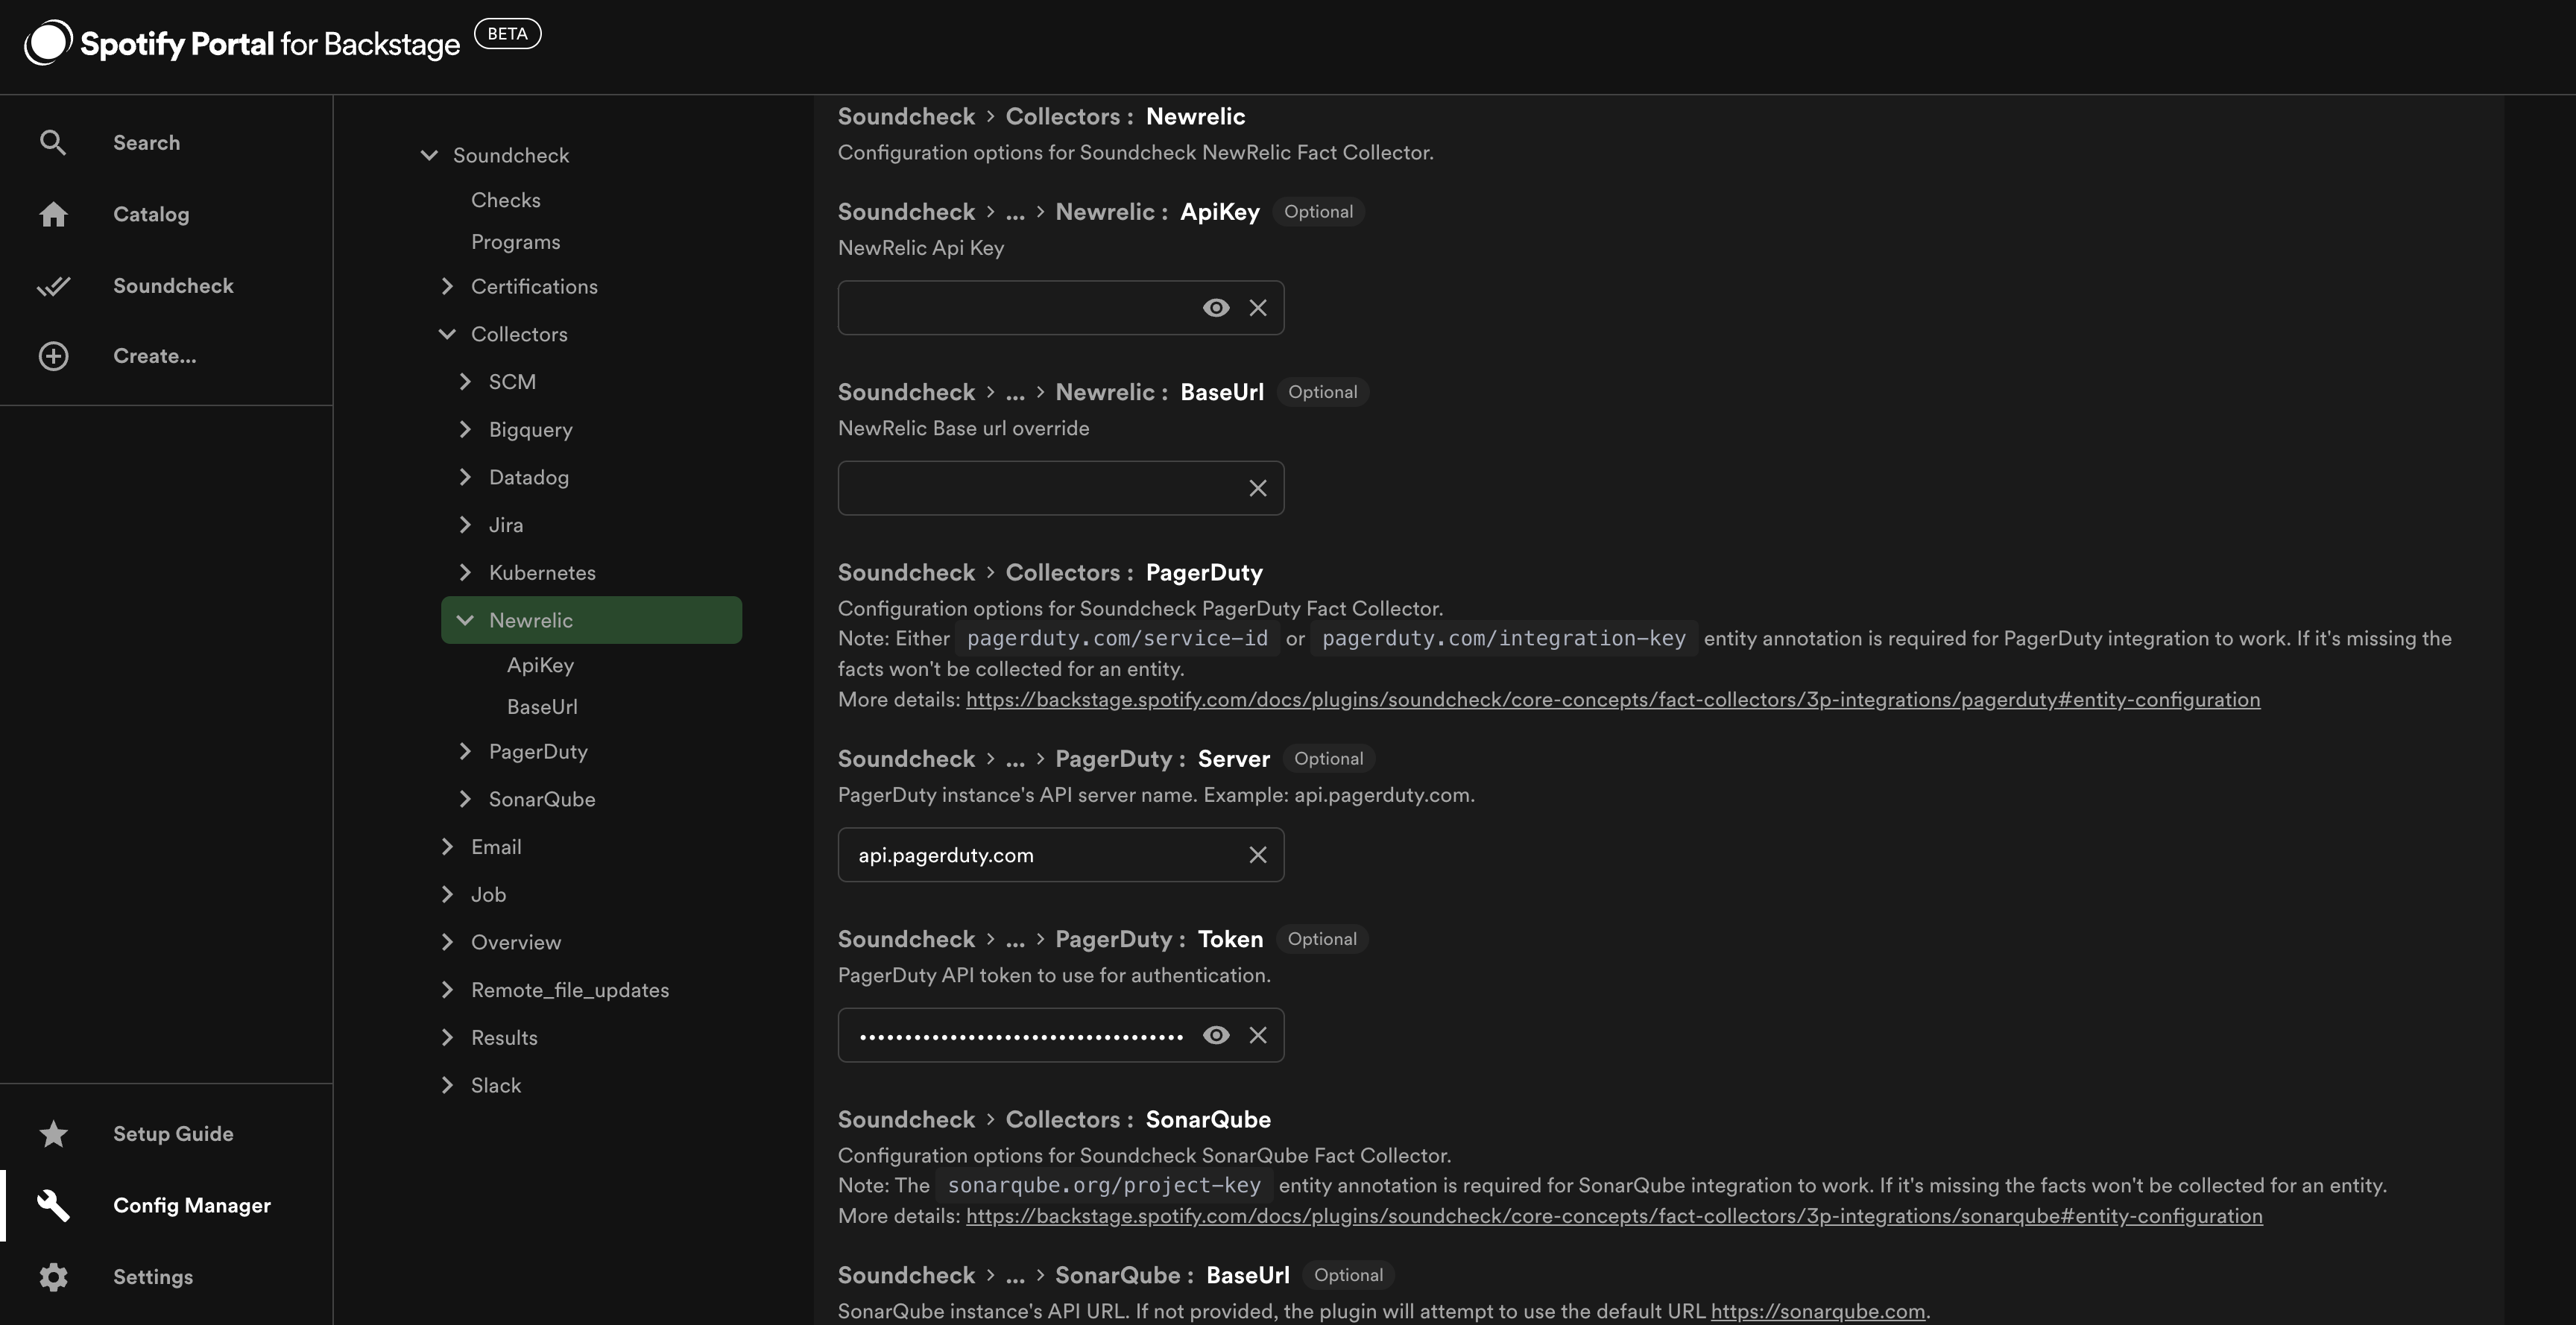
Go to Config Manager > Soundcheck and enter the baseUrl and apiKey under soundcheck.collectors.newrelic.
To enable the NewRelic integration, go to Soundcheck > Integrations > NewRelic and click the Configure button.
Find out more in the Soundcheck plugin documentation - Fact Collectors - Third Party Integrations - NewRelic.
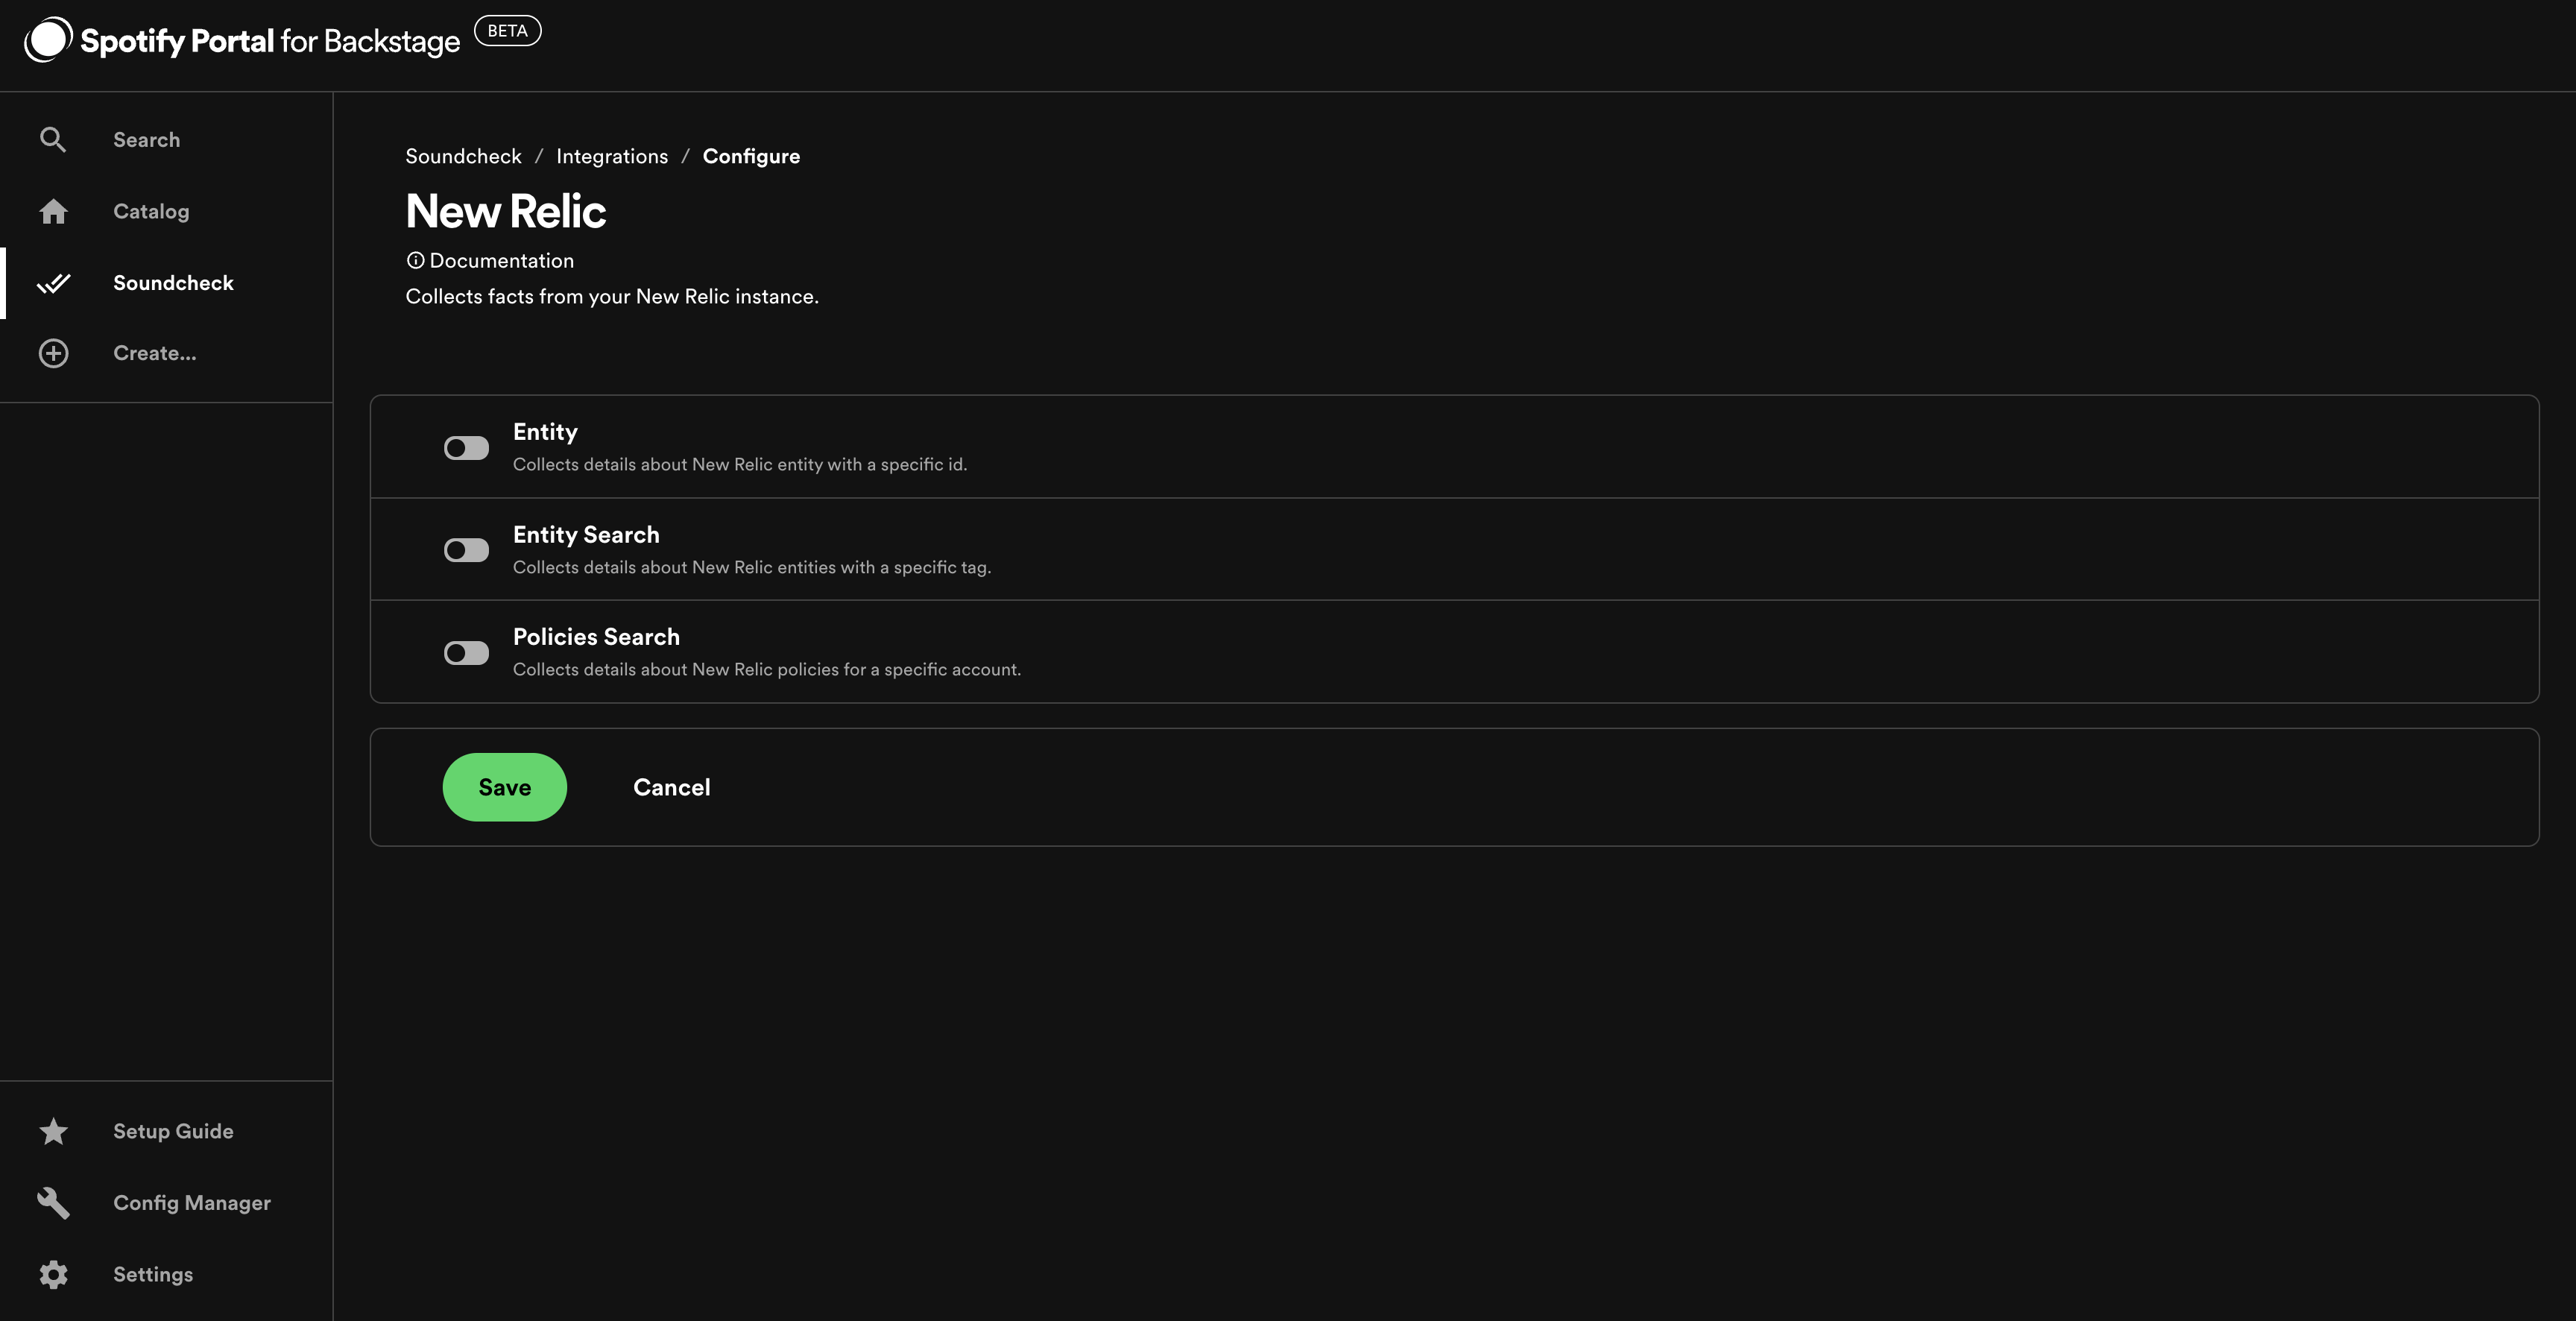
Note: The newrelic.com/entity-guid entity annotation can be set as a filter for NewRelic entity integration.
The newrelic.com/tag entity annotation can be set as a filter for NewRelic entity-search integration.
The newrelic.com/account-id entity annotation can be set as a filter for NewRelic policies-search integration.
PagerDuty Integration
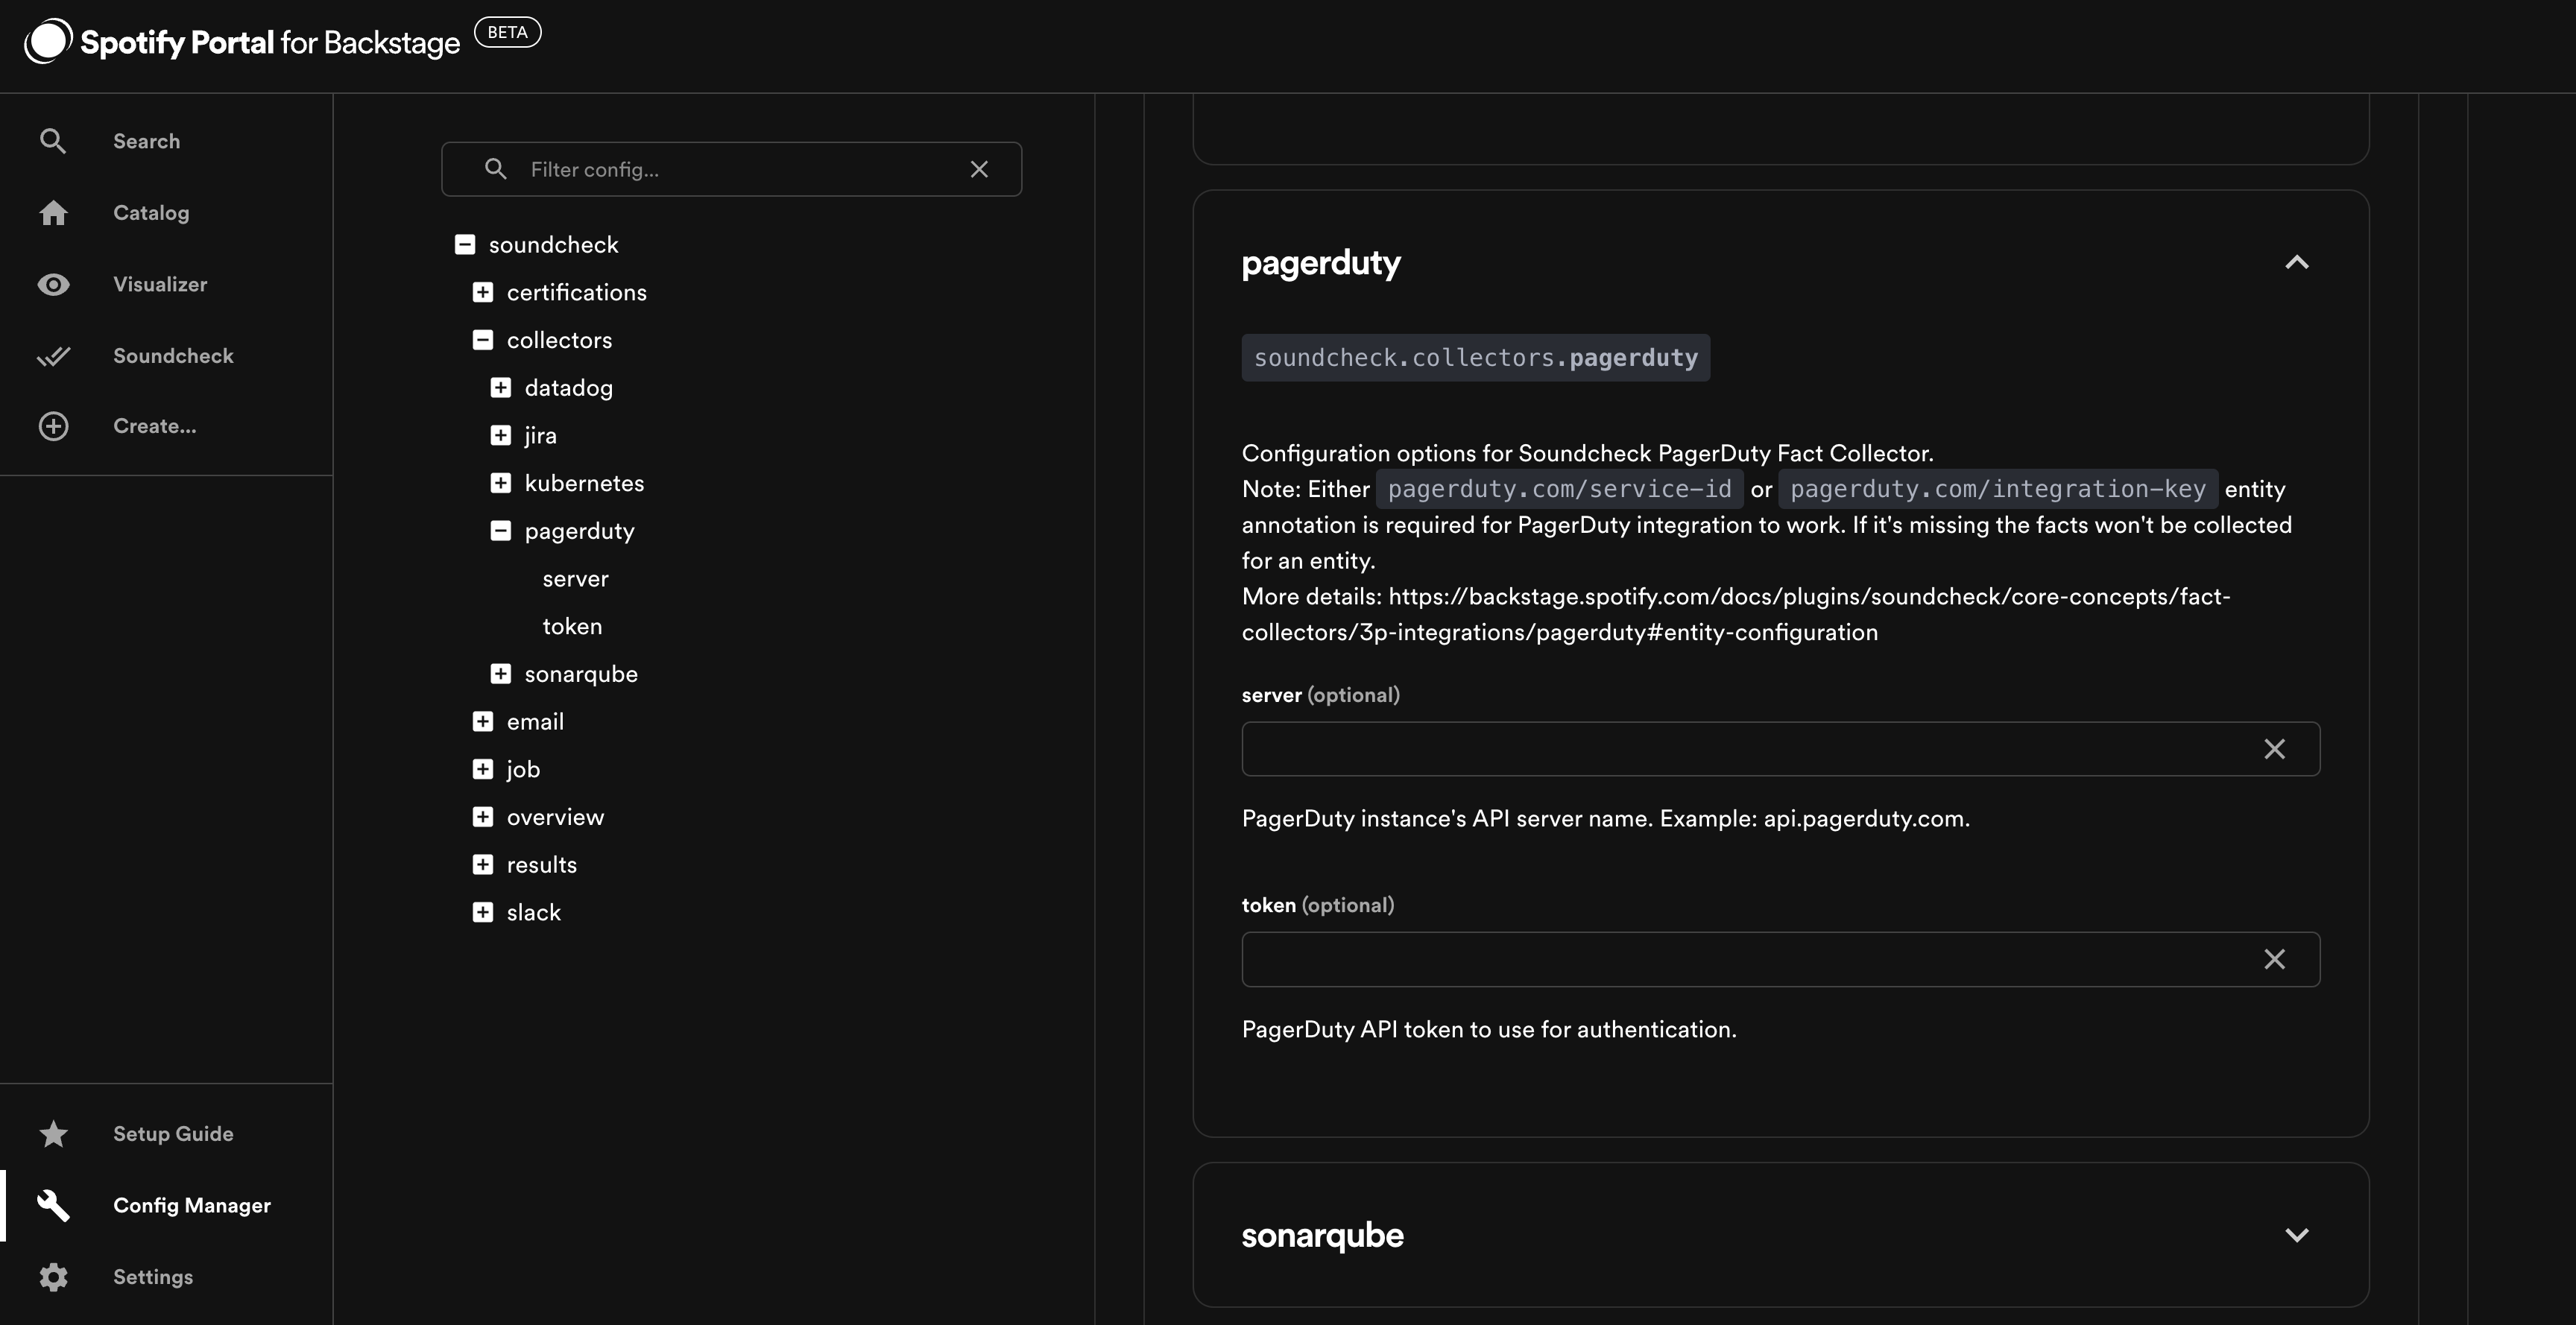
As a prerequisite to enabling the PagerDuty integration, you must configure your PagerDuty instance details.
Go to Config Manager > Soundcheck and enter the server and token under soundcheck.collectors.pagerduty.
To enable the PagerDuty integration, go to Soundcheck > Integrations > PagerDuty and click the Configure button.
Find out more in the Soundcheck plugin documentation - Fact Collectors - Third Party Integrations - PagerDuty.
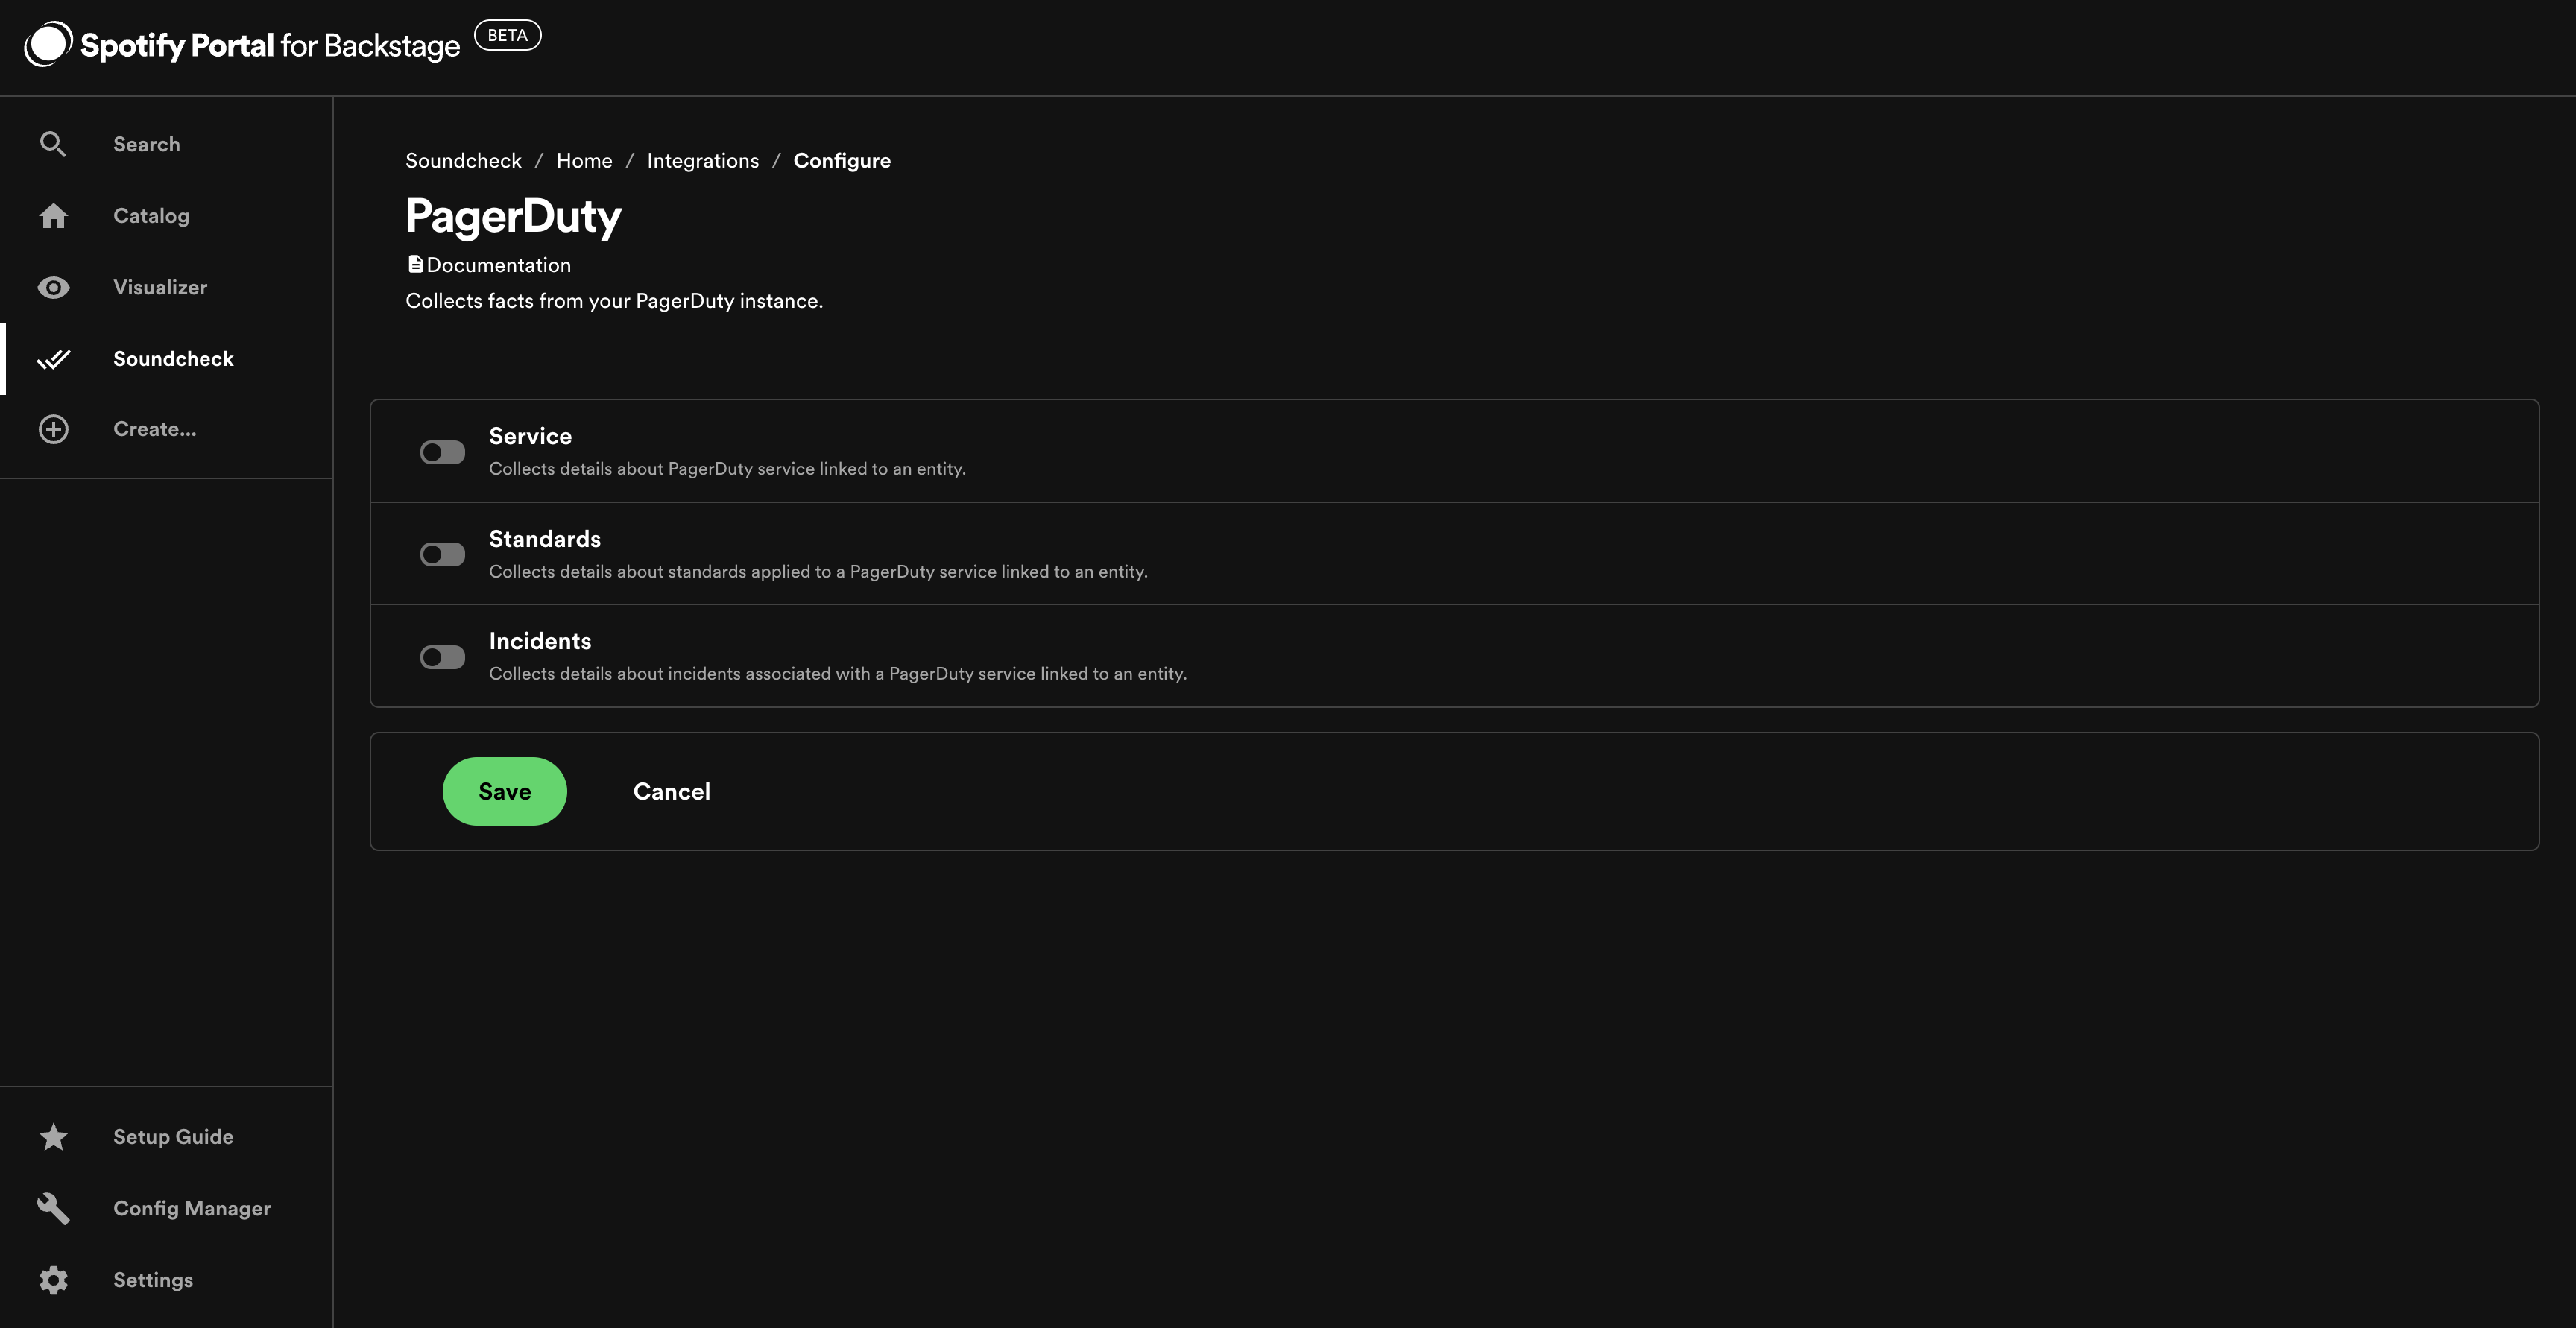
Note: Either pagerduty.com/service-id or pagerduty.com/integration-key entity annotation is required for PagerDuty integration to work. If it's missing the facts won't be collected for an entity.
SonarQube Integration
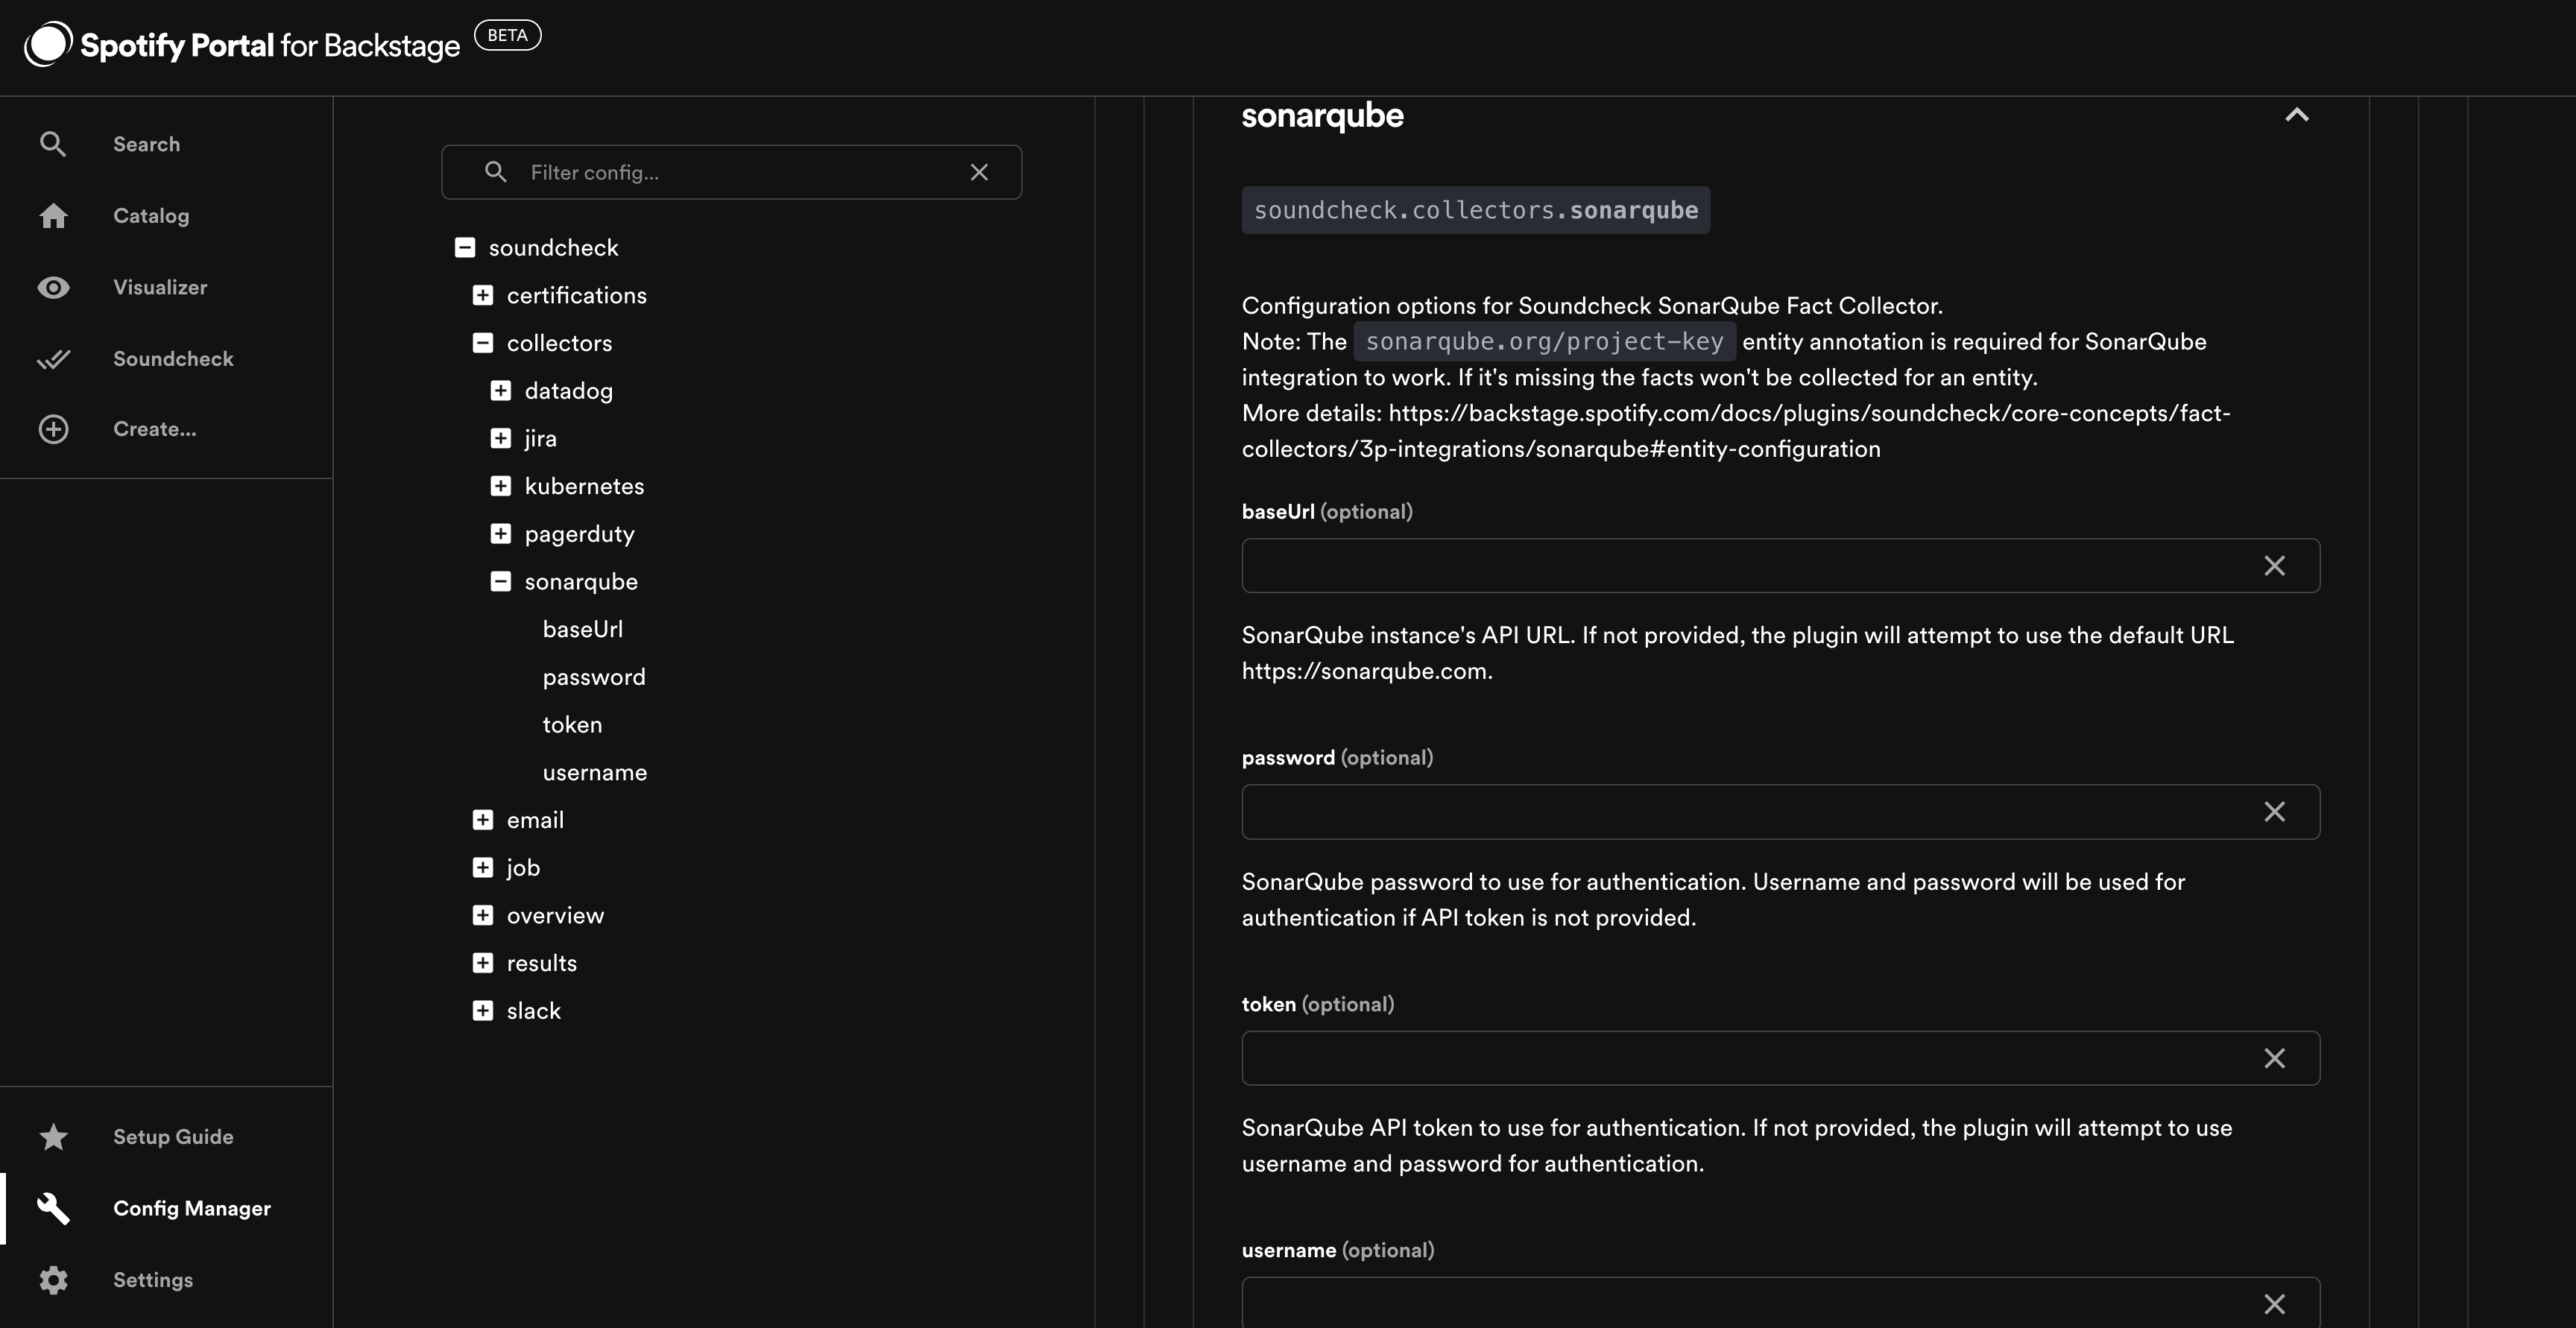
As a prerequisite to enabling the SonarQube integration, you must configure your SonarQube instance details.
Go to Config Manager > Soundcheck and enter the baseUrl and either token or username and password under soundcheck.collectors.sonarqube.
To enable the SonarQube integration, go to Soundcheck > Integrations > SonarQube and click the Configure button.
Find out more in the Soundcheck plugin documentation - Fact Collectors - Third Party Integrations - SonarQube.
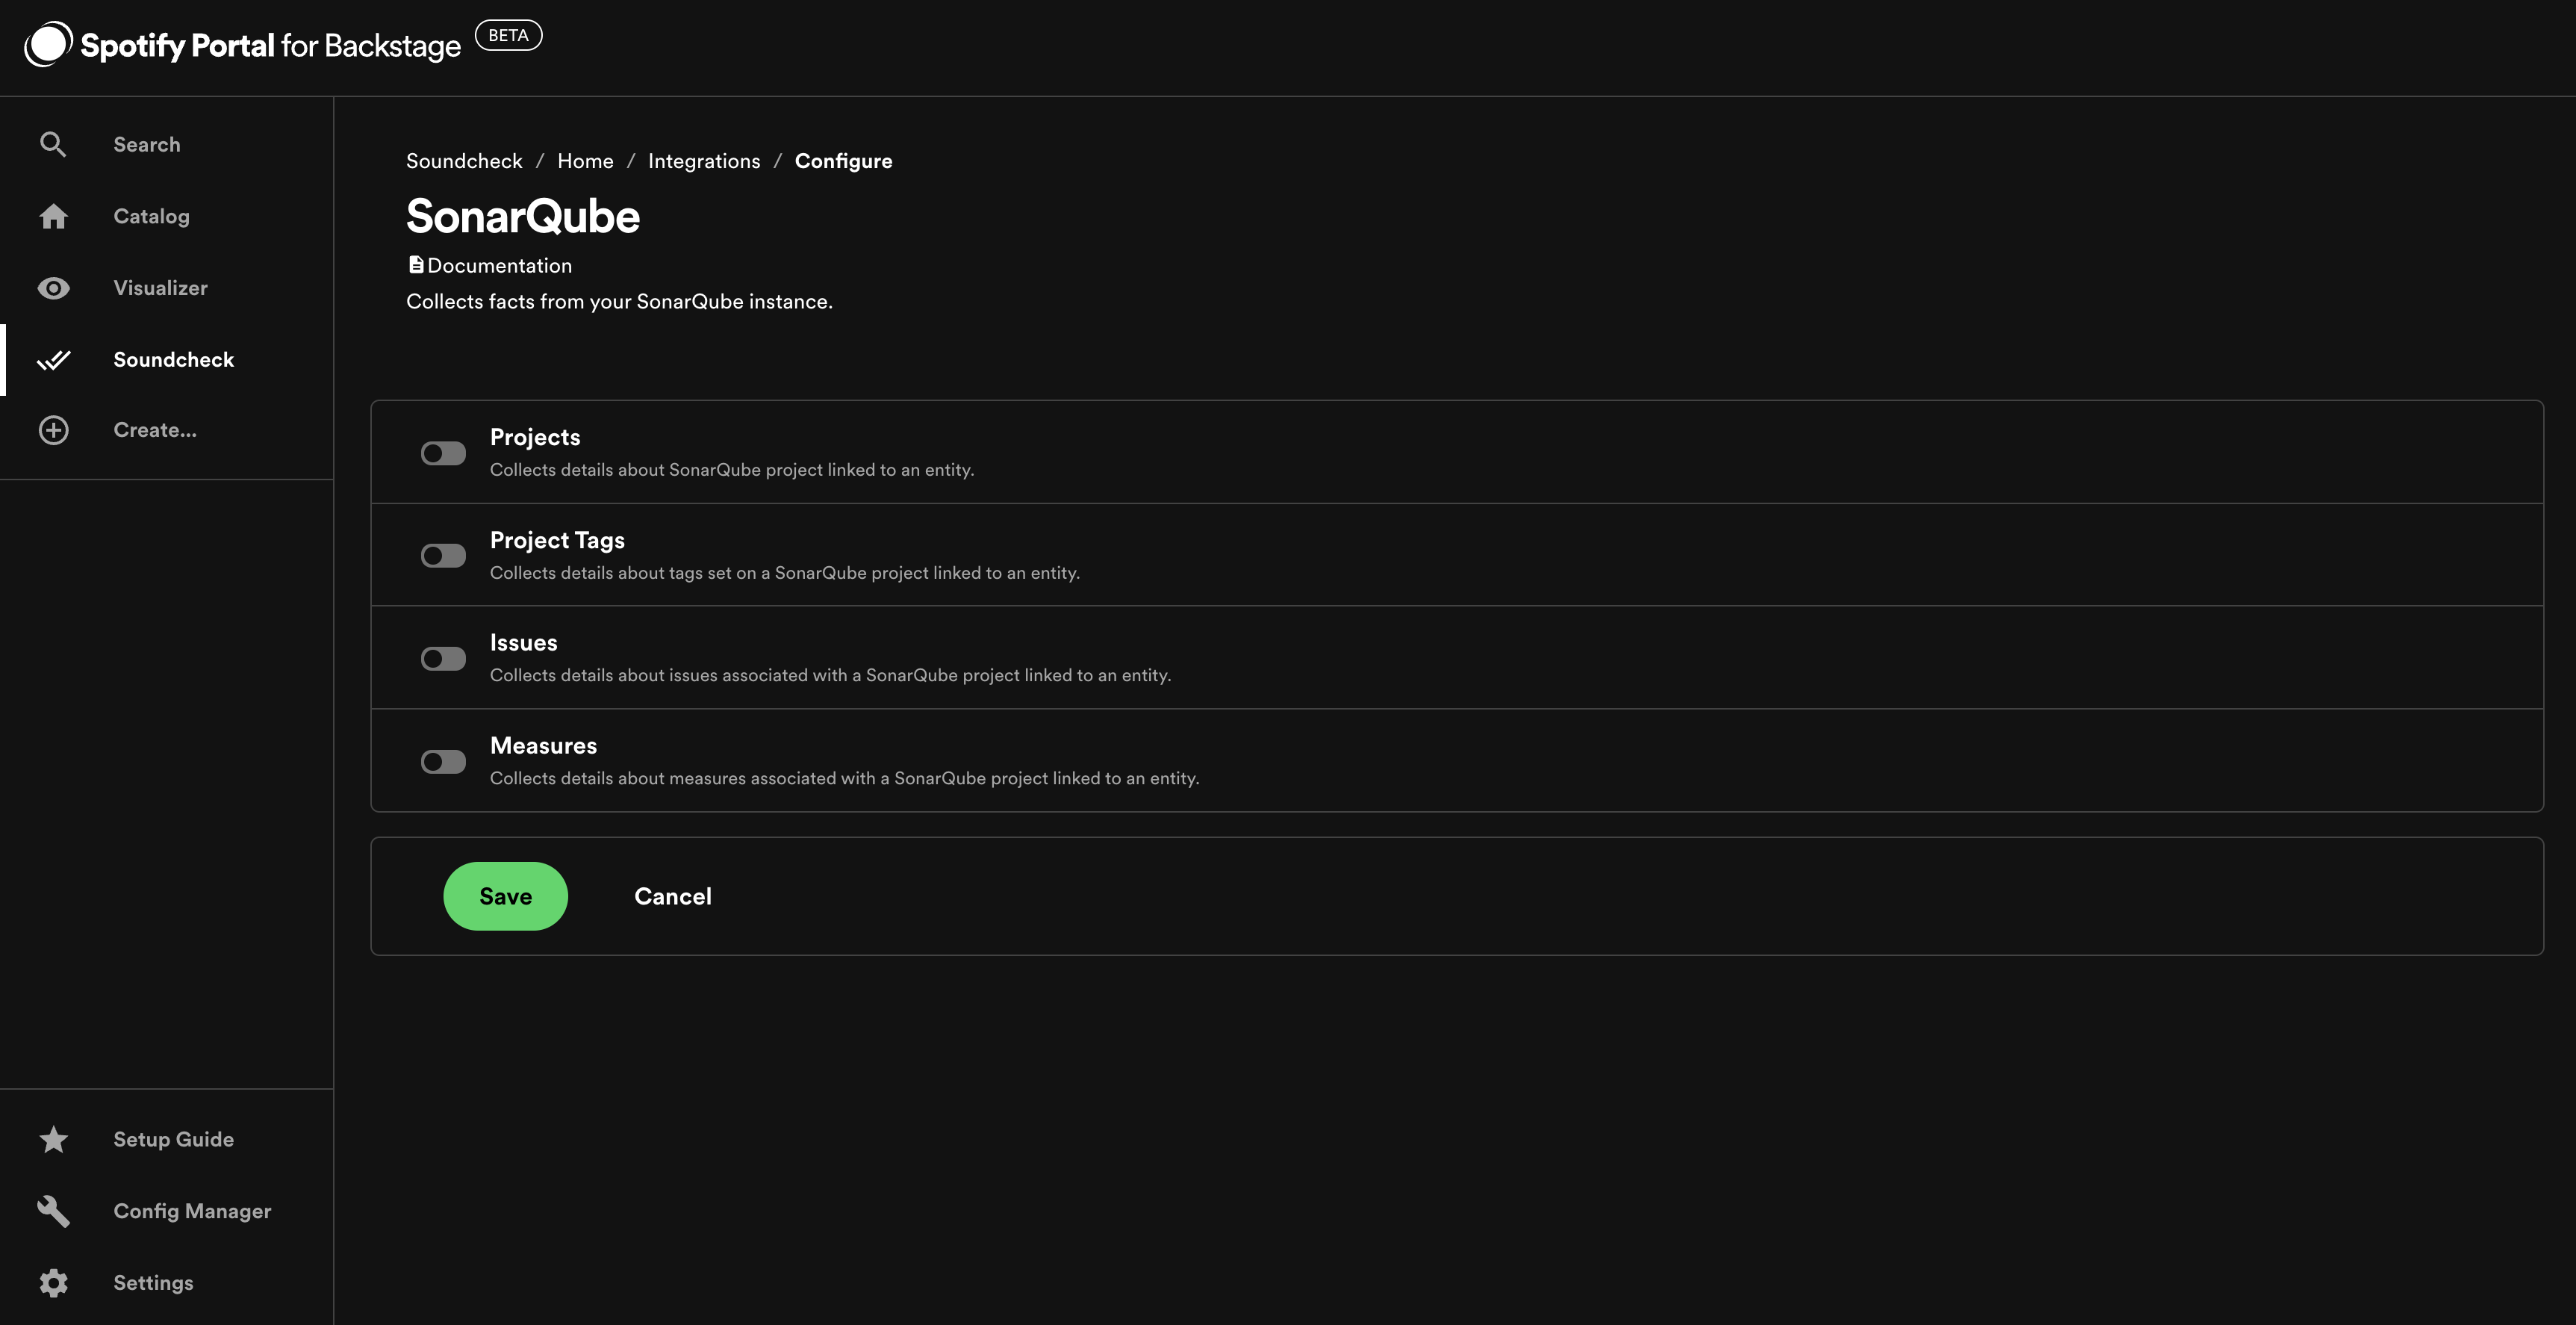
Note: The sonarqube.org/project-key entity annotation is required for SonarQube integration to work. If it's missing the facts won't be collected for an entity.
Data Registry Integration
As a prerequisite to enabling the Data Registry integration, you should enable and configure your Data Registry settings in Portal.
To enable the Data Registry integration, go to Soundcheck > Integrations > Data Registry and click the Configure button.
Find out more in the Soundcheck plugin documentation - Fact Collectors - Third Party Integrations - Data Registry.
