

Configure a monorepo from Catalog Settings
- Go to Catalog Settings > Settings.
- Under Auto-ingestion > Monorepos, select Add monorepo.
- Choose the monorepo root:
- Select Existing entity to choose a Portal-managed Component or Repository from the dropdown when the repository is already in the catalog.
- Select Repository URL when the repository is not yet in the catalog. Portal creates a Repository root from the URL.
- Enter comma-separated Folder globs, such as
packages/*, plugins/*. - Optional: enter an Indicator file, such as
package.json, to include only matched folders that contain that file. Use Excluded folder globs to omit folders that match a broad pattern but should not become Components. - Save the settings. Portal starts package discovery and shows Syncing in the catalog header.
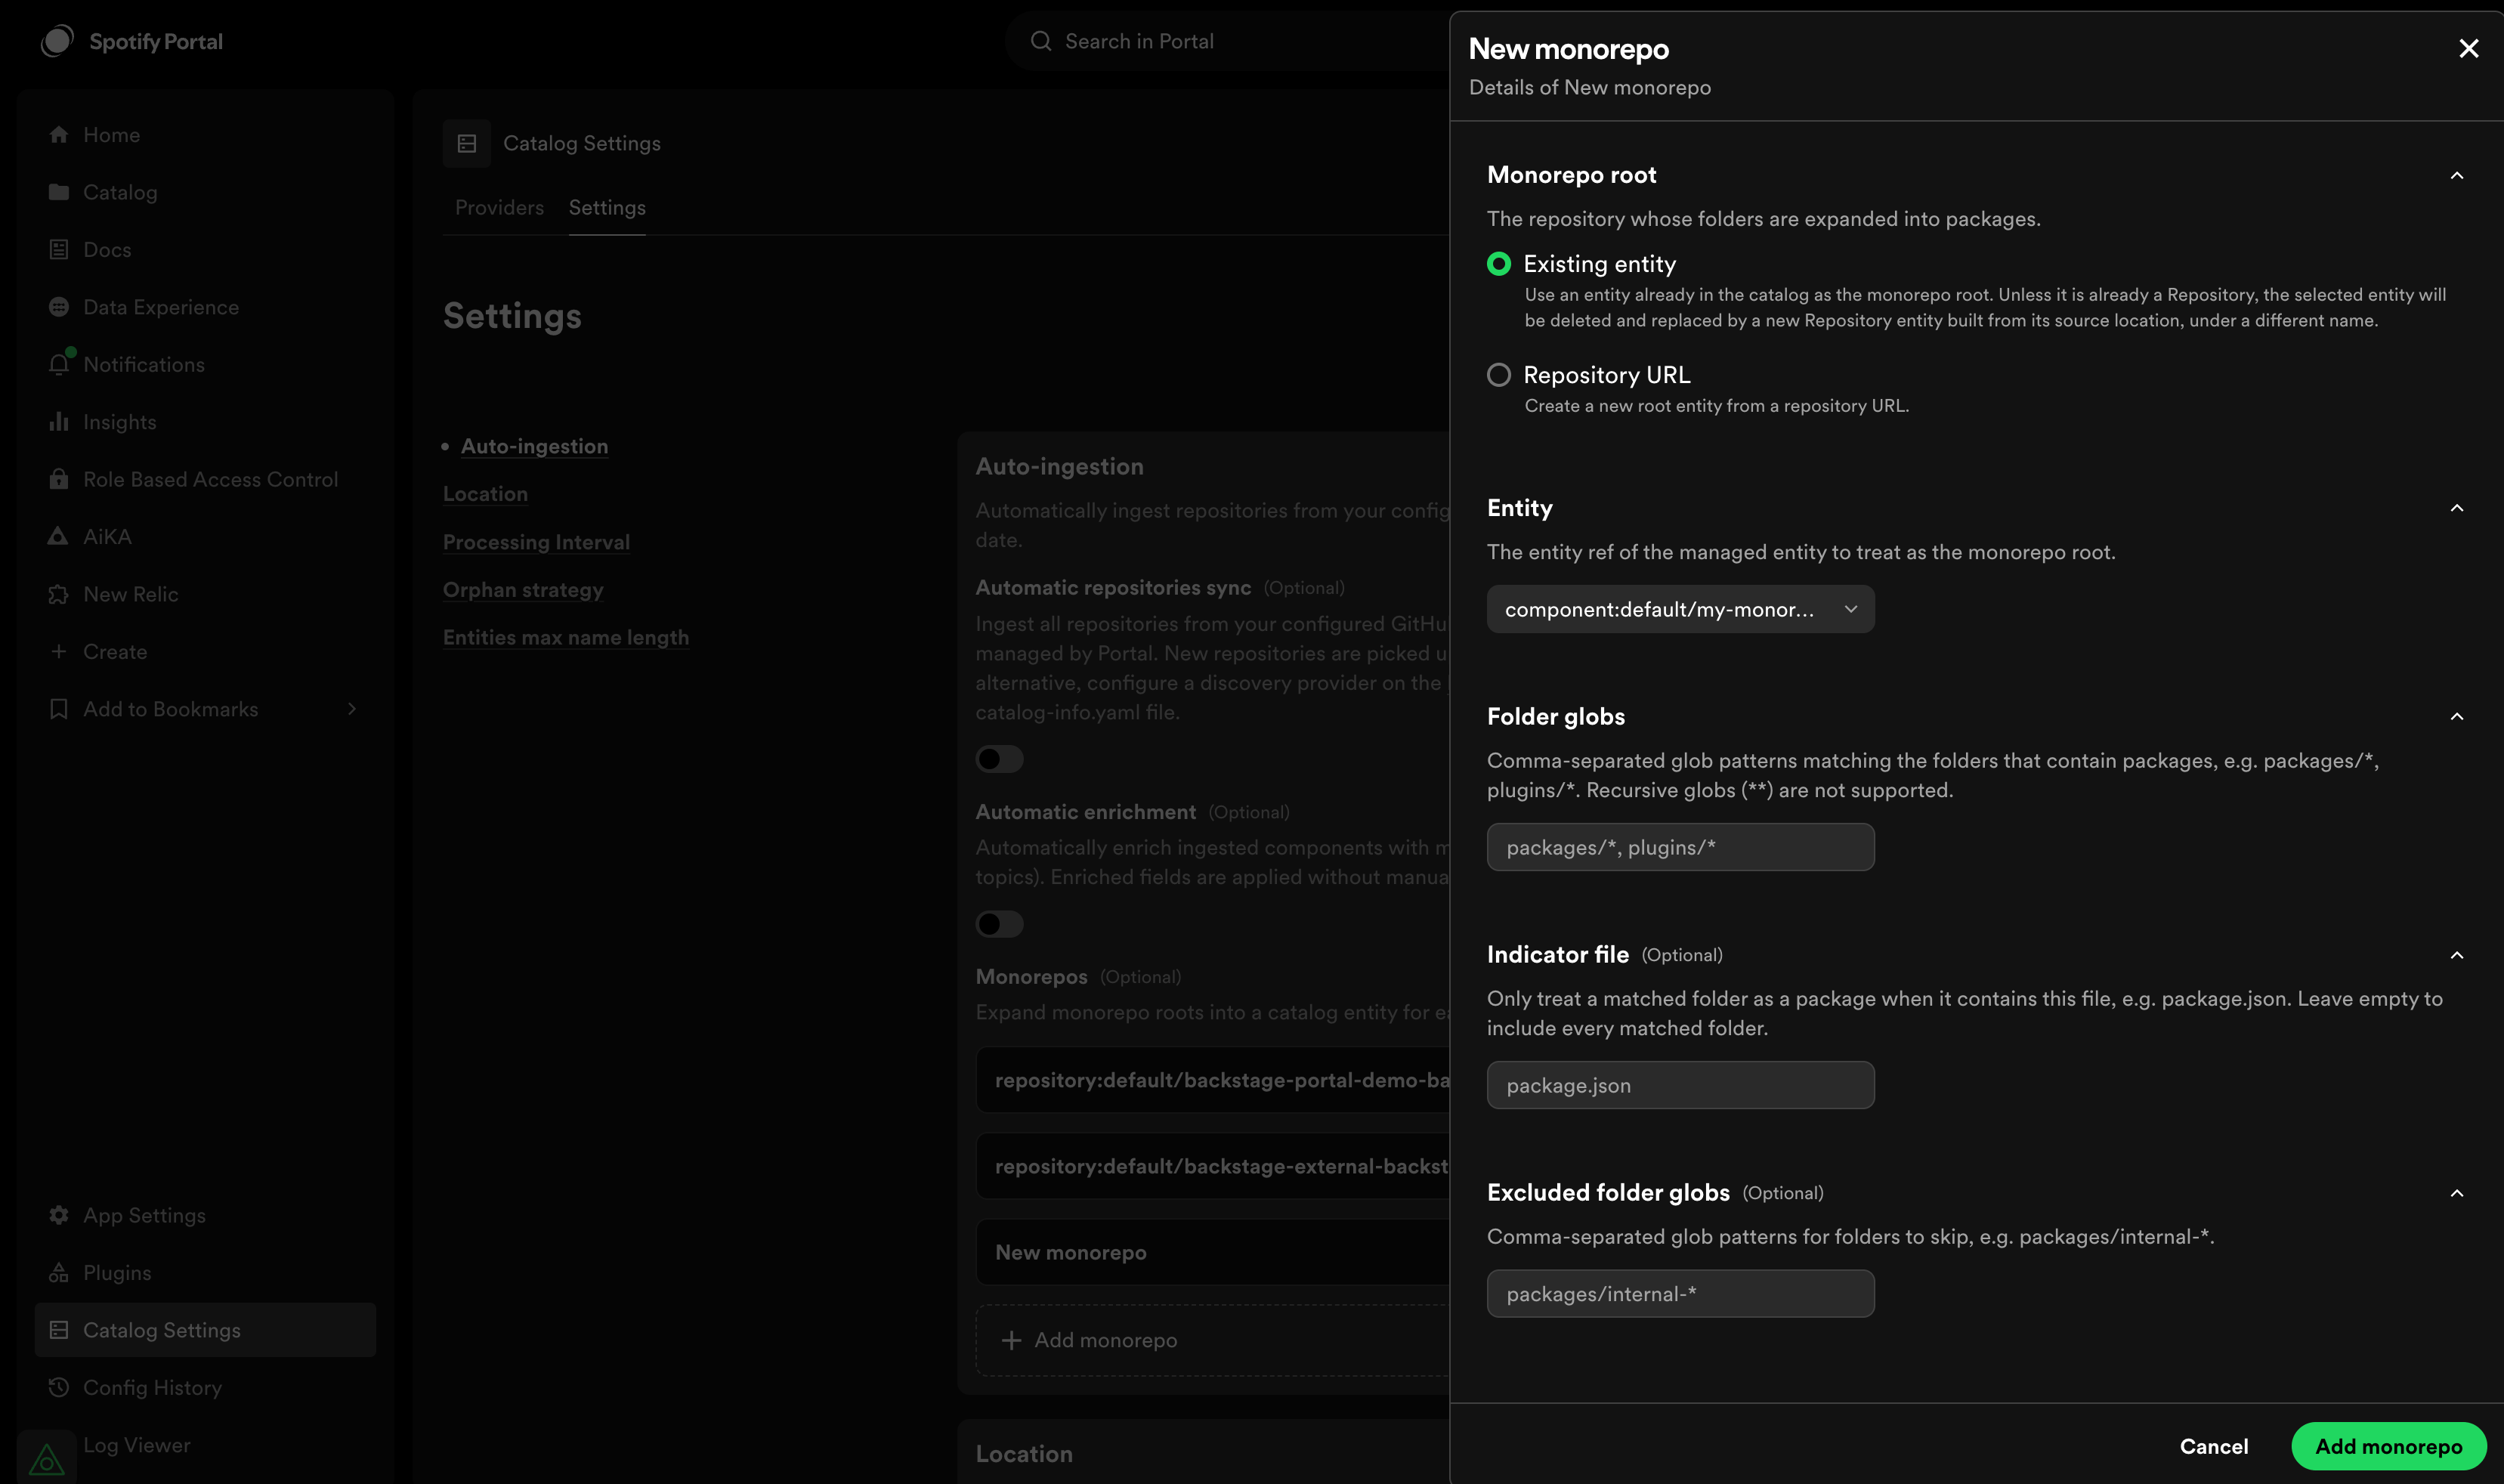
Configure a monorepo from Catalog Settings.
Configure a monorepo from an entity page
- In Catalog, select an eligible Portal-managed Component to open its entity page.
- Open the entity actions menu and select Configure as monorepo.
- Complete the package matching fields in the prefilled settings form.
- Save the settings.
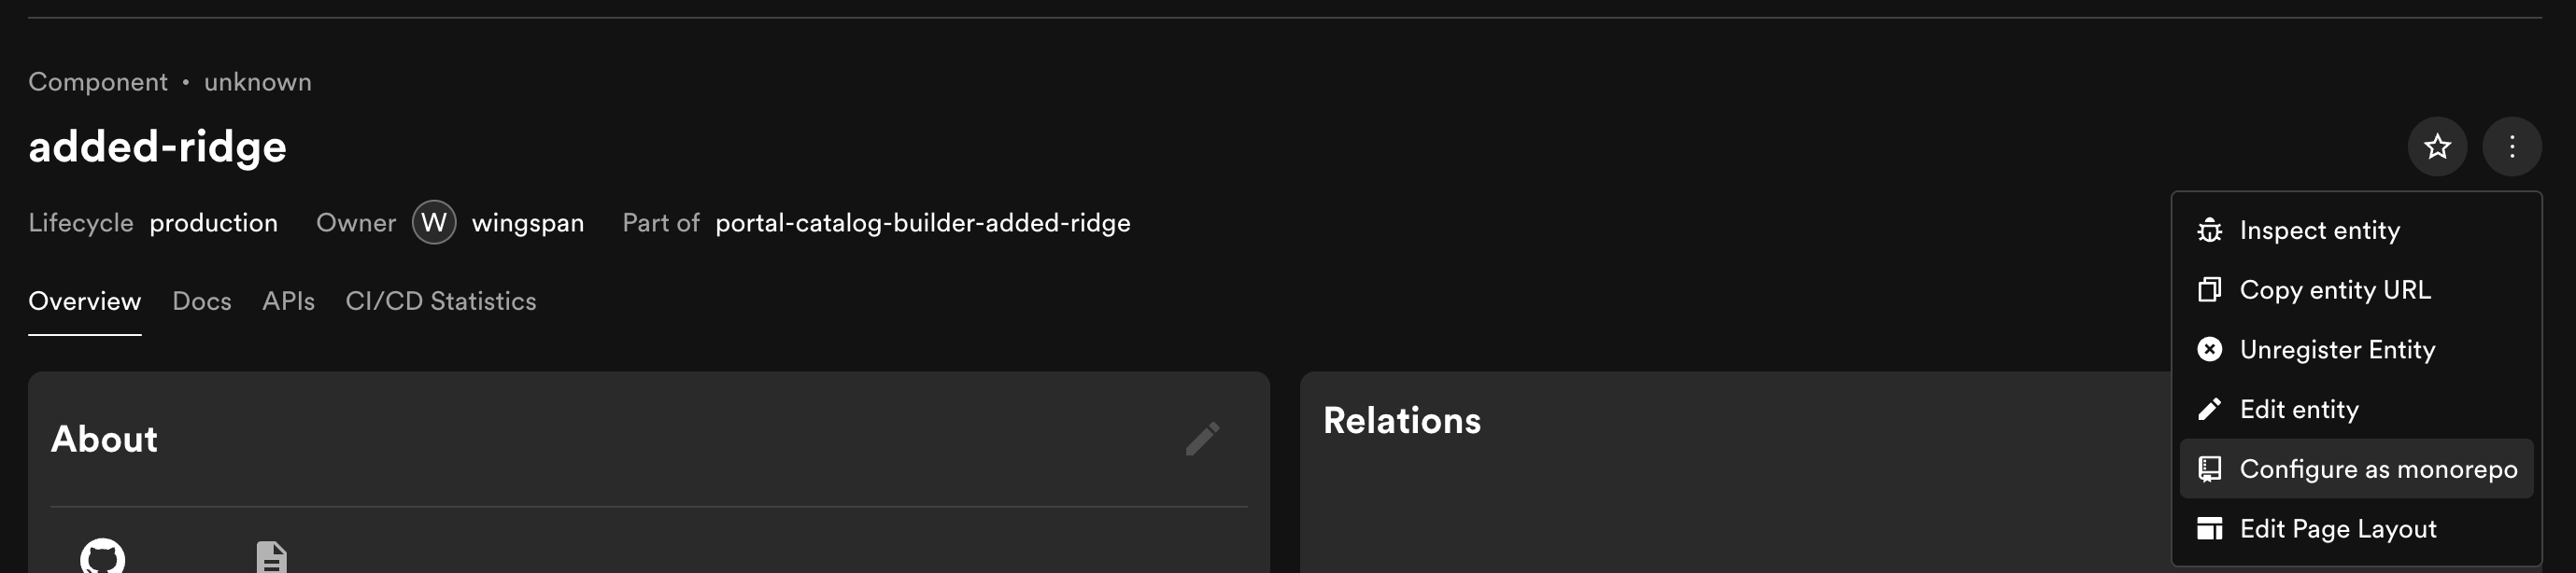
Configure a Portal-managed entity as a monorepo.