

Overview
Modes let you turn AiKA into a purpose-built agent for a specific use case. Each mode defines what the agent knows (instructions), what it can do (tools), and how it behaves (processors) — so instead of a generic assistant, your team gets a dedicated agent for support, code review, documentation, incident response, or any other workflow. You can give AiKA domain-specific knowledge and boundaries, connect it to specific MCP tools, enforce response quality with built-in verification and confidence scoring, and let users switch between different agent behaviors without reconfiguring anything.Prerequisites
- AiKA is enabled in your Portal instance
- You have access to the AiKA chat interface
Creating your first mode
- Open AiKA in Portal
- Click the Modes dropdown and select Manage modes
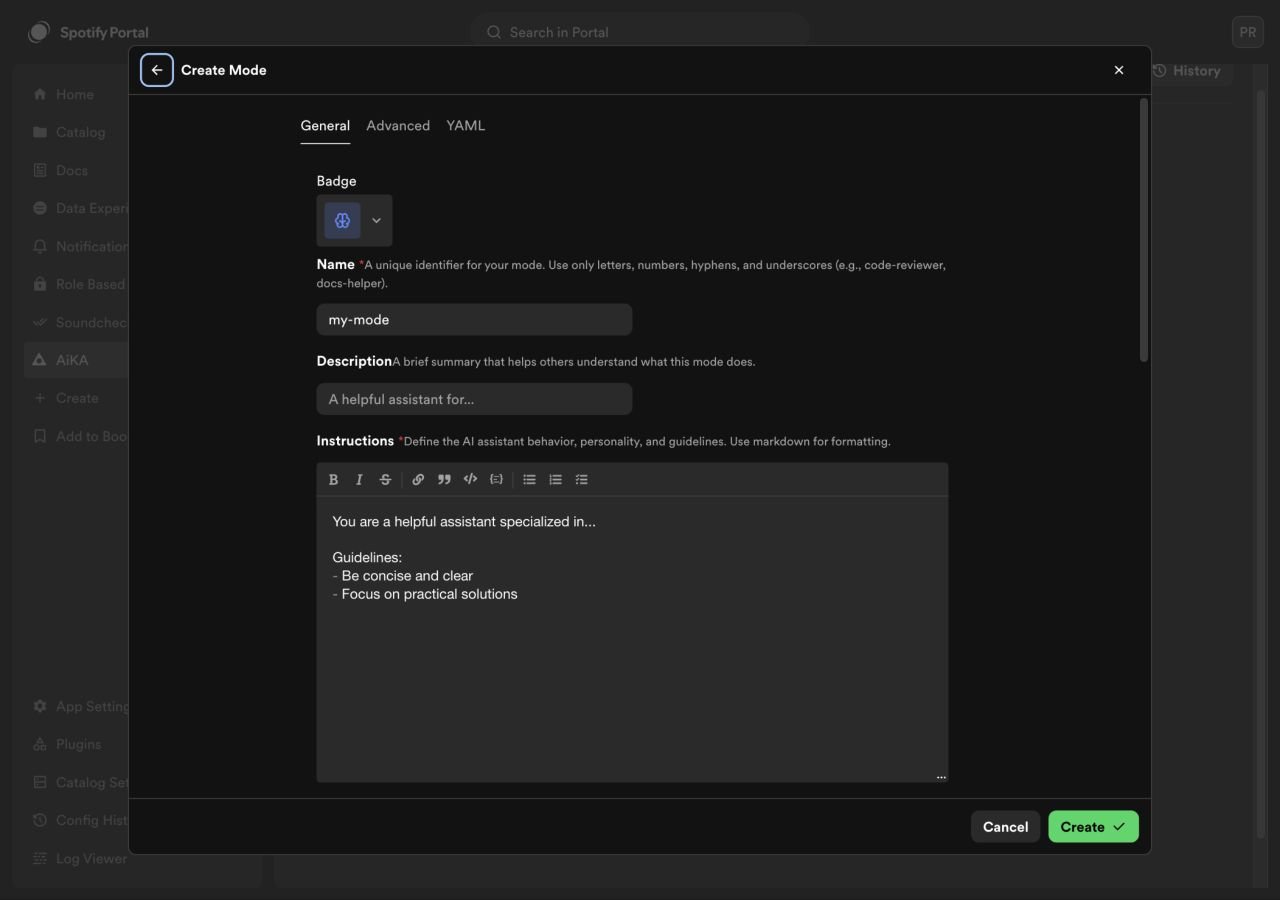
- Click Create mode
- Fill in the required fields:
- Name — a short, descriptive name (e.g.
platform-support) - Instructions — tell the agent what it should do, what it should not do, and how it should respond
- Name — a short, descriptive name (e.g.
- Set visibility to public if you want others to use this mode
- Click Create
Writing good instructions
Instructions are the most important part of a mode. A few guidelines:- Be specific about scope. Tell the agent exactly what domain it covers. “You answer questions about deployments, CI/CD, and Kubernetes” is better than “You are helpful.”
- Set boundaries. Without explicit limits, the agent will try to answer everything. Add lines like “Do not answer questions outside of platform operations” or “If you’re unsure, say so.”
- Keep it short. Long instructions dilute focus. Aim for a clear paragraph, not a full page.
Using a mode
Before you can select a mode from the picker, add it to your mode list:- Open AiKA chat
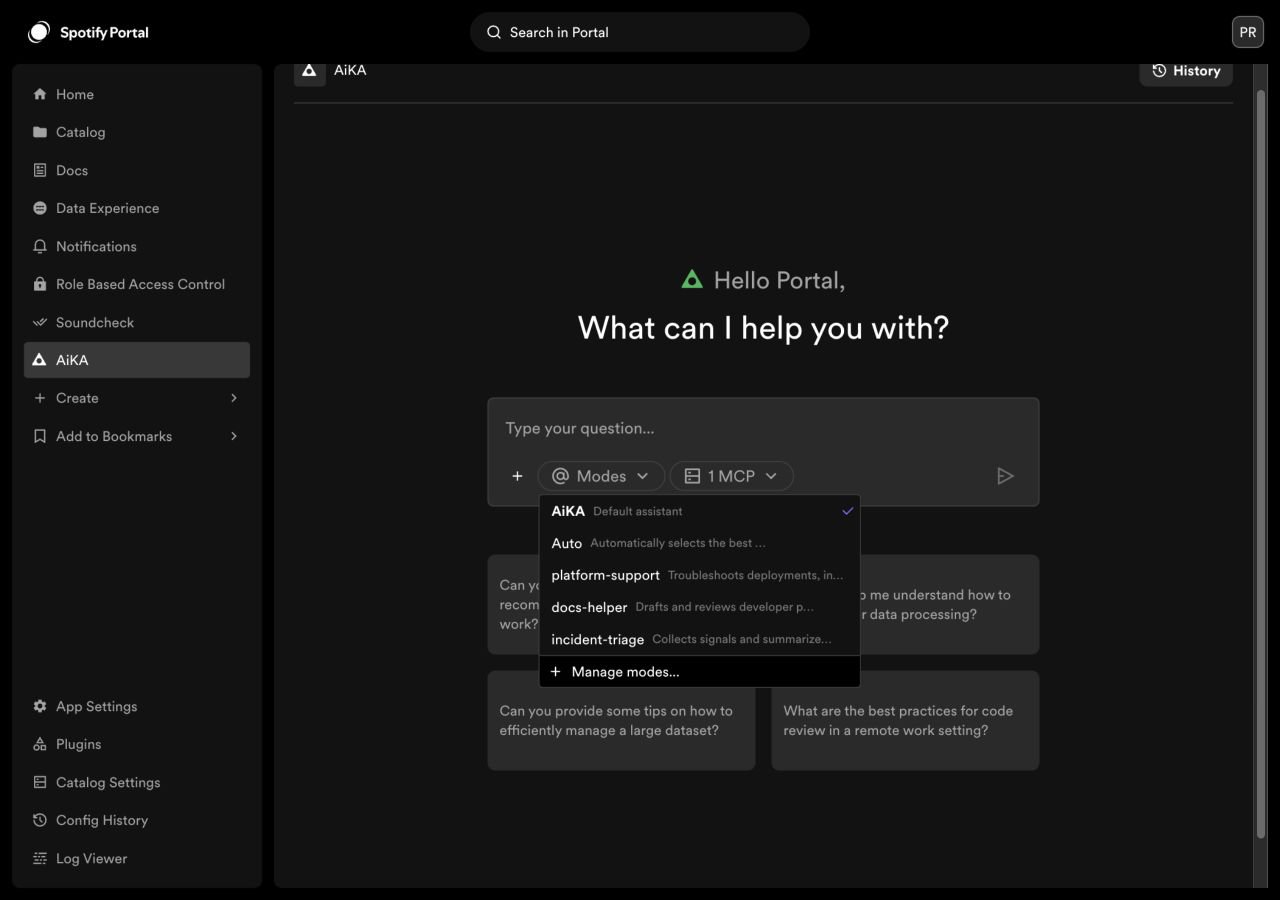
- Click the Modes dropdown in the chat input area
- Select Manage modes
- Find the mode you want to use and click + to add it to your list
- Return to the Modes dropdown and select the mode — AiKA will use that mode’s instructions and tools for the conversation
@mode-name directly in the chat input to invoke a specific mode for a single message.
Discovering popular modes
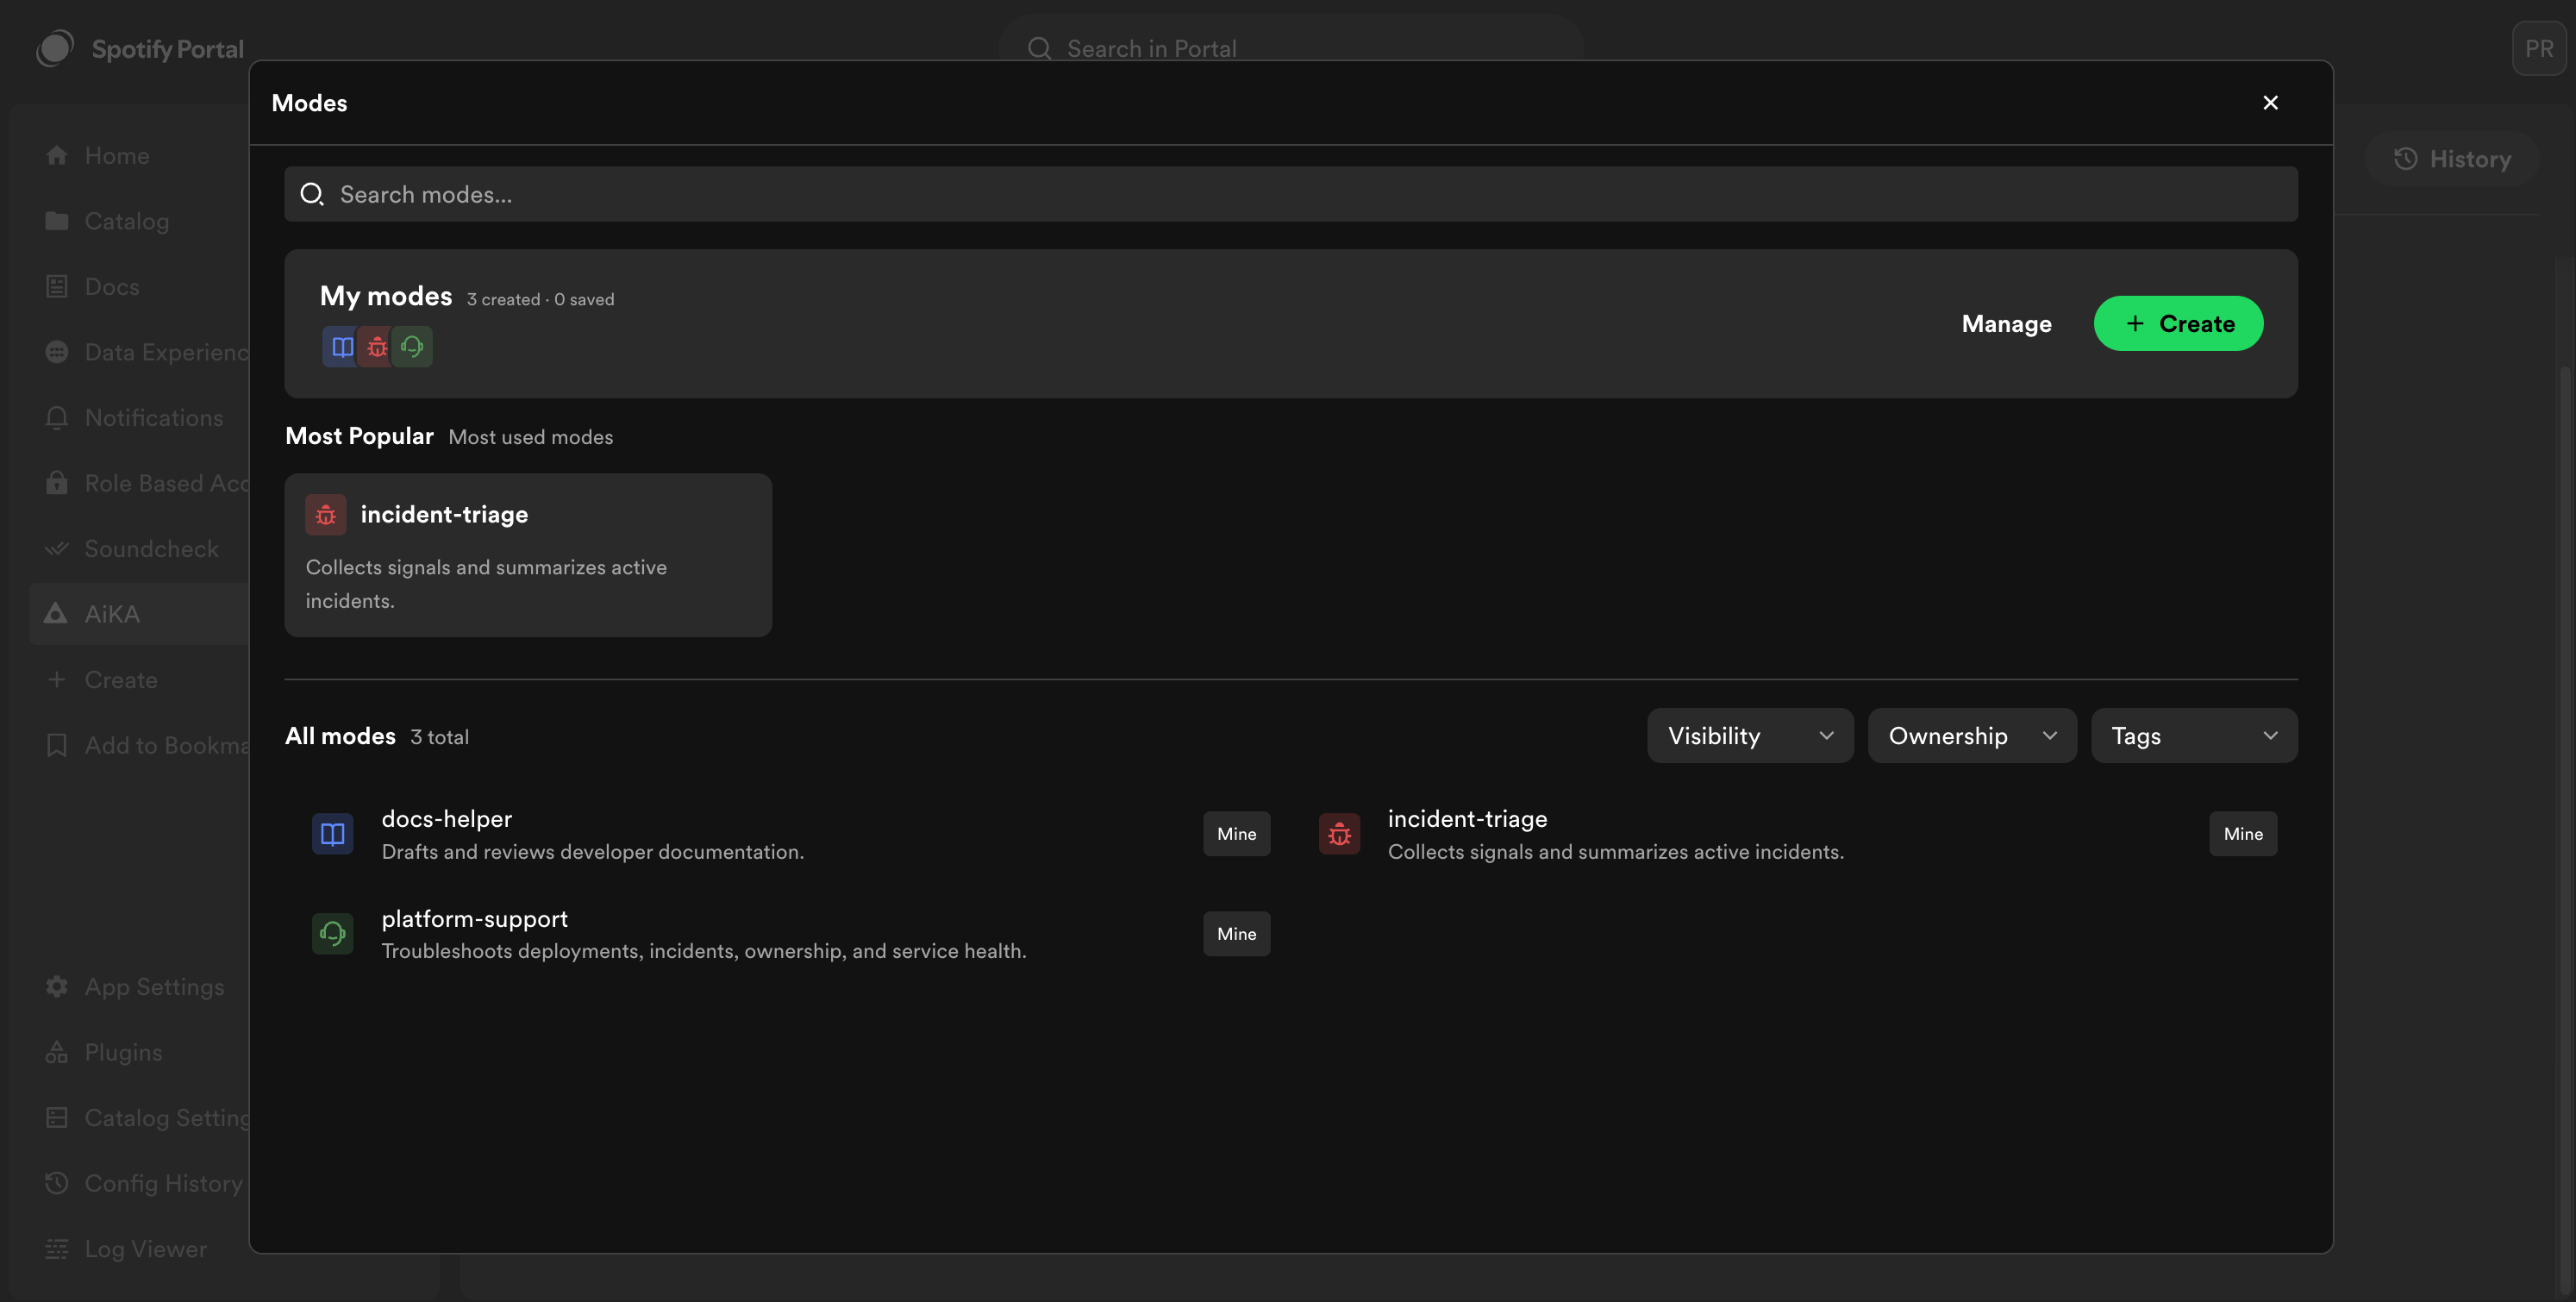
You don’t have to build every mode yourself. The Manage modes dialog includes a Most Popular section that surfaces the public modes used in the most conversations across your workspace over the last 30 days. This is a quick way to discover modes your organization already relies on.- Open AiKA chat
- Click the Modes dropdown in the chat input area
- Select Manage modes — popular modes appear at the top of the dialog
Connecting tools
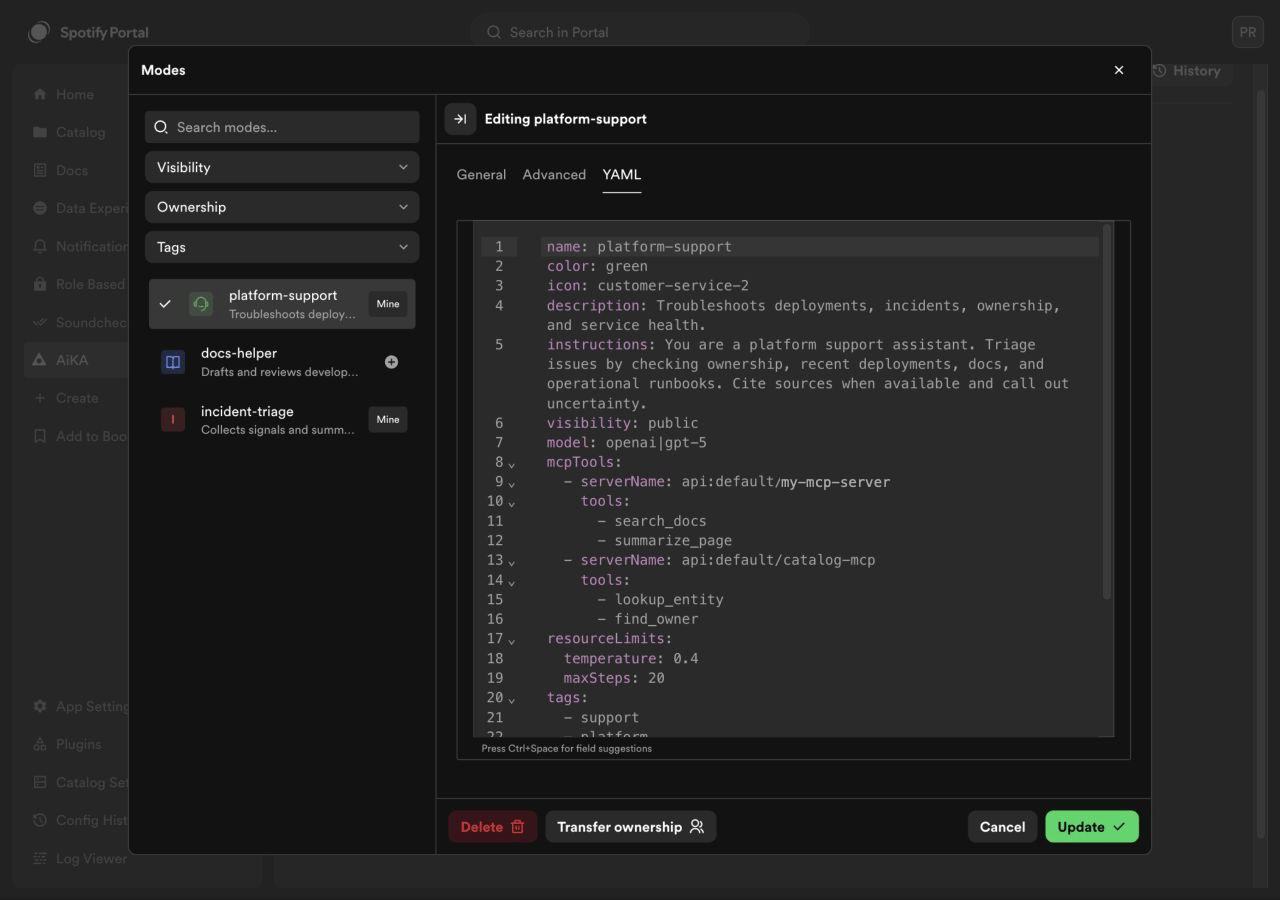
Modes can use MCP servers to give the agent access to external tools — search, documentation, APIs, or any other capability registered in your Backstage catalog. Add tools in the mode editor under MCP Tools, or in YAML:mcpTools list determines exactly which tools the agent has access to. If you don’t add any servers, the agent runs without tools. If you add a server without specifying individual tools, the agent gets access to everything on that server. To restrict it, list only the tool names you want.
Improving response quality with processors
Processors are optional pipeline stages that wrap the agent with structured pre- and post-processing. They help you enforce quality standards without relying on prompt engineering alone. Enable a processor by adding it to your mode’s YAML. Usetrue for defaults, or pass an object to customize:
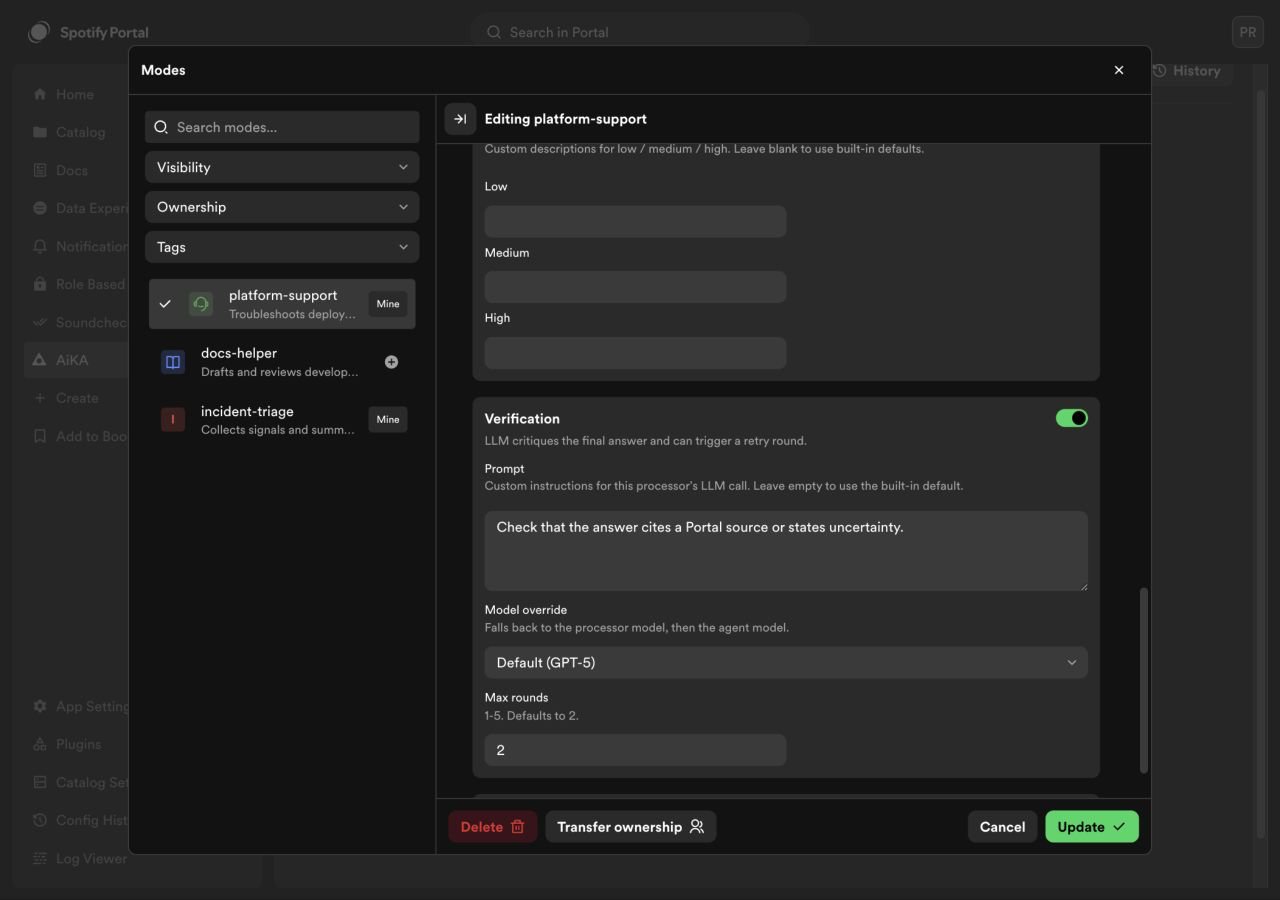
Available processors
Classification
Classification
Categorizes the user’s request (e.g. “how-to”, “operational”, “lookup”) before the agent responds. Useful for routing behavior or analytics.
Planning
Planning
Generates a brief investigation plan before the agent starts using tools. Helps the agent work more methodically on complex questions.
Answer formatting
Answer formatting
Tells the agent how to structure every response. Use this to enforce a consistent format across all conversations.
Verification
Verification
Reviews the agent’s final response against quality criteria you define — independent of the answer formatting processor. If the response fails, the agent automatically retries with feedback. You can set how many retries are allowed (default 2, max 5).
Confidence scoring
Confidence scoring
Rates the agent’s response as low, medium, or high confidence based on how well it’s supported by tool results.
Context management
Context management
Controls how long conversations are handled. Set a token limit to prune old messages, or enable observational memory to intelligently compress conversation history.
Using a different model for processors
By default, processors use the same model as the agent. To run processors on a cheaper or faster model, setprocessorModel:
model field.
Visibility and sharing
Modes have two visibility levels:
Set a mode to public when you want your team or organization to use it. Private modes are useful for personal workflows or modes still being developed. Public modes are also eligible to appear in the Most Popular section of the Manage modes dialog.
Transferring ownership
You can transfer a mode to another user or to a Backstage group. This is useful when the original creator leaves a team, or when you want shared ownership across a group.- Open Manage modes and select the mode you own
- Click Transfer Ownership
- Search for and select the new owner (a user or group)
- Confirm the transfer
Reference
Mode fields
Processor fields
All processors accepttrue (enable with defaults) or an object with these shared fields:
Processor-specific fields:
Limitations
- Private modes cannot be shared. To let others use a mode, set it to public. There is no invite-only sharing.
- Processors add latency. Each enabled processor adds an extra LLM call before or after the agent responds, which increases response time. Verification with retries can multiply this further — for example, 2 retry rounds means up to 3x the verification cost. Start with the processors you need and add more as you identify quality gaps.