Standing Up Backstage
Adding integrations
Next we can add an integration. Integrations allow Backstage to read or publish data using external sources such as GitHub, LDAP, or cloud providers. The authentication we set up is for people logging into the Backstage frontend; integrations are instead used by the backend service.
The Backstage software catalog, for example, needs an integration to read software metadata from your source control system. Creating software through Backstage’s software templates also uses an integration to publish to a new repository.
You will practice using GitHub, but the steps are quite similar for other supported source control systems.
GitHub Integration
The GitHub integration supports loading catalog entities from GitHub or GitHub Enterprise. Entities can be added to a static catalog configuration, registered with the catalog-import plugin, or discovered from a GitHub organization.
Users and Groups can also be loaded from an organization. While using GitHub Apps might be the best way to set up integrations, for this Backstage Learn course you'll use a Personal Access Token (PAT).
Create an access token
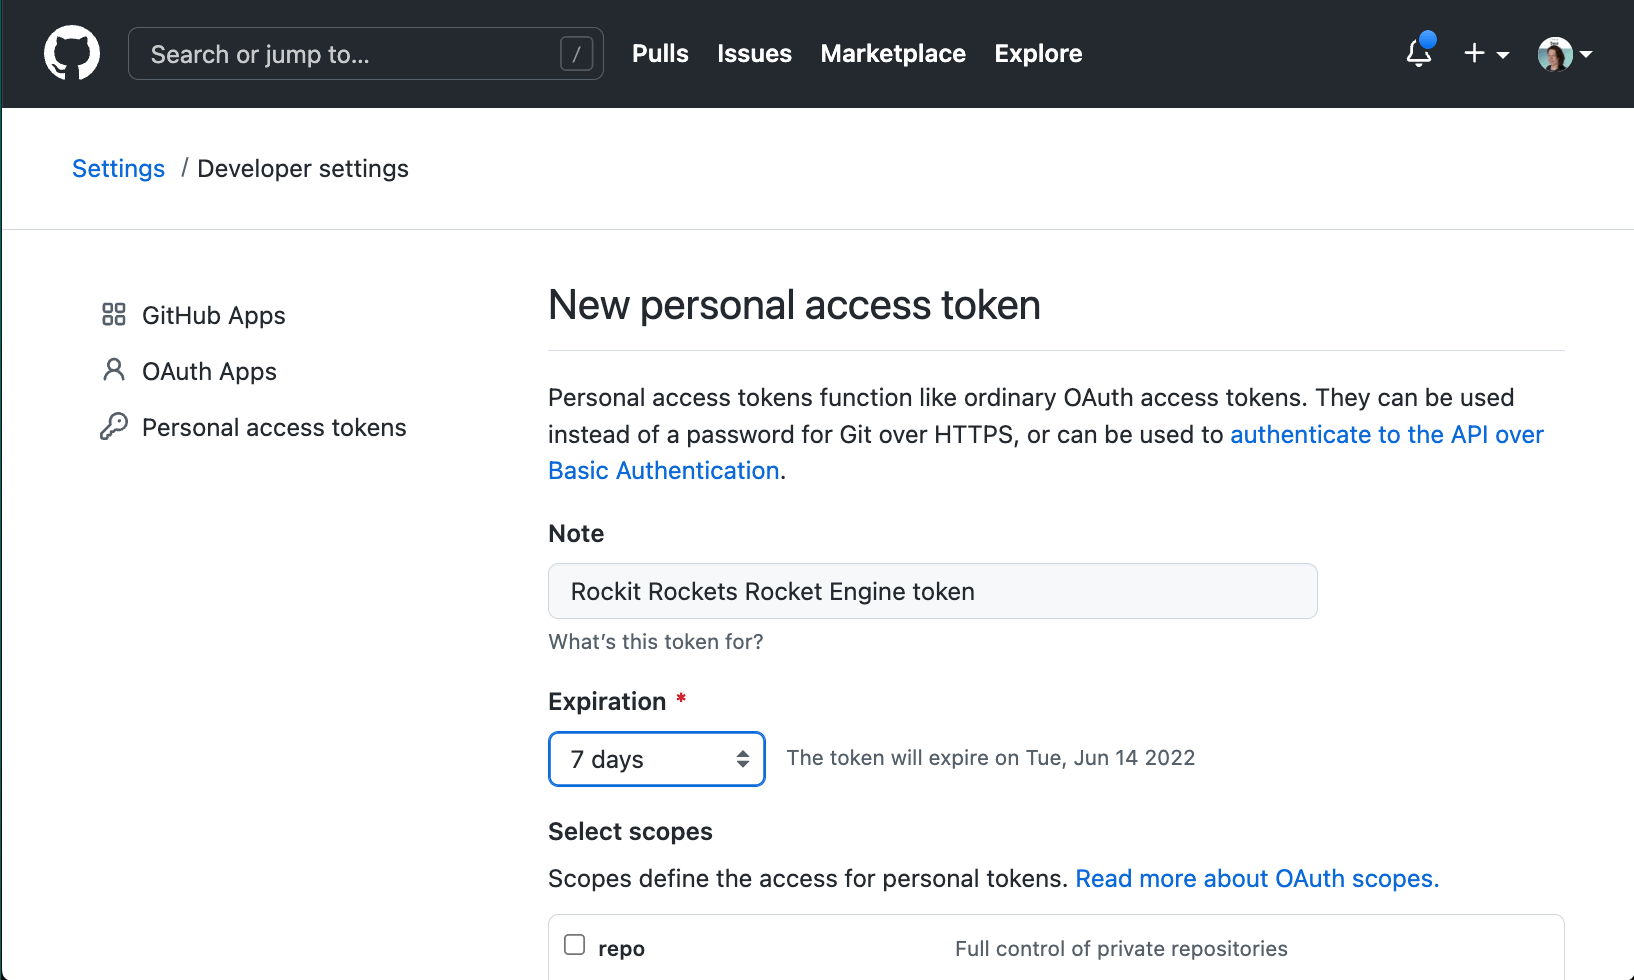
Create your Personal Access Token by opening the GitHub token creation page. Use a name to identify this token and put it in the notes field. Choose a number of days for expiration. If you have a hard time picking a number, we suggest to go for 7 days, it's a lucky number.

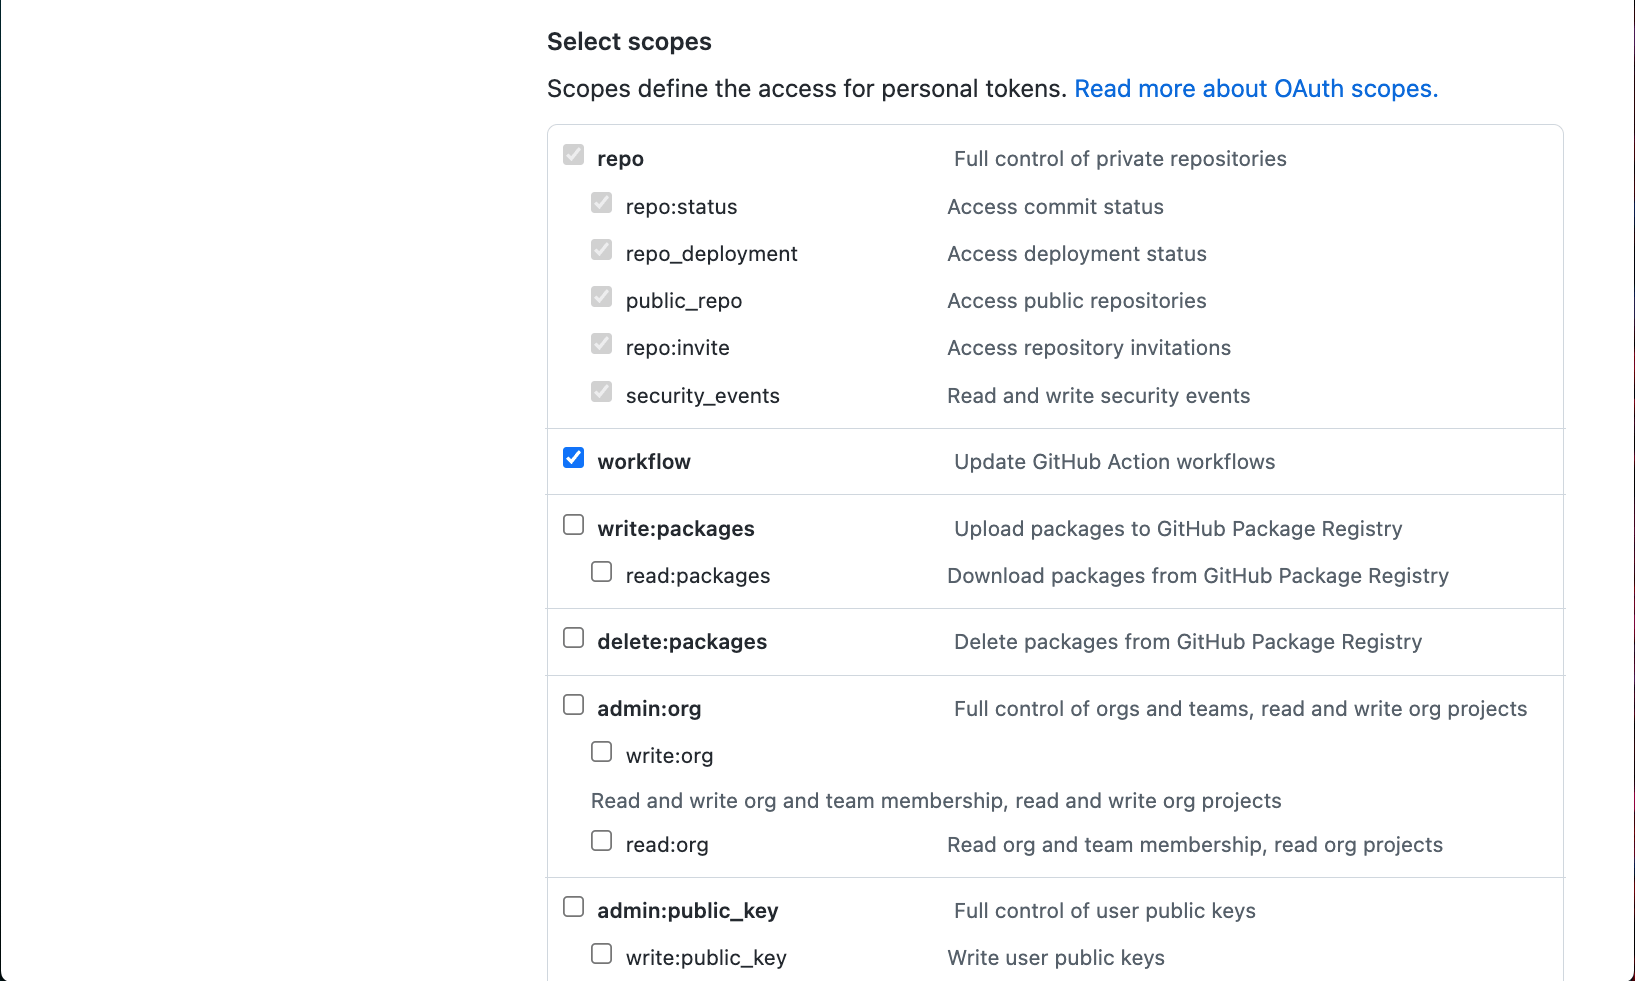
Set the scope to your likings. For this tutorial, selecting repo and workflow is required as Software Templates in this guide configures a GitHub actions workflow for the newly created project.

Click Generate Token. If successfull, your token will appear on a new page. Don't forget to copy the Personal Access Token and keep it in a safe place.
Backstage can also use GitHub Apps instead of a personal access token. This is slightly harder to set up, but it does allow higher rate limits for the GitHub API. You can find these instructions in the documentation.
Add your GitHub Personal Access Token to the configuration
In your app-config.local.yaml you've used earlier, add the following at the bottom of the file:
integrations:
  github:
    - host: github.com
      token: ghp_urtokendeinfewinfiwebfweb # this should be the token from GitHub
You can save the file, and continue to the next chapter.
If you're looking for a more production-like way to manage this secret, then you can store the token in an environment variable called
GITHUB_TOKEN, and use that in your configuration file.