Establish a foundational permission policy
Estimated Time: 5 minutes
Introduction
In this tutorial, we’re helping your organization integrate Role Based Access Control (RBAC), where you will configure a foundational permission policy.
Prerequisites
- Completed RBAC Prerequisites
- Completed RBAC Backend Setup
- Completed RBAC Frontend Setup
- Reviewed the documentation on importing and exporting a the policy
Understanding the RBAC plugin
The RBAC plugin allows you to control permissions in Backstage without writing code. Instead, you can manage your policy using the RBAC interface integrated with Backstage. Once you publish the changes to your policy, they will be reflected immediately
With the RBAC plugin, you manage the permissions in your Backstage instance by assigning users and groups to roles, and configuring the rules that should apply for each role.
What is an RBAC policy?
An RBAC Policy is simply an async function which receives a request to authorize a specific action for a user and (optional) resource, and returns a decision on whether to authorize that permission.
What is an RBAC role?
Roles make permission decisions in the RBAC plugin. Each role includes a list of members and affiliated permissions. Members for a role can be specified at an individual user level, group level, or namespace level.
What is an RBAC permission?
Permissions refer to specific actions, or resources, and determine the authorization decision for the associated members of the role the permissions are defined within.
Permissions can be matched to the role by specific permission name, permission properties, or globally. Permissions return policy decisions – either allow, deny or conditional
NOTE: For additional information on how RBAC works, check out our core concepts.
Foundational permission policy
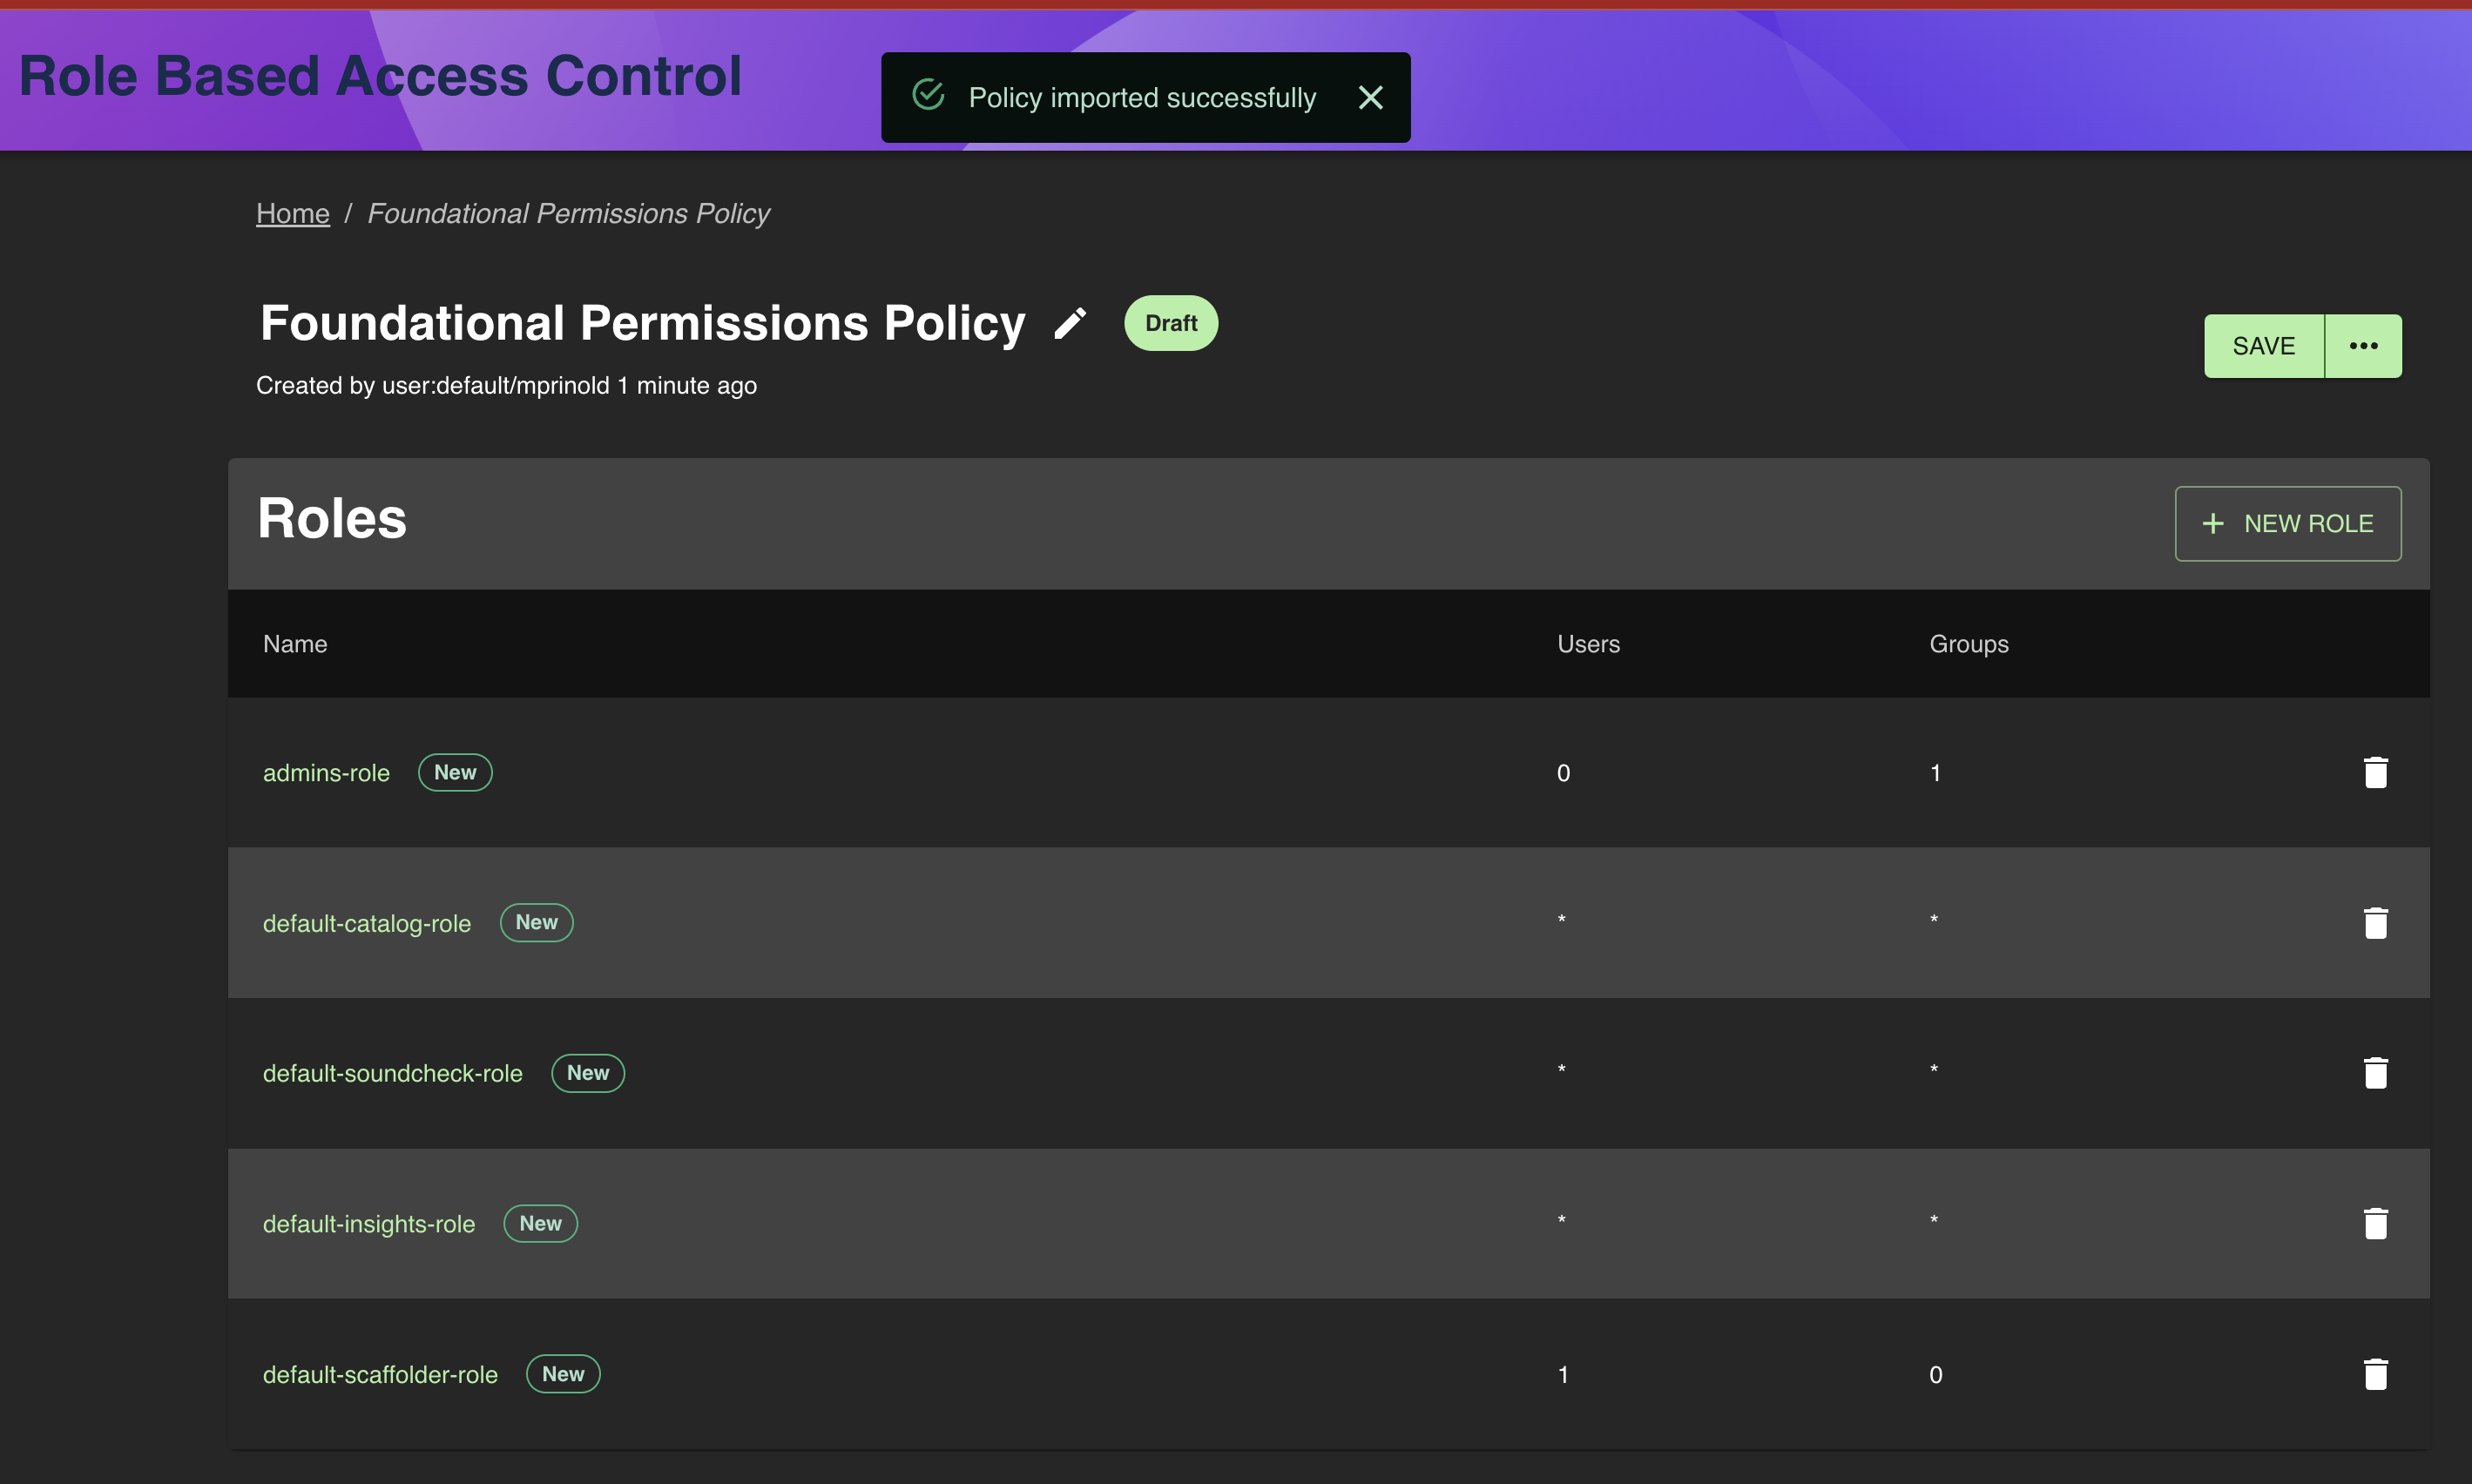
The foundational Permission Policy we will setup in this tutorial consists of these roles:
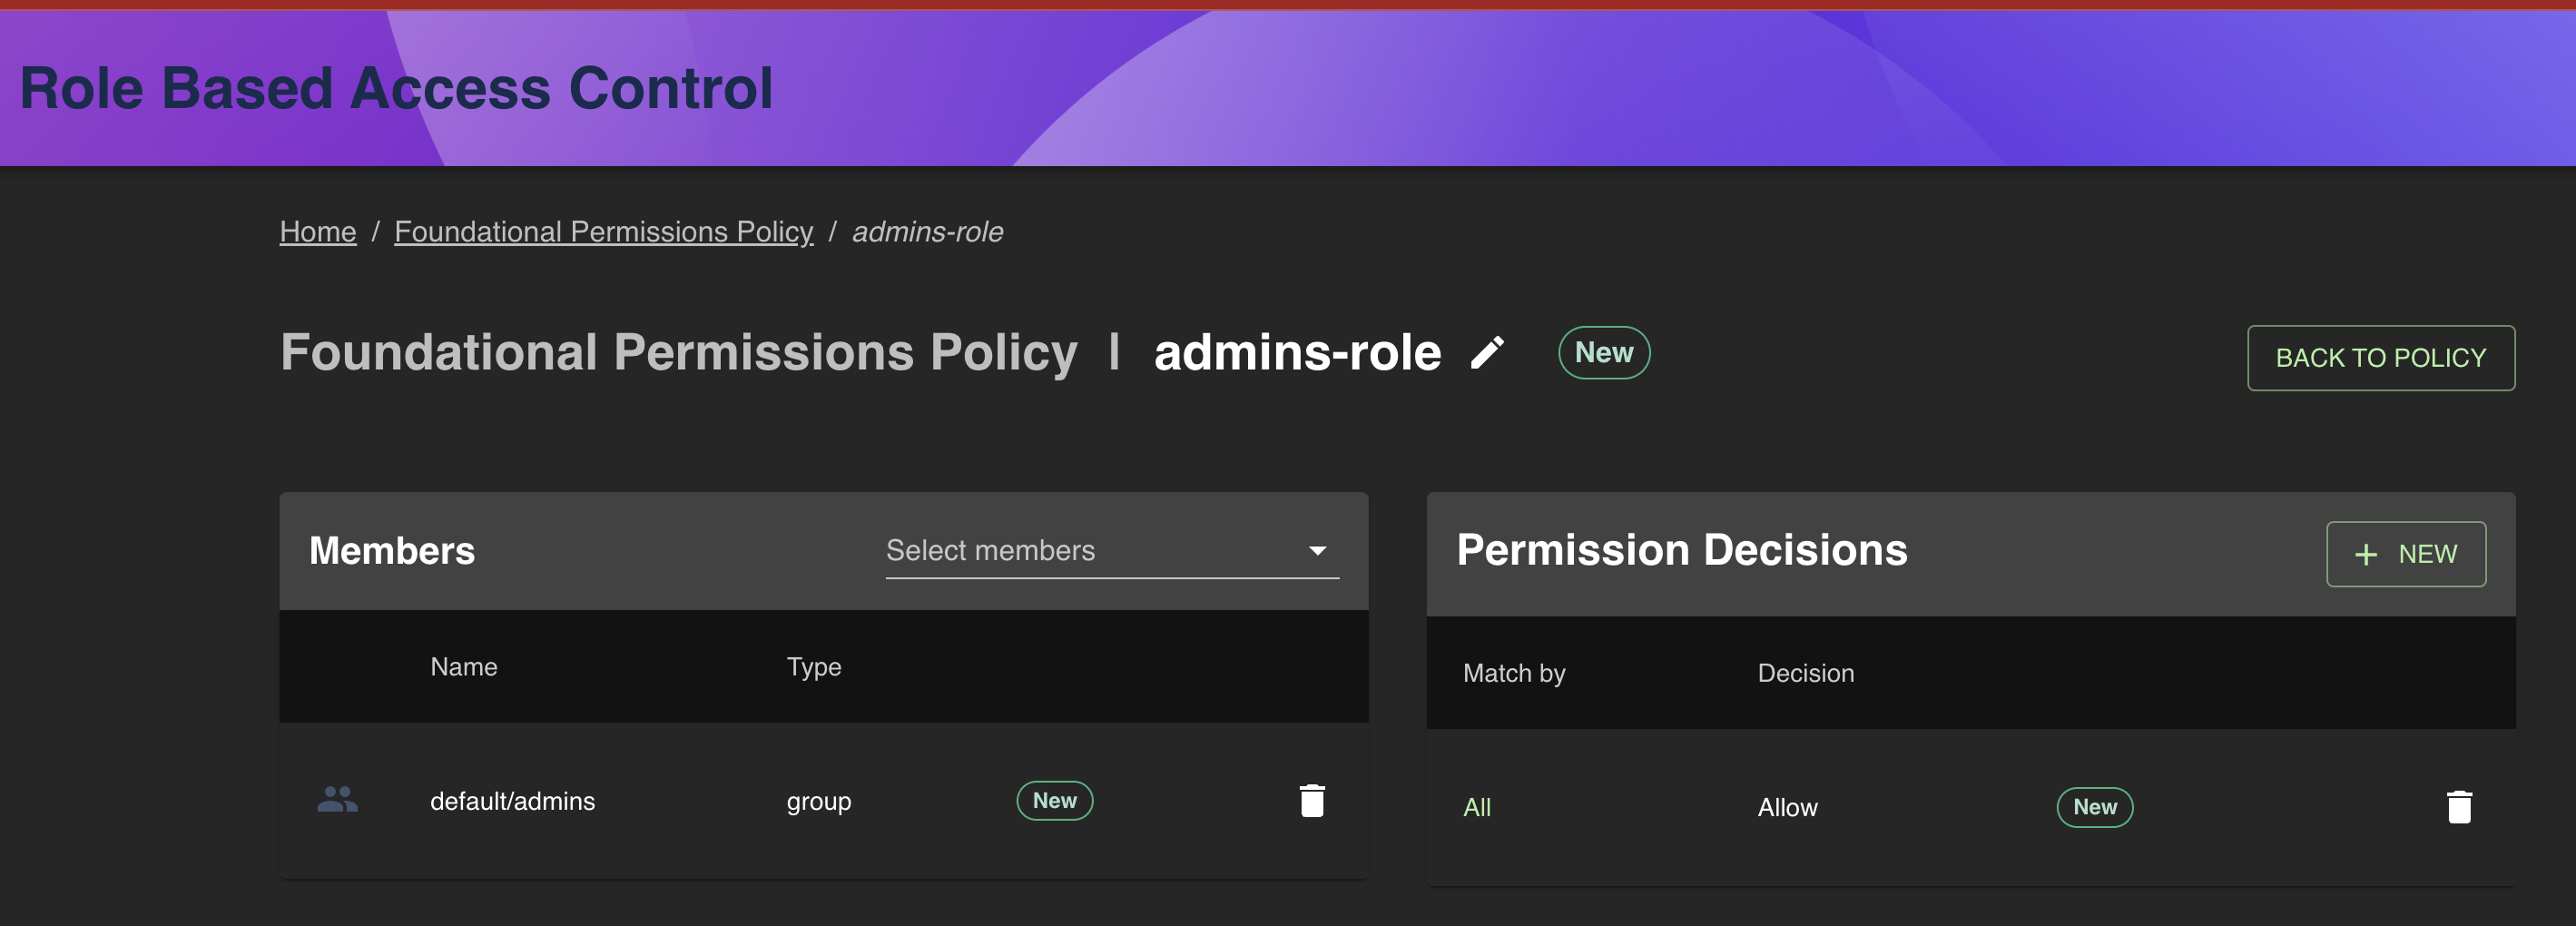
- Admins-role: It applies to members of a singular group entity defined in your catalog, you will define the group the admin role applies to later on in the tutorial. The Admin role provides unrestricted access to all backstage and its functionality.
- Default-catalog-role: It applies to all users and provides users with read access to the catalog as well as update and delete access to entities in the catalog that they are an owner of either directly or through being a member of the owner group. It also restricts read access of templates so that users can only see templates that they own or templates that have the tag production in the entities metadata.
- Default-soundcheck-role: It applies to all users and provides read access to Soundcheck Tech-Health, Integrations, Campaigns, Tracks, and Checks.
- Default-insights-role: It applies to all users and provides read access to Insights data and surveys.
- Default-scaffolder-role: It applies to all users within the default namespace and provides create access from templates that the user has read access to in the catalog.
Configuring a policy
- Create a new file
foundational-permission-policy.yaml, copy and paste the contents into the file.
name: Foundational Permissions Policy
description: null
options:
  resolutionStrategy: any-allow
roles:
  - name: admins-role
    members:
      - group:default/admins
    permissions:
      - match: '*'
        decision: allow
  - name: default-catalog-role
    members: '*'
    permissions:
      - match:
          actions:
            - delete
          resourceType: catalog-entity
        decision:
          pluginId: catalog
          resourceType: catalog-entity
          conditions:
            rule: IS_ENTITY_OWNER
            params:
              claims:
                - ':backstageUser'
      - match:
          actions:
            - update
          resourceType: catalog-entity
        decision:
          pluginId: catalog
          resourceType: catalog-entity
          conditions:
            rule: IS_ENTITY_OWNER
            params:
              claims:
                - ':backstageUser'
      - match:
          actions:
            - read
          resourceType: catalog-entity
        decision:
          pluginId: catalog
          resourceType: catalog-entity
          conditions:
            anyOf:
              - not:
                  rule: IS_ENTITY_KIND
                  params:
                    kinds:
                      - Template
              - allOf:
                  - rule: IS_ENTITY_KIND
                    params:
                      kinds:
                        - Template
                  - rule: HAS_METADATA
                    params:
                      key: tags
                      value: production
              - allOf:
                  - rule: IS_ENTITY_KIND
                    params:
                      kinds:
                        - Template
                  - rule: IS_ENTITY_OWNER
                    params:
                      claims:
                        - ':backstageUser'
  - name: default-soundcheck-role
    members: '*'
    permissions:
      - match:
          name: soundcheck.techHealth.read
        decision: allow
      - match:
          name: soundcheck.collector.read
        decision: allow
      - match:
          actions:
            - read
          resourceType: soundcheck-campaign
        decision: allow
      - match:
          actions:
            - read
          resourceType: soundcheck-track
        decision: allow
      - match:
          actions:
            - read
          resourceType: soundcheck-check
        decision: allow
  - name: default-insights-role
    members: '*'
    permissions:
      - match:
          name: insights.survey.read
        decision: allow
      - match:
          name: insights.read
        decision: allow
  - name: default-scaffolder-role
    members:
      - user:default/*
    permissions:
      - match:
          name: scaffolder.task.create
        decision: allow
- Review the permissions and authorized users configuration in
app-config.yaml. The foundational Permission Policy requires you to have enabled permissions for the catalog and scaffolder plugins. You must also have your user or a group that you are a member of configured as RBAC administrator users. Yourapp-config.yamlshould contain the below sections replacing the list of authorized Users with your organizations RBAC administrator users or groups.
permission:
  enabled: true
  permissionedPlugins:
    - catalog
    - scaffolder
  rbac:
    authorizedUsers:
      - group:default/admins
      - user:default/alice
      - user:default/bob
- In Backstage navigate to the RBAC plugin, if you have followed the Completed RBAC Frontend Setup guide you should have a navigation link in the side menu, alternatively you can use the url
<BACKSTAGE_URL>/rbacreplacing<BACKSTAGE_URL>with base url for your backstage instance. - Click the import button, then select and open the
foundational-permission-policy.yamlfile you created previously.
- Click the Admins Role from the Roles list to navigate to the role editor

- Delete the default/admins group from the members list, and use the Select members drop down to choose which members the admin role applies to.
- Click Back To Policy
- From here you can use the Policy Tester to test permission decisions for different roles.
- Once you are happy with the policy click the horizontal triple dot icon, then Save & Publish, and follow the onscreen instruction to publish the policy.
Congratulations, you have successfully imported, configured and published your first RBAC policy!