Putting Backstage into action
40 MINS
Adding components
There's multiple ways of adding new entities to the Backstage Catalog. INSERT EXPLANATION
Register an existing component
- In the sidebar, choose
createand clickRegister existing component - As URL use
https://github.com/backstage/backstage/blob/master/catalog-info.yaml. This is used in our demo site catalog.
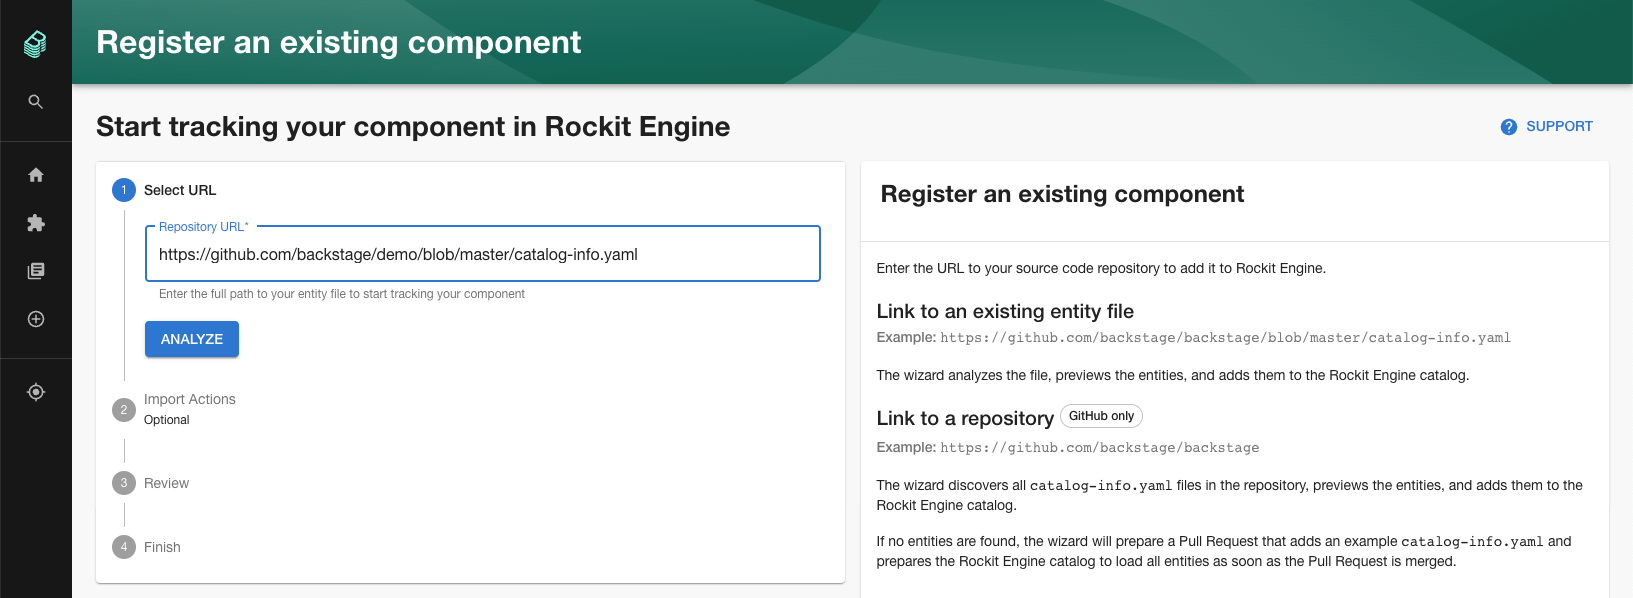
- Hit
Analyzeand review the changes. Apply them if correct
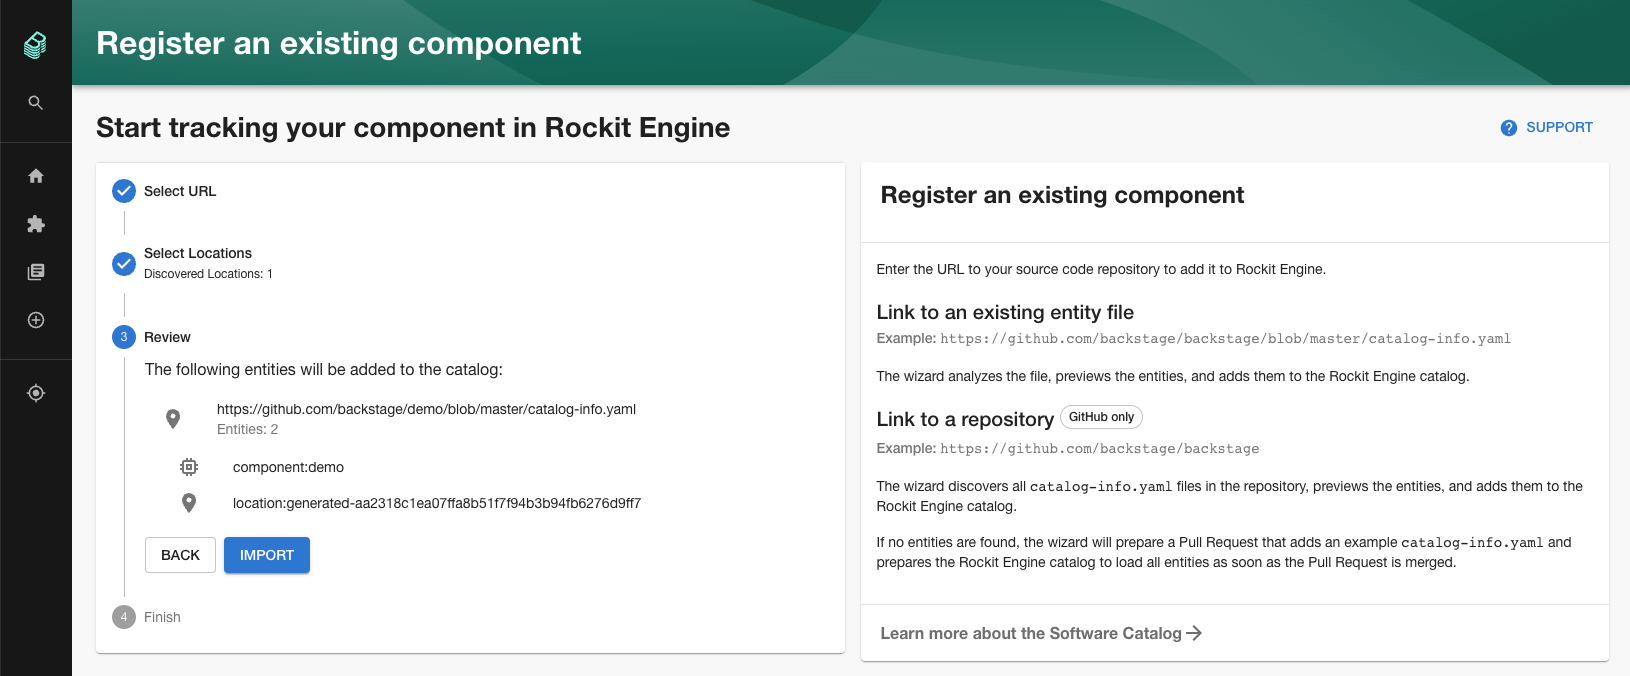
- You should receive a message that your entities have been added.
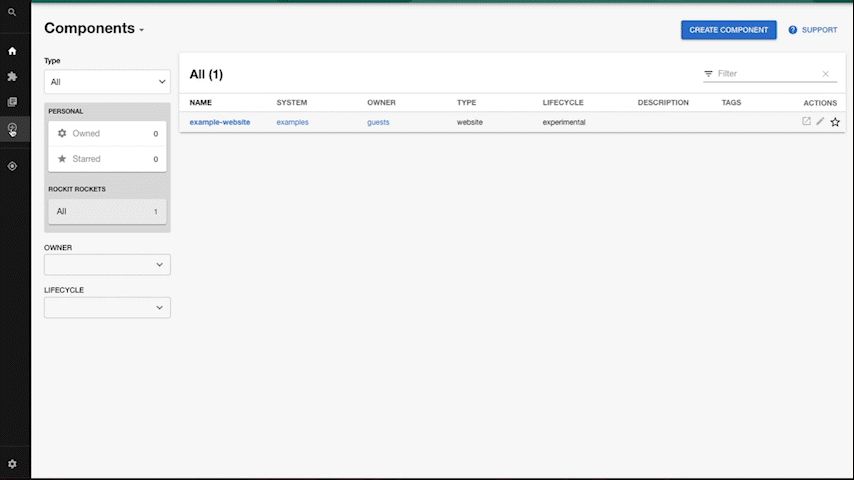
- If you go back to
Home, you should be able to findbackstage. You should be able to click it and see the details of this newly imported entity.
Create a new component
- In the sidebar, click on
createand choose to create a website with theExample Node.js Template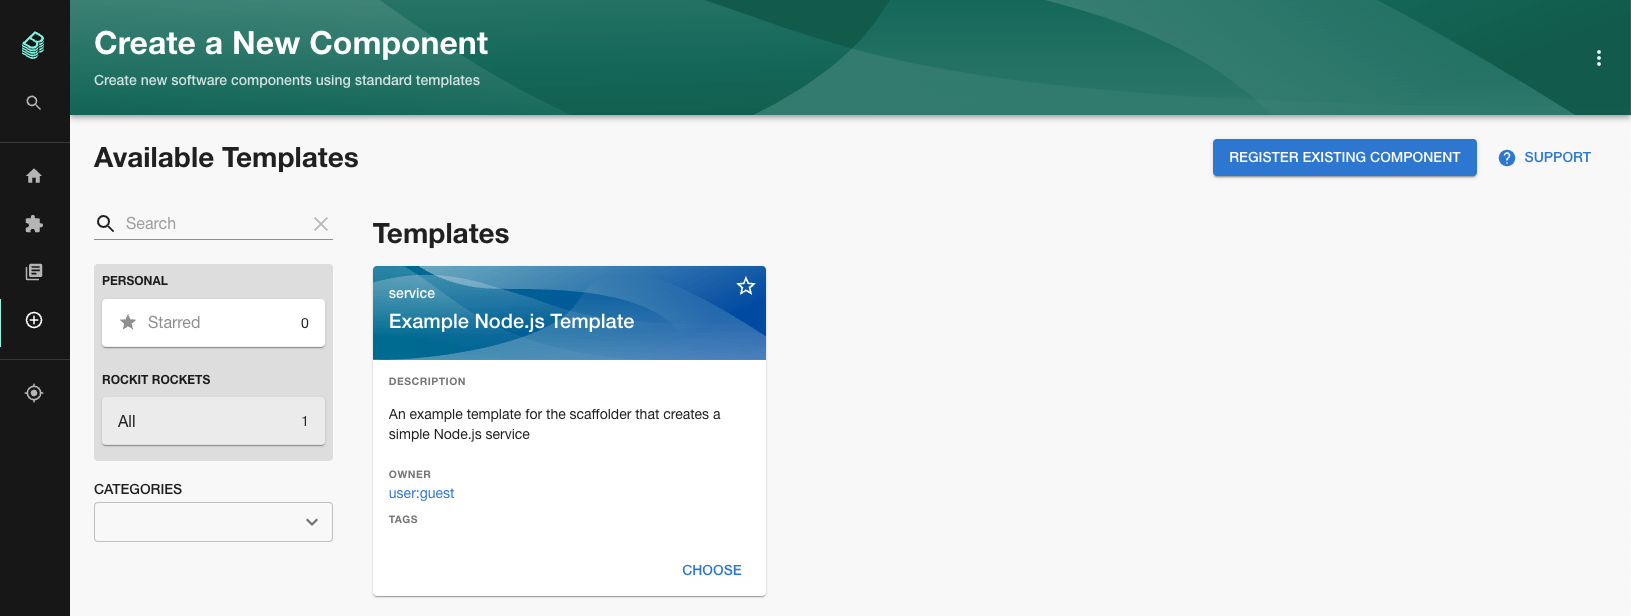
- Type in a name, for instance
rocket-app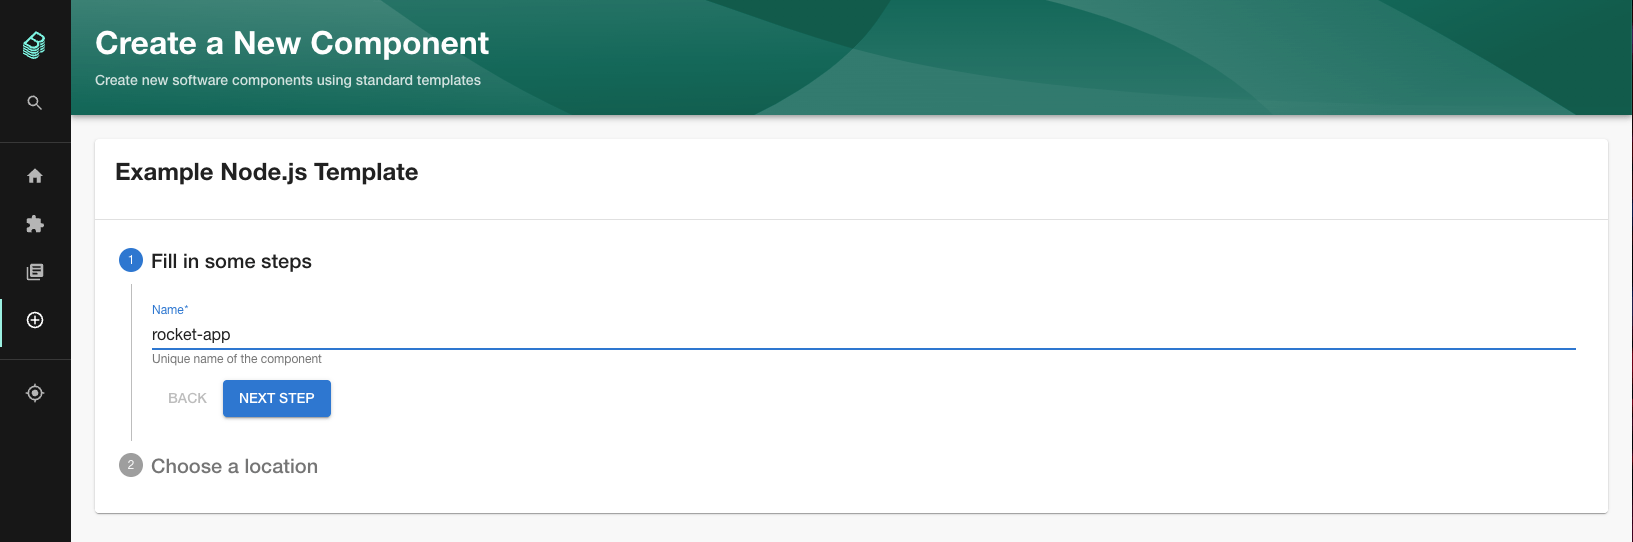
- Select the group
team-awhich will own this new website, and go to the next step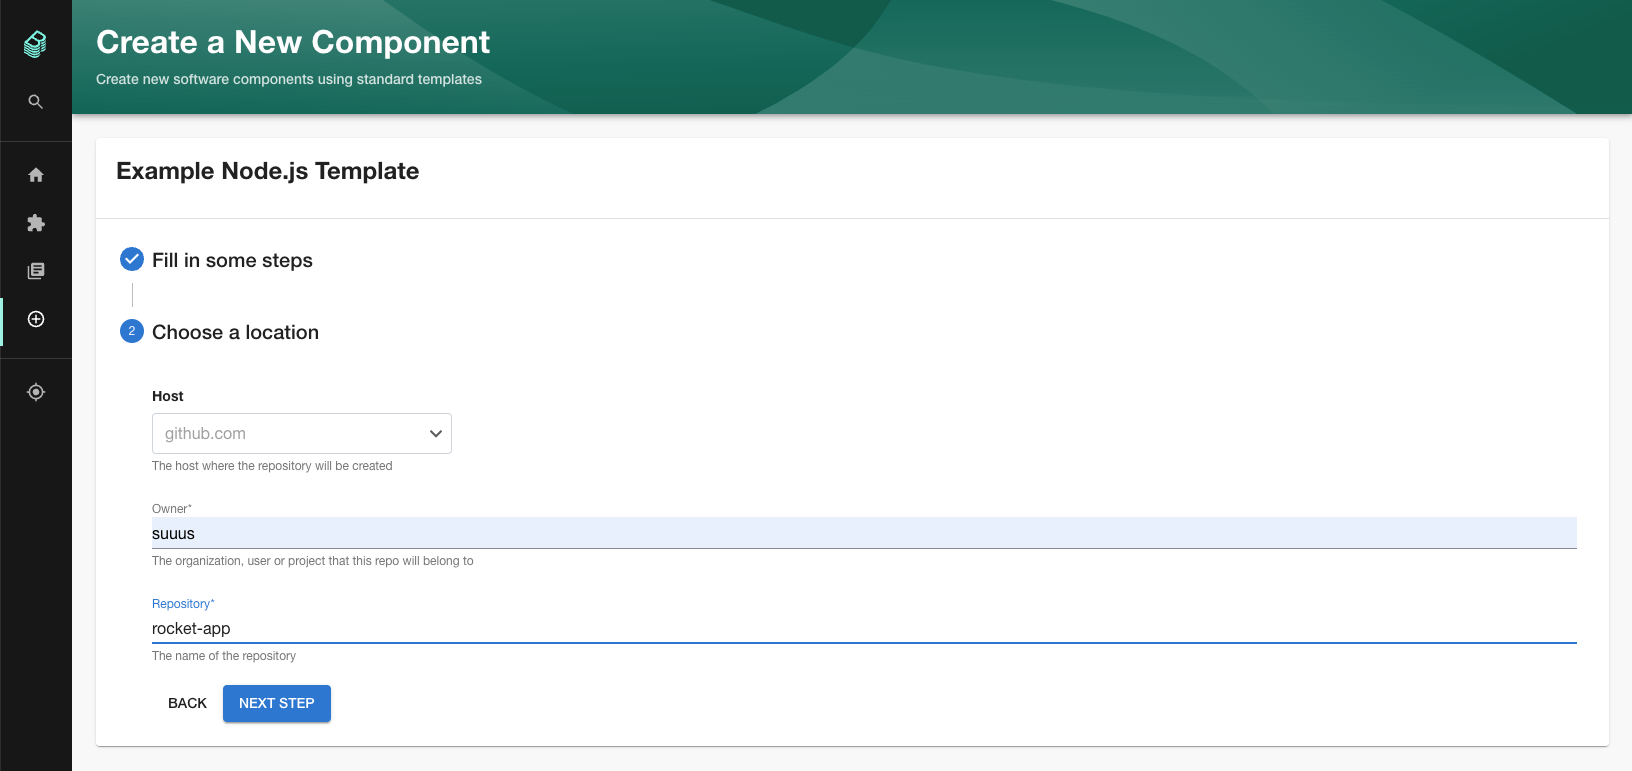
- For the location, leave it at github.com
- As owner, enter your GitHub username
- For the repository name, type
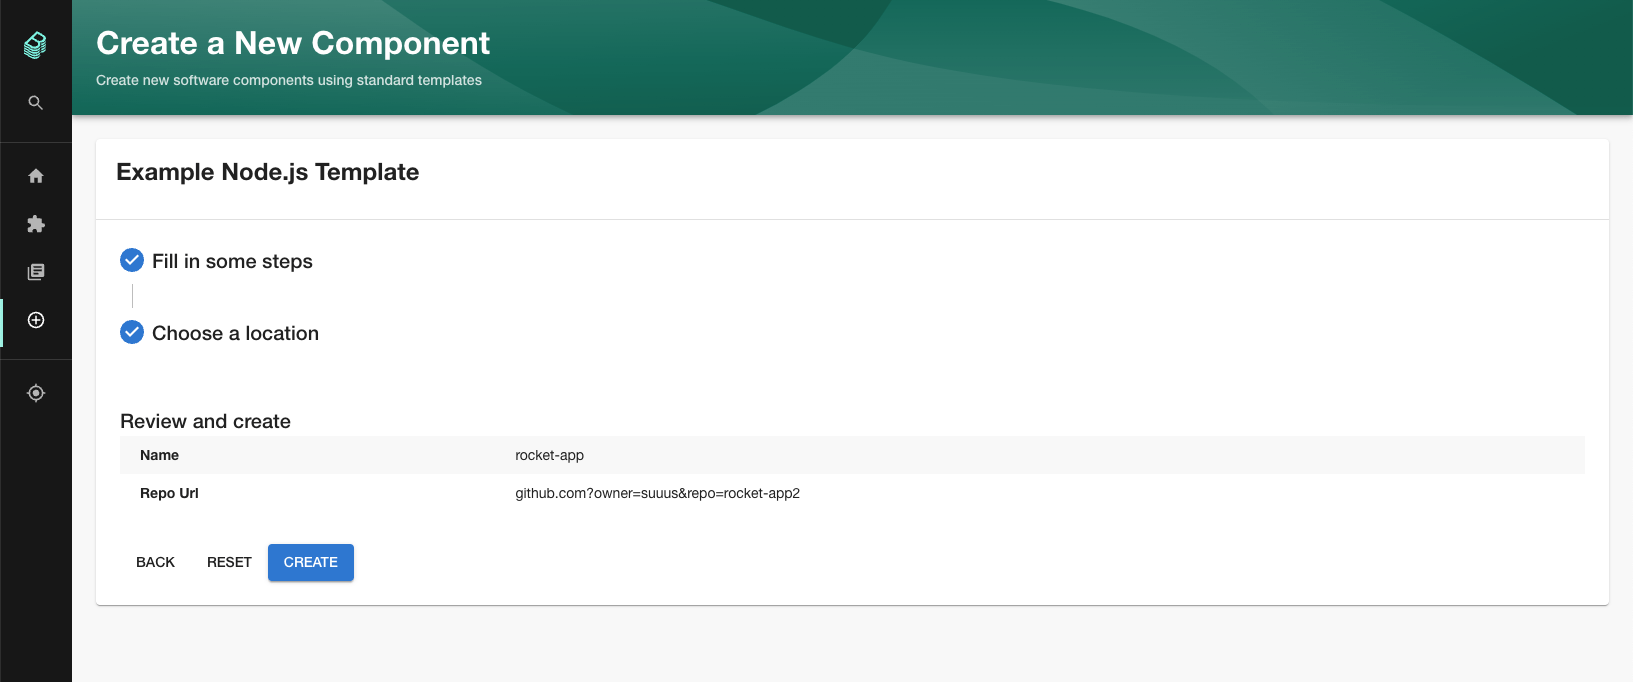
rocket-app. - Review the details of this new service, and press
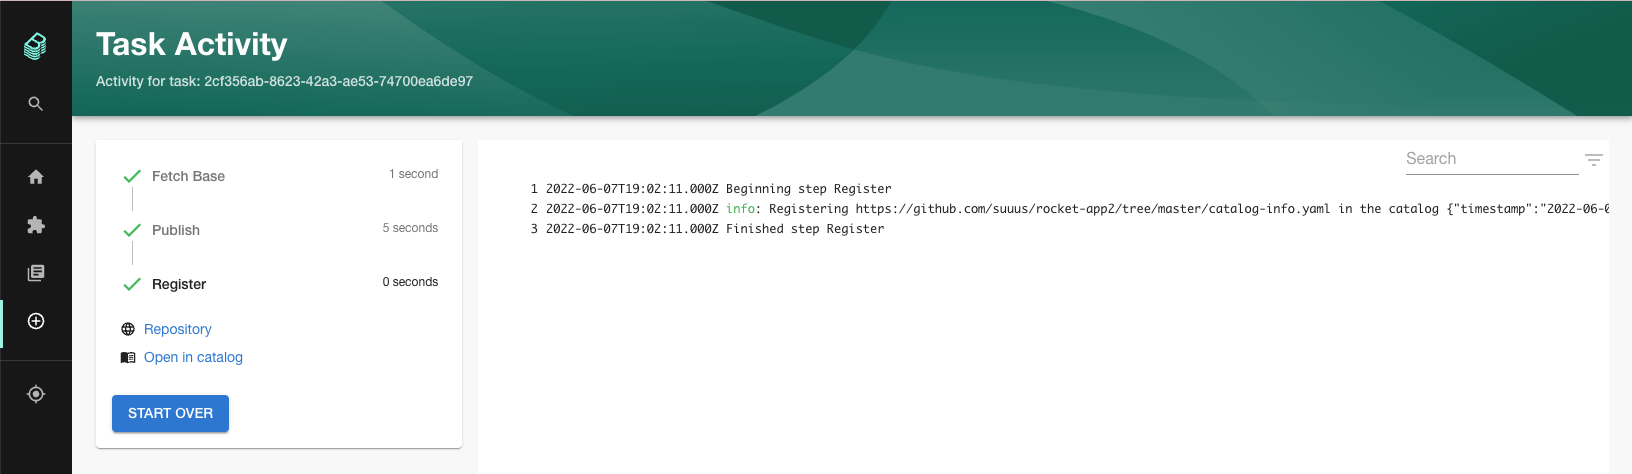
Createif you want to deploy it like this. - As soon as every step is
finished succesfull, you can take a look at your new service by clicking
Open in catalog