> ## Documentation Index
> Fetch the complete documentation index at: https://backstage.spotify.com/docs/llms.txt
> Use this file to discover all available pages before exploring further.
# Ingest users and groups
> Create an Okta API Services app and configure the catalog provider to import users and groups from Okta into Portal.
export const providerName_0 = "Okta"
It is important to follow all the steps in this guide to ensure a successful configuration of {providerName_0} authentication.
If you encounter any issues, [please contact support](https://backstage.spotify.com/account/support/).
Portal can ingest organizational data—such as users and teams—from your Okta tenant via the Okta API. To do this, you must create a new Okta App with specific permissions and configure the Okta catalog provider in Portal.
## Create new App in Okta
Within your Okta dashboard create a new app integration where the sign-in method is `API Services`.
Call the application "Spotify Portal - Provisioning" (or your own custom app name).
In the **Client Credentials** section, find **Client authentication** and select **Public key / Private key**.
In the **Public keys** section, generate a new public key by pressing the **Add** button and then **Generate new key**. Copy your **Private key** in **PEM** format — you'll need it when configuring Portal.
In the **General settings** section, uncheck the `Require Demonstrating Proof of Possession (DPoP) header in token requests` option. This is required for Portal to properly authenticate with Okta.
In addition, in the tab `Okta API Scopes` you need to grant the following scopes:
* `okta.groups.read`
* `okta.users.read`
### Scoping the application
It is important to note that you can scope the application to make sure Portal can access only the users and groups it needs.
This can be done by creating and assigning the following Resource Sets and Roles:
1. Navigate to `Security > Administrators`
2. Click on the `Resources` tab and create a new resource set called "Spotify Portal Users & Groups".
3. Add the `Users` and `Groups` resources. (For now, we recommend to ingest all users but only a set list of groups.)
4. Now navigate back to your newly created app
5. Select the `Admin roles` tab and select add assignment
6. Select "Create a role" and call it "Spotify Portal org data viewer" with the following permissions
* `User > View users and their details`
* `Group > View groups and their details`
7. Assign the admin role to the just created resource set
## Configure the Okta Org Provider in Portal
1. In **Catalog Settings**, go to the Okta provider
2. Scroll to `catalog.providers.okta`
3. from your Okta instance fill in
* `id` (e.g., `default`)
* `oktaUrl` (URL of your Okta instance)
* `clientId`
* `privateKey`
* `keyId` (which is the `KID`)
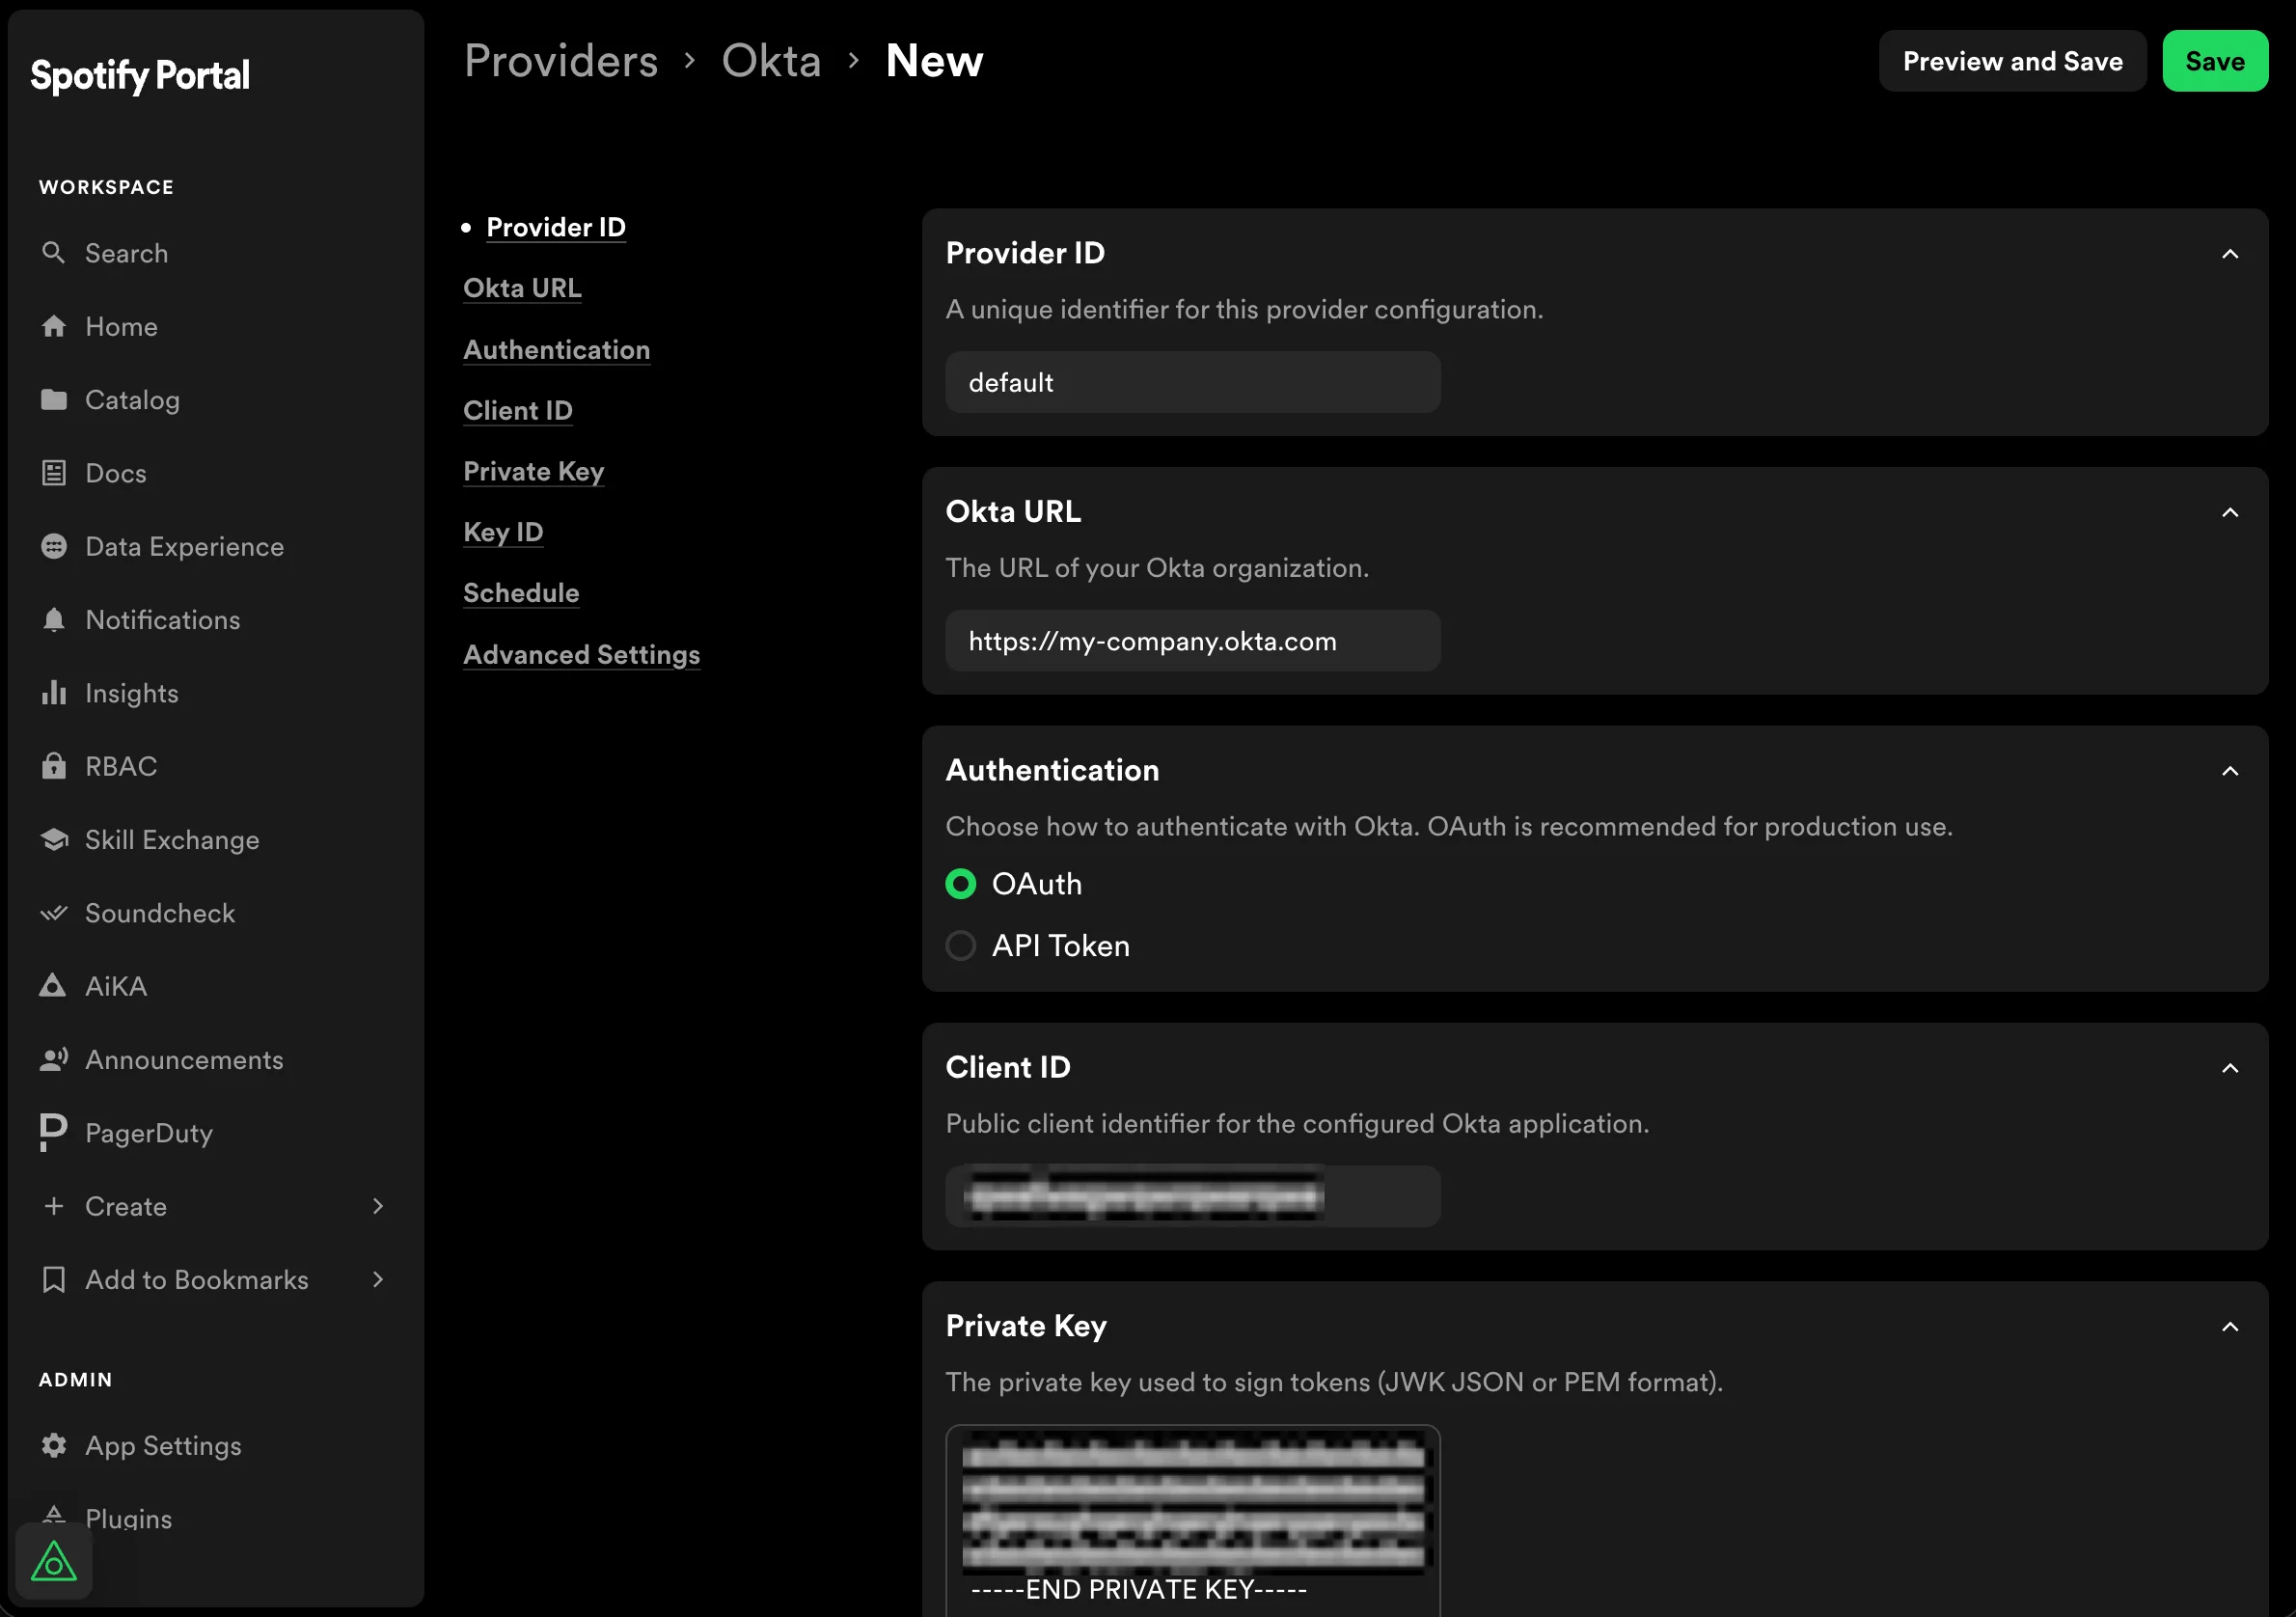 3. Then scroll down and fill in the `Schedule`
* `Frequency` (we recommend every 30 minutes)
* `Timeout` (we recommend keeping it consistent with the chosen `Frequency` value)
4. Optionally, expand **Advanced Settings** to configure filtering:
* **User Search Filter** — an [Okta search expression](https://developer.okta.com/docs/api/openapi/okta-management/management/tags/user/other/listusers#other/listusers/t=request\&in=query\&path=search) passed to the List Users API call. Use this to narrow which users are fetched from Okta (e.g., `status eq "ACTIVE"`).
* **Group Filter** — choose how to filter which groups are ingested:
* **Group Names** — specify individual Okta group names to include.
* **Search Expression** — provide an [Okta search expression](https://developer.okta.com/docs/api/openapi/okta-management/management/tags/group/other/listgroups#other/listgroups/t=request\&in=query\&path=search) to filter groups (e.g., `profile.name sw "public-"`). This is useful when you want to match groups dynamically instead of listing them by name.
When a group filter is configured, only users who belong to at least one matching group are included in the catalog.
5. Click Save changes.
Portal will now begin ingesting and synchronizing user and group data from Okta.
You can check this by visiting Portal's Catalog, and looking to see if expected users and groups are being added from Okta.
## Next Steps
Your Portal instance should now have users and groups from Okta within the catalog.
Follow the next section for how to configure Okta as authentication provider.
3. Then scroll down and fill in the `Schedule`
* `Frequency` (we recommend every 30 minutes)
* `Timeout` (we recommend keeping it consistent with the chosen `Frequency` value)
4. Optionally, expand **Advanced Settings** to configure filtering:
* **User Search Filter** — an [Okta search expression](https://developer.okta.com/docs/api/openapi/okta-management/management/tags/user/other/listusers#other/listusers/t=request\&in=query\&path=search) passed to the List Users API call. Use this to narrow which users are fetched from Okta (e.g., `status eq "ACTIVE"`).
* **Group Filter** — choose how to filter which groups are ingested:
* **Group Names** — specify individual Okta group names to include.
* **Search Expression** — provide an [Okta search expression](https://developer.okta.com/docs/api/openapi/okta-management/management/tags/group/other/listgroups#other/listgroups/t=request\&in=query\&path=search) to filter groups (e.g., `profile.name sw "public-"`). This is useful when you want to match groups dynamically instead of listing them by name.
When a group filter is configured, only users who belong to at least one matching group are included in the catalog.
5. Click Save changes.
Portal will now begin ingesting and synchronizing user and group data from Okta.
You can check this by visiting Portal's Catalog, and looking to see if expected users and groups are being added from Okta.
## Next Steps
Your Portal instance should now have users and groups from Okta within the catalog.
Follow the next section for how to configure Okta as authentication provider.